


The newest Aseprite version (v1.3.8) changed how Magic Wand works and the implementation that I used for selecting image mask stopped working. I just pushed an update to v3.0.1 for this extension that should fix it ✌️
A member registered Mar 31, 2015 · View creator page →
Creator of


16x16 animated animal sprites

50+ Unique Units


Extension to Sci Fi Inventory by Adam Saltsman

A set of simple, textured hex tiles

Minimalistic Sci Fi Tiles and Sprites

Over 30 Single Color Item Icons

8 Directional Top View

4 Directional Top View
Recent community posts
Magic Pencil for Aseprite comments · Replied to chaos max dragon in Magic Pencil for Aseprite comments
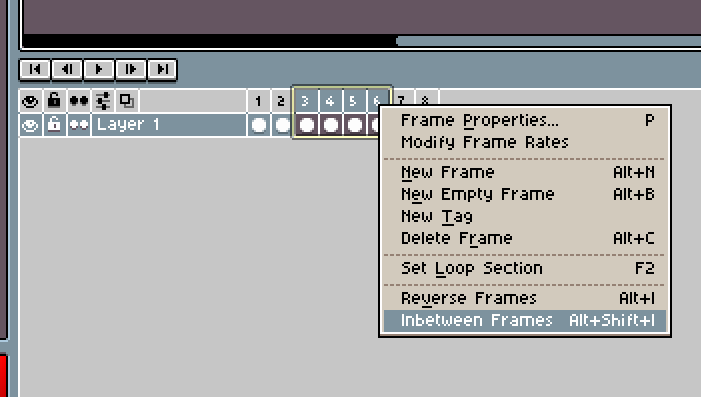
NxPA Studio for Aseprite community · Posted in AddInbetweenFrames not added after installing the extension

