Game Guide
Welcome to CorsixTH! If you haven't played in a while or never played Theme Hospital before, then you may have forgotten how things work or wonder what all the rooms and objects are for. This guide explains how to play CorsixTH and where it differs from Theme Hospital.
Opening Screen
The Staff
The Rooms
Corridor Objects
Main Screen Area
Using the Control Panel
Build/Hire Controls
The Business Screen Buttons
Using pop up panels
Pop up Icons
Other
Disasters
Mood Icons
Keyboard Commands

We'll start with the opening screen and the main menu. The Tip of the Day appears in the bottom right corner. You can read through more tips by clicking on the Next Tip and Previous Tip buttons.

The Campaign consists of the twelve original levels from Theme Hospital.
The Player Name is what you will be referred to as in-game. Usually this will show your login name when you open this menu for the first time, but you can change it to whatever you prefer. This will be remembered the next time you open this menu.

The Tutorial is set to Off by default. If set to On, you will be taken to the first level of the campaign and receive some guidance to get you started.

There are three difficulty settings for the campaign: Junior (Easy), Doctor (Medium), and Consultant (Hard). Select a difficulty level and click Start to begin.
The difficulty level can have a wide range of gameplay effects, including:
- How much money you'll start each level with
- The number of staff available for hire during specific periods, and how likely available doctors will have higher Seniority and/or Skills
- Minimum salary levels for staff
- How quickly staff will become tired and recover in the Staff Room
- How quickly staff will become unhappy and threaten to resign
- How quickly staff will learn Skills and be promoted to Doctor/Consultant in the Training room
- Patient behaviour, such as how quickly they become unhappy and leave your hospital, and how frequently they will drop litter, throw up, and need the toilet
- The initial effectiveness of newly discovered drugs
- The speed of your Research Department (including the Auto-Autospy machine's effectiveness and how much reputation you'll lose if it gets randomly discovered)
- The maximum number of patients in Emergencies
- The severity of Earthquakes
- How contagious Epidemics will be, how much you will be fined per infected patient, and how much compensation you'll receive if you successfully cover it up
- The interest rate for loans
- The amount of money and reputation earned (or lost) from end-of-year awards
- The lose criteria for each level

Custom Campaign is where you can play multi-level campaigns other than the original campaign from Theme Hospital. Two campaigns are included with CorsixTH and others will be available online.
The briefing for the selected map appears on the right.

Single Scenario is for custom games using maps that you have either created yourself or downloaded from the Internet. We have included some levels to get you started.
The briefing for the selected map appears on the right.
The Free Build option can be enabled by changing the red cross to a green tick. In this mode, there is no money and there are no goals, so you can never win or lose. This is nice if you want to practice your building skills or test out your own map creations.
Continue Game will load your most recent save file. This will usually be an autosave if you haven't manually saved in a while.
Load Game allows you to select a game which you want to play - see Load.

Settings lets you switch between Fullscreen and Windowed mode, change the resolution, change the in-game language, adjust the scroll speed, and more. You can also edit these and other settings directly in the Configuration File.
Setting the language to French, German, Italian, Spanish, or Swedish will change the receptionist's announcements, menus, and Adviser's messages. For all other languages, only the menus and Adviser's messages will change, and the receptionist's announcements will remain in English.
There are also three further menus that can be accessed from the Settings Menu: Customise, Folders, and Hotkeys.

Custom Settings allow you to further adjust the gameplay, such as disabling the introduction movie, enabling building while paused, and enabling the ability to delete rooms containing destroyed machinery for a fee. Hover over the button or label to display an explanation for each setting. You can also edit these and other settings directly in the Configuration File.

Folder Locations can be changed from the default directory to wherever you want, although the location of TH Data must be where your Theme Hospital files are located. There should be no real need to change the Font unless your language settings require a different font with non-standard characters. If Theme Hospital was originally released in your language, you should be okay. If you have selected one of the newer languages that we've added and it contains non-standard characters or glyphs etc., then select a font that contains these characters. You can also edit these and other settings directly in the Configuration File.

Hotkeys allow you to reassign shortcuts to your keyboard. The Accept button will save your changes, the Reset to Defaults button will restore the default hotkeys, and the Cancel button will discard your unsaved changes.
The Map Editor is where you can create your own maps for custom levels and campaigns.
When you've finished playing, Exit will close CorsixTH and return you to your desktop. You will be asked for confirmation first.


Doctors will be either a Junior, a Doctor, or a Consultant. Juniors are trainees and are cheap to hire, but they are inexperienced and will often make mistakes. You can train them in the Training Room so that they can be promoted to a higher Seniority. Consultants are the highest level of Seniority and will diagnose patients more quickly and more accurately. You do have to pay them more, or else they will eventually become unhappy and threaten to quit.
A Doctor may also have up to three different Skills: Surgeon, Psychiatrist and Researcher. Junior and Doctors (but not Consultants) can learn any of these skills in the Training Room.

These women work in the Pharmacy, Ward, and Fracture Clinic. They will also vaccinate contagious patients during an Epidemic. They can become very busy, so be prepared to hire more than one.

These guys work really hard. They repair your expensive machines so that they won't explode, they water the plants so that they stop wilting, and most importantly of all, they keep your hospital clean by sweeping up all the litter, vomit, and goodness knows what else on the floor - yuk! Make sure you employ enough of them so that they aren't run off their feet.

She works tirelessly, never complains, and does not need to take breaks; she just keeps going all year round. She is vital to your hospital because she staffs the reception desk and directs your patients to diagnosis rooms.

From time to time, your hospital will be visited by a Very Important Visitor (VIP). They will walk around your hospital, peer into every room, and check to see how well things are being run.
In later levels, you may also be briefly visited by the Health Inspector, who will evaluate how many contagious patients are still in the hospital at the end of an Epidemic.

You might also see the Grim Reaper appear in your hospital. This indicates that a patient is about to leave this world after your doctors got the treatment wrong, guessed the wrong cure, or your drugs simply weren't up to the job. You won't want to see him often, as this means you are making a mess of things and will soon be getting the push! Not all dead patients will be dispatched this way - the good ones get a better send off!

Patients receive their initial consultation and results in the GP's Office.
This is the fundamental diagnosis room in your hospital. All incoming patients are sent here to find out what is wrong with them. They will then either be referred for further diagnosis or sent to a room where they can be cured. You might want to build another GP's Office if this room gets too busy. The bigger the room, and the more extra objects you place in it, the higher the prestige for the Doctor. This is also true of all the occupied rooms.
The GP's Office requires any Doctor and has a minimum size of 4x4 squares.

A Doctor uses the General Diagnosis Room for basic diagnosis of patients. Cheap and often very effective.
Patients who require further diagnosis are sent to be examined here. If a GP's Office doesn't find out what is wrong with them, General Diagnosis often will. Afterwards, they will be sent back to the GP's office for an analysis of their results.
The General Diagnosis Room requires any Doctor and has a minimum size of 5x5 squares.

The Psychiatry Room cures mad patients and helps in the diagnosis of other patients, but needs a Doctor with Psychiatry skills.
Patients diagnosed with psychiatric illnesses must visit the Psychiatry Room to receive counselling. Psychiatrists can also diagnose patients, finding out what type of illnesses they have, and if mental in origin, later treating them using the trusty couch.
The Psychiatry Room requires a Doctor with the Psychiatrist qualification and has a minimum size of 5x5 squares.

Wards are useful for both diagnosis and pre-operative assessment. Patients are kept here for observation by a Nurse during diagnosis and also remain here prior to having a operation.
Note that patients who undergo surgery won't need to rest in the Ward afterwards. They'll head home as soon as the procedure has finished.
The Ward requires at least one Nurse and has a minimum size of 6x6 squares.

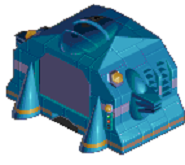
This important installation is where a variety of conditions are treated. The Theatre has to be a good size, and must be filled with the correct equipment. It is a vital part of your hospital.
The Operating Theatre requires two Doctors with Surgeon qualifications and has a minimum size of 6x6 squares. It also requires maintenance.

The Nurse dispenses drugs to cure patients in a Pharmacy.
Patients who have been diagnosed with an illness that can be treated with a drug must visit the Pharmacy to take their medicine. As more and more drug cures are researched and become available, this room gets busier. You might want to build another Pharmacy later.
This room needs a nurse and has a minimum size of 4x4 squares.

A Doctor uses the Cardio Room to diagnose Patients.
Patients are diagnosed by running on the cardio, before heading back to a GP's Office to discuss their results.
The Cardio requires any Doctor and has a minimum size of 4x4 squares. It also requires maintenance.

A Doctor uses the Scanner Room to diagnose Patients.
Patients are accurately diagnosed using the sophisticated Scanner. They then return to the GP's Office for an analysis of their scan.
The Scanner requires any Doctor and has a minimum size of 5x5 squares. It also requires maintenance.

A Doctor uses the Ultrascan Room to diagnose Patients.
The Ultrascan is the ultimate in diagnostic equipment. It costs a fortunate but is worthwhile if you want superb diagnosis in your hospital.
The Ultrascan requires any Doctor and has a minimum size of 5x5 squares. It also requires maintenance.

A Doctor uses the Blood Machine Room to diagnose Patients.
The Blood Machine is an advanced piece of diagnosis equipment which checks the cells in a patient's blood to find out what is wrong with them.
The Blood Machine Room requires any Doctor and has a minimum size of 4x4 squares. It also requires maintenance.

A Doctor uses the X-ray Room to diagnose Patients.
The X-ray machine photographs people's insides using special radiation to provide staff with a good idea of what is wrong with them.
The x-ray requires any Doctor and has a minimum size of 6x6 squares. It also requires maintenance.

A Doctor uses the Inflator Room to cure Patients with Bloat 10000 y Heads.
Patients with the painful-yet-humorous condition of Bloaty Head must come to the Inflation Clinic, where the overlarge cranium will be popped and re-inflated to the correct pressure.
The Inflation Clinic requires any Doctor and has a minimum size of 4x4 squares. It also requires maintenance.

A Doctor uses the Tongue-Slicing Room to cure Slack Tongues.
Patients diagnosed in the GP's Office with Slack Tongue will be sent to this clinic for treatment. The Doctor will use a piece of high-tech machinery to extend the tongue and snip it off, thus returning the patient to normal good health.
The Slack Tongue Clinic requires any Doctor and has a minimum size of 4x4 squares. It also requires maintenance.

A Nurse uses the Fracture Clinic to repair Broken Bones.
Patients unlucky enough to have Broken Bones will be sent here. The Cast Removal Machine will use powerful industrial lasers to slice off any hardened cast, causing only a little agony to the patient.
The Fracture Clinic requires a Nurse and has a minimum size of 4x4 squares. It also requires maintenance.

A Doctor uses the Hair-Restorer Room to cure Baldness.
Patients suffering from the extreme condition of Baldness will be directed towards the Hair Restorer Machine in this Clinic. A Doctor will operate the machine, and it will rapidly seed the patient's head with fresh hair.
The Hair Restoration Clinic requires any Doctor and has a minimum size of 4x4 squares. It also requires maintenance.

A Doctor uses the Electrolysis room to cure Hairyitis.
Patients with Hairyitis are directed to this room, where a special machine called the Electrolyser yanks out the hairs and seals the pores electrically using a compound not unlike grout.
The Electrolysis Room requires any Doctor and has a minimum size of 5x5 squares. It also requires maintenance.

A Doctor uses the Jelly-vat to cure Jellyitis.
Patients with Jellyitis must wobble their way to the Jelly Clinic, be placed in the Jelly Vat, and have their flesh poured over a new skeleton. This cures them in a way still not fully understood by the medical profession.
The Jelly Vat Clinic requires any Doctor and has a minimum size of 4x4 squares. It also requires maintenance.

A Doctor uses the Decontamination Shower to cure Radioactivity.
Patients who have been exposed to Radiation are quickly shown to the Decontamination Clinic. This room contains a shower which cleanses them of all the horrid radioactivity and muck.
The Decontamination Shower requires any Doctor and has a minimum size of 5x5 squares. It also requires maintenance.

A Doctor uses the DNA-Fixer Room to cure patients with Alien DNA.
Patients who have been meddled with by visitors from another world must have their DNA replaced in this room using a very complex piece of equipment.
It requires a Doctor with the Research qualification to work it and has a minimum size of 5x5 squares. Unusually, it does NOT require maintenance and will never break down.
Doctors, handymen and Nurses relax in the staff room and become less tired. It has a minimum size of 4x4 squares.
Your staff will become tired as they carry out their jobs. They require this room to relax and refresh themselves. Tired staff move slower, make more mistakes, and become unhappy, causing them to demand pay rises and eventually quit. Building a staff room with plenty to do is very worthwhile. Make sure there is room for several staff members at one time.
Doctors with Research skills can discover new drugs and machines in the Research Room.
New diagnosis rooms, cures, and drugs are invented or improved upon in the Research Room. It's a vital part of your hospital and will do wonders for your cure percentages.
The Auto Autopsy Machine is the first machine available for the Research Room. If you have a patient who has not been successfully diagnosed, you can send them to this machine and perform research on their remains. This process will kill the patient (although this will not be officially recorded as a death on the Yearly Appraisal screen). Be warned - this machine is extremely controversial and has a small chance of being discovered when used, costing you dearly in reputation.

The next item that unlocks once you have researched it is the Computer. This is a key research component.
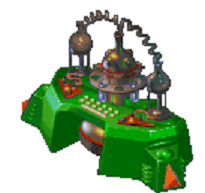
The last machine that can be researched for this room is the Atom Analyser, also known as the Chemical Mixer. These machines speed up the research process.
The Research Room requires at least one Doctor with the Research qualification and has a minimum size of 5x5 squares.

Build Toilets to stop Patients making a mess in your hospital!
Patients feeling a call of nature will need to unburden themselves in the comfort of your toilet facilities. You can build extra stalls and sinks if you expect a lot of visitors. In some cases, you might consider building further facilities elsewhere in the hospital. It has a minimum size of 4x4 squares.

A Training room with a Consultant can be used to train other Doctors.
Your Juniors and Doctors can gain valuable extra qualifications by studying in this room. A Consultant with Surgery, Research or Psychiatric skills will pass these on to any Juniors and Doctors being trained. Doctors who already have these skills will find their ability to use them increases whilst here.
How long it takes to train a Doctor depends on how many Doctors you send for training at any one time. The more Doctors attending a training session, the longer the session takes. Furnishing the Training Room with Skeletons and Bookcases helps to reduce this length of time. While a Doctor is in training, you can see how far his training has progressed by calling up the Staff Screen and selecting the Doctor being trained. The Doctor’s skills are displayed at the bottom of the screen on a bar below the scale in which he’s being trained. This indicates how far the Doctor’s training has progressed.
The Training Room requires a Consultant and has a minimum size of 4x4 squares.

Requires a Receptionist who directs patients to Doctors. You need to place at least one of these near the entrance of your hospital to enable your Receptionist to process patients and assign them to Diagnosis Rooms. Right-clicking will rotate the desk before placement.

Provides seating for one patient, making waiting more comfortable. Place these in busy locations. They can be rotated by using the right mouse button before placing them with the left button.

Stops patients from getting thirsty and provides revenue. Placing drinks machines around your hospital makes your patients happier. They can be rotated with the right mouse button and placed with the left button. They require no maintenance once installed.

So you can sabotage opponents' hospitals (neither are currently implemented.)
The following items can also be placed inside rooms.

Minimises danger from malfunctioning machinery and impresses VIPs. Place these in Rooms and Clinics to reduce the risk of a machine exploding. When placed in corridors, they make the building safer overall.

Keeps your hospital from getting cold. These moderate the temperatures in your hospital and may randomly malfunction. Place them at intervals along your walls. Right-clicking rotates them and left-clicking places them. They require no maintenance once installed.

Keeps patients happy and purifies the air. Healthy plants make both your patients and staff happier. Handymen will water the plants automatically, but you can adjust their priorities to make sure the plants stay hydrated.

Patients put their rubbish here. You never actually see them being used, though!

Employees resting in the Staff Room will sit quietly on a sofa unless there's a better way of relaxing.

Helps your male staff relax. Nurses prefer the TV or Video Game.

Make sure your staff don't miss their favourite programmes.

Let your staff relax with Hi-Octane.

Your more hygiene-conscious patients may wash their soiled hands in this. If there aren't enough sinks, patients become unhappy.
Patients, er, use this. You should place more than one if you don't want queues to build up!
The Consultant will use this while teaching.

Your learning Doctors sit here to take notes, get bored and doodle idly. The more chairs you place, the larger your class sizes can be.
The next two items can also be placed in the Psychiatric Room.

Reference material for Doctors.

Used for training purposes and the Halloween party. In the Training Room, the Consultant may point at this while teaching.
These items are common for a lot of the rooms.
Essential for a Doctor or Nurse to put their PC on.

Contains patient files, notes and research documents.
Patients sit here and discuss their illnesses.
Patients and surgeons will undress and put their clothes back on behind this screen, out of the player's view.
Really sick people lie around on these.

The Control Panel is the technical name we’ve given to the area beneath the Hospital View window. The Control Panel is split into four main sections: Finance, Build/Hire, Business, and Dynamic Info Bar. How the panel works is described in Using the Control Panel , below.

The Build Timer is one of the first things you notice when you start playing. It indicates how much time you have before your Hospital opens to the public. You have the option of a few minutes grace in which to begin building and hiring, or you can left-click on GO to open your Hospital immediately. Computer players run three competing Hospitals. Computer players do not always wait until the end of Build Time before opening their Hospitals.(Computer players are not implemented)

The little chap who lurks in the bottom-right corner of the screen, just above the Control Panel, happens to be very well informed about all aspects of Hospital Management. He’s agreed to keep an eye on you every time you play and give you his good advice for free. Isn’t that nice?

Hidden, until you move the pointer to the top edge of the screen, is the Menu Bar. From here, you can save your game, load saved games, alter different aspects of the game, such as game speed, for example, or find out information about your game. There are three menus on the Menu bar and a clock on the right so you don't miss your tea!
| File | Options | Charts |
|---|---|---|
 |
 |
 |
 . This will open up the save menu where you can either select an existing save (double left-click) or create a new one by typing the name in the space provided and pressing


 if you want to restart the current game from the beginning .
 if you want to quit back to the opening menu screen.


 (the pie chart and other players are not implemented)


 and selecting the Doctor being trained. The Doctor’s skills are displayed at the bottom of the screen on a bar below the scale in which he’s being trained. This indicates how far the Doctor’s training has progressed.


 . Your choice of music doesn’t affect the psychiatric well being of Staff or Patients but it will probably affect yours.
 to open the


| Staff | ||
|---|---|---|
 |
Hot | Staff are overheating. You might have too many radiators, or the boiler thermostat might be malfunctioning. In this case, you can do nothing until it’s automatically fixed. |
 |
Cold | Either Staff require more radiators to warm them up or the boiler is on the blink and your radiators are temporarily out of order. |
 |
Diagnosis Complete | This is self explanatory, isn’t it? |
 |
Patient Needs More Diagnosis | This Patient will be sent for further diagnosis automatically. |
 |
Staff Resigning | This member of Staff is threatening to leave the Hospital in disgust. A Pop-Up Icon will inform you of the demands being made, or maybe they have had enough and there is nothing you can do to keep them. |
 |
Staff Tired | The Staff member will soon be heading for the Staff Room for a rest. If you’ve built one, that is. |
 |
Staff Waiting For Patient | This Staff member is ready to see the next Patient. |
 |
No More Diagnosis | Your Staff have exhausted all the possibilities for diagnosing this Patient, without finding exactly what is what with him or her. |
| Patients | ||
|
Hot | Patients will soon require visits to Drinks machines. You might have too many radiators, or the boiler thermostat might be malfunctioning. In this case, you can do nothing until it is fixed automatically. |
|
Cold | Either Patients require more radiators to warm them up or the boiler is on the blink and your radiators are temporarily out of order. |
 |
Thirsty | Patients will visit Drinks machines, if any exist in your Hospital. |
 |
Unhappy | Patients require treatment that is more prompt, drinks, toilet facilities, more moderate temperatures, plants and fire extinguishers, or greater cleanliness from your Hospital. |
 |
Leaving/Fed Up | Patients achieve this state when they’ve been unhappy for a considerable length of time. |
 |
Patient Cured | Your treatment has been 100 per cent successful. The Patient will now leave, happy. |
 |
Patient Not Cured | Treatment has been unsuccessful. The Patient is about to meet their maker or worse! |
 |
Patient Not Paying | Your charges for treatment are almost certainly set too high, and the Patient, although cured successfully, is refusing to cough up the readies. |
 |
Patient Going To The Toilet | Even characters in computer games need to relieve themselves occasionally. |
 |
Contagious Disease | Patient must be treated soon and is at risk of starting an epidemic. |
 |
Waiting For Vaccination | During an epidemic, the Patient has contracted a contagious disease and must be vaccinated as soon as possible. |
 |
Next In Line For Cure | Patient is at the head of the queue for cure. |
 |
Vaccinated | Patient has been vaccinated in time, and no longer presents an epidemic threat to the Hospital. |
 |
Patient In Emergency | Patient has been admitted under Emergency conditions, and must be seen as soon as possible. |
 |
Patient Waiting For Decision | You must decide what course of action to take with this individual. A Pop-Up Icon will inform you of the possible selections. |
 |
Patient In Queue system. | Patient is waiting for diagnosis or treatment in a queue This icon indicates that the Patient is reasonably happy. |
 |
Patient Close To Death | There are four variations on this icon to depict how close the Patient is to death. It’s up to you to try a last minute cure or to send them home... |
 |
 |
 |
| Other | ||
 |
Machine Due For Repair | This icon pops up wherever you mark a machine for repair by a Handyman. |
| Key | Action |
|---|---|
 |
Bank Manager |
 |
Statement Screen |
 |
Staff Management Screen |
 |
Town Map |
 |
Drug Casebook |
 |
Research Screen (Research Room must be in hospital to view screen) |
 |
Status Screen |
 |
Charts / Graphs Screen |
 |
Policy Screen |
 |
Machines Menu |
 + +
|
Reloads the game |
   
|
Scroll screen |
|
+
|
Scroll screen faster |
 / / 
|
Zoom in / out (DirectX only) |
|
\
|
Zoom in / out 5x (DirectX and SDL2) |
 |
Set game speed to "slowest" |
 |
Set game speed to "slower" |
 |
Set game speed to "normal" |
 |
Set game speed to "max speed" |
 |
Set game speed to "and then some more" |
 |
Speeds game to "and then some more" whilst being held down, returning to previous speed on release |
 |
Pause / Un-pause game |
 |
Open Research Screen (Research Room must be in hospital to view screen) |
 |
Open the Drug Casebook |
 |
Open the Town Map |
 |
Open the Jukebox Panel |
 |
Open first fax message (if any are waiting) |
 |
Make walls transparent whilst being held down, returning to solid walls on release |
+ 
|
Open the save game dialog |
+ 
|
Open the load game dialog |
|
+
|
Re-starts Current Game From the Beginning |
+ 
|
Quit from the game back to the main menu |
+  + +
|
Quick Save Current Game |
|
+ +
|
Load Last Quick Save |
+ 
|
Toggle the announcements |
|
+
|
Toggle the sound effects |
|
+
|
Toggle the music |
 + +
|
Takes a screenshot |
|
+
|
Toggle Adviser |
 |
Close the topmost window (if any are open) |
+ 
|
Toggle full screen |
|
+ Drag Window |
Restricts window movement to set increments |
 or or
|
Skip in-game movies |