Use MQTTX to Test Connection
This article will introduce using MQTTX as an MQTT client testing tool to connect the deployment of EMQX Cloud.
MQTTX is a cross-platform MQTT 5.0 client tool open sourced by EMQ, which can run on macOS, Linux and Windows, and supports formatting MQTT payload.
MQTTX simplifies the operation logic of the page with the help of chatting software. The user can quickly create a connection to save and establish multiple connection clients at the same time. It is convenient for the user to quickly test the connection of MQTT/TCP、MQTT/TLS, and MQTT/WebSocket Publish / Subscribe functions and other features.
Prerequisites
- Install the MQTTX client tool.
- Already created a deployment in the EMQX Cloud, and the deployment status is running.
Before downloading and installing, please visit our website or GitHub to get the latest version information. The latest version helps to improve the using experience. If you are familiar with this project, you can also directly clone MQTTX repository source code, package and use it yourself. During using, if you have any questions, you can go to GitHub issues to post questions and opinions or Fork our project, and submit a revised PR to us, We will carefully review and reply.
Deploy MQTT Broker
To connect your application to the EMQX Cloud, you need to create and configure a deployment.
Serverless Deployment
Create a Serverless deployment in the EMQX Cloud Console.
Once the deployment is created and running, go to the deployment Overview page to find the MQTT connection information, including:
Broker address
Port number (only TLS ports are supported in Serverless)
Serverless deployments require TLS connections. Make sure to download the CA certificate from the Overview page and use port
8883for TLS.Configure the default authentication (username/password) under Access Control -> Client Authentication in the deployment.
For more details, refer to the Serverless Port Guide.
Dedicated Flex or BYOC Deployment
- You can create a Dedicated Flex or BYOC deployment in the EMQX Cloud Console.
- After creation, go to the deployment Overview page to retrieve MQTT connection information, including:
- Broker address
- TCP and TLS port numbers for MQTT and WebSocket (Both TCP and TLS connections are supported).
- Configure the default authentication (username/password) under Access Control -> Client Authentication in the deployment.
For detailed port configurations, see the Dedicated & BYOC Port Guide.
Connection Configuration
Broker Information
Get the connection address and port in the Deployment Overview (the following xxxxx represents a random port, the specific port information, please refer to the information on the deployment overview page).
- Dedicated Flex plan address: domain; port: 1883(mqtt), 8083(ws) is enabled by default, you can enable port 8883(mqtts) and 8084(wss) by configuring TLS/SSL
- BYOC plan address: the domain name specified at deployment time; port: 1883 (mqtt), 8083 (ws), 8883 (mqtts), 8884 (wss)
Authentication
All deployments of EMQX Cloud have user authentication enabled, so when using MQTTX to test the connection, you need to fill in the Username and Password fields.
Set the Username and Password in
Access Control>Authentication, which can be added one by one, or can be imported at once.
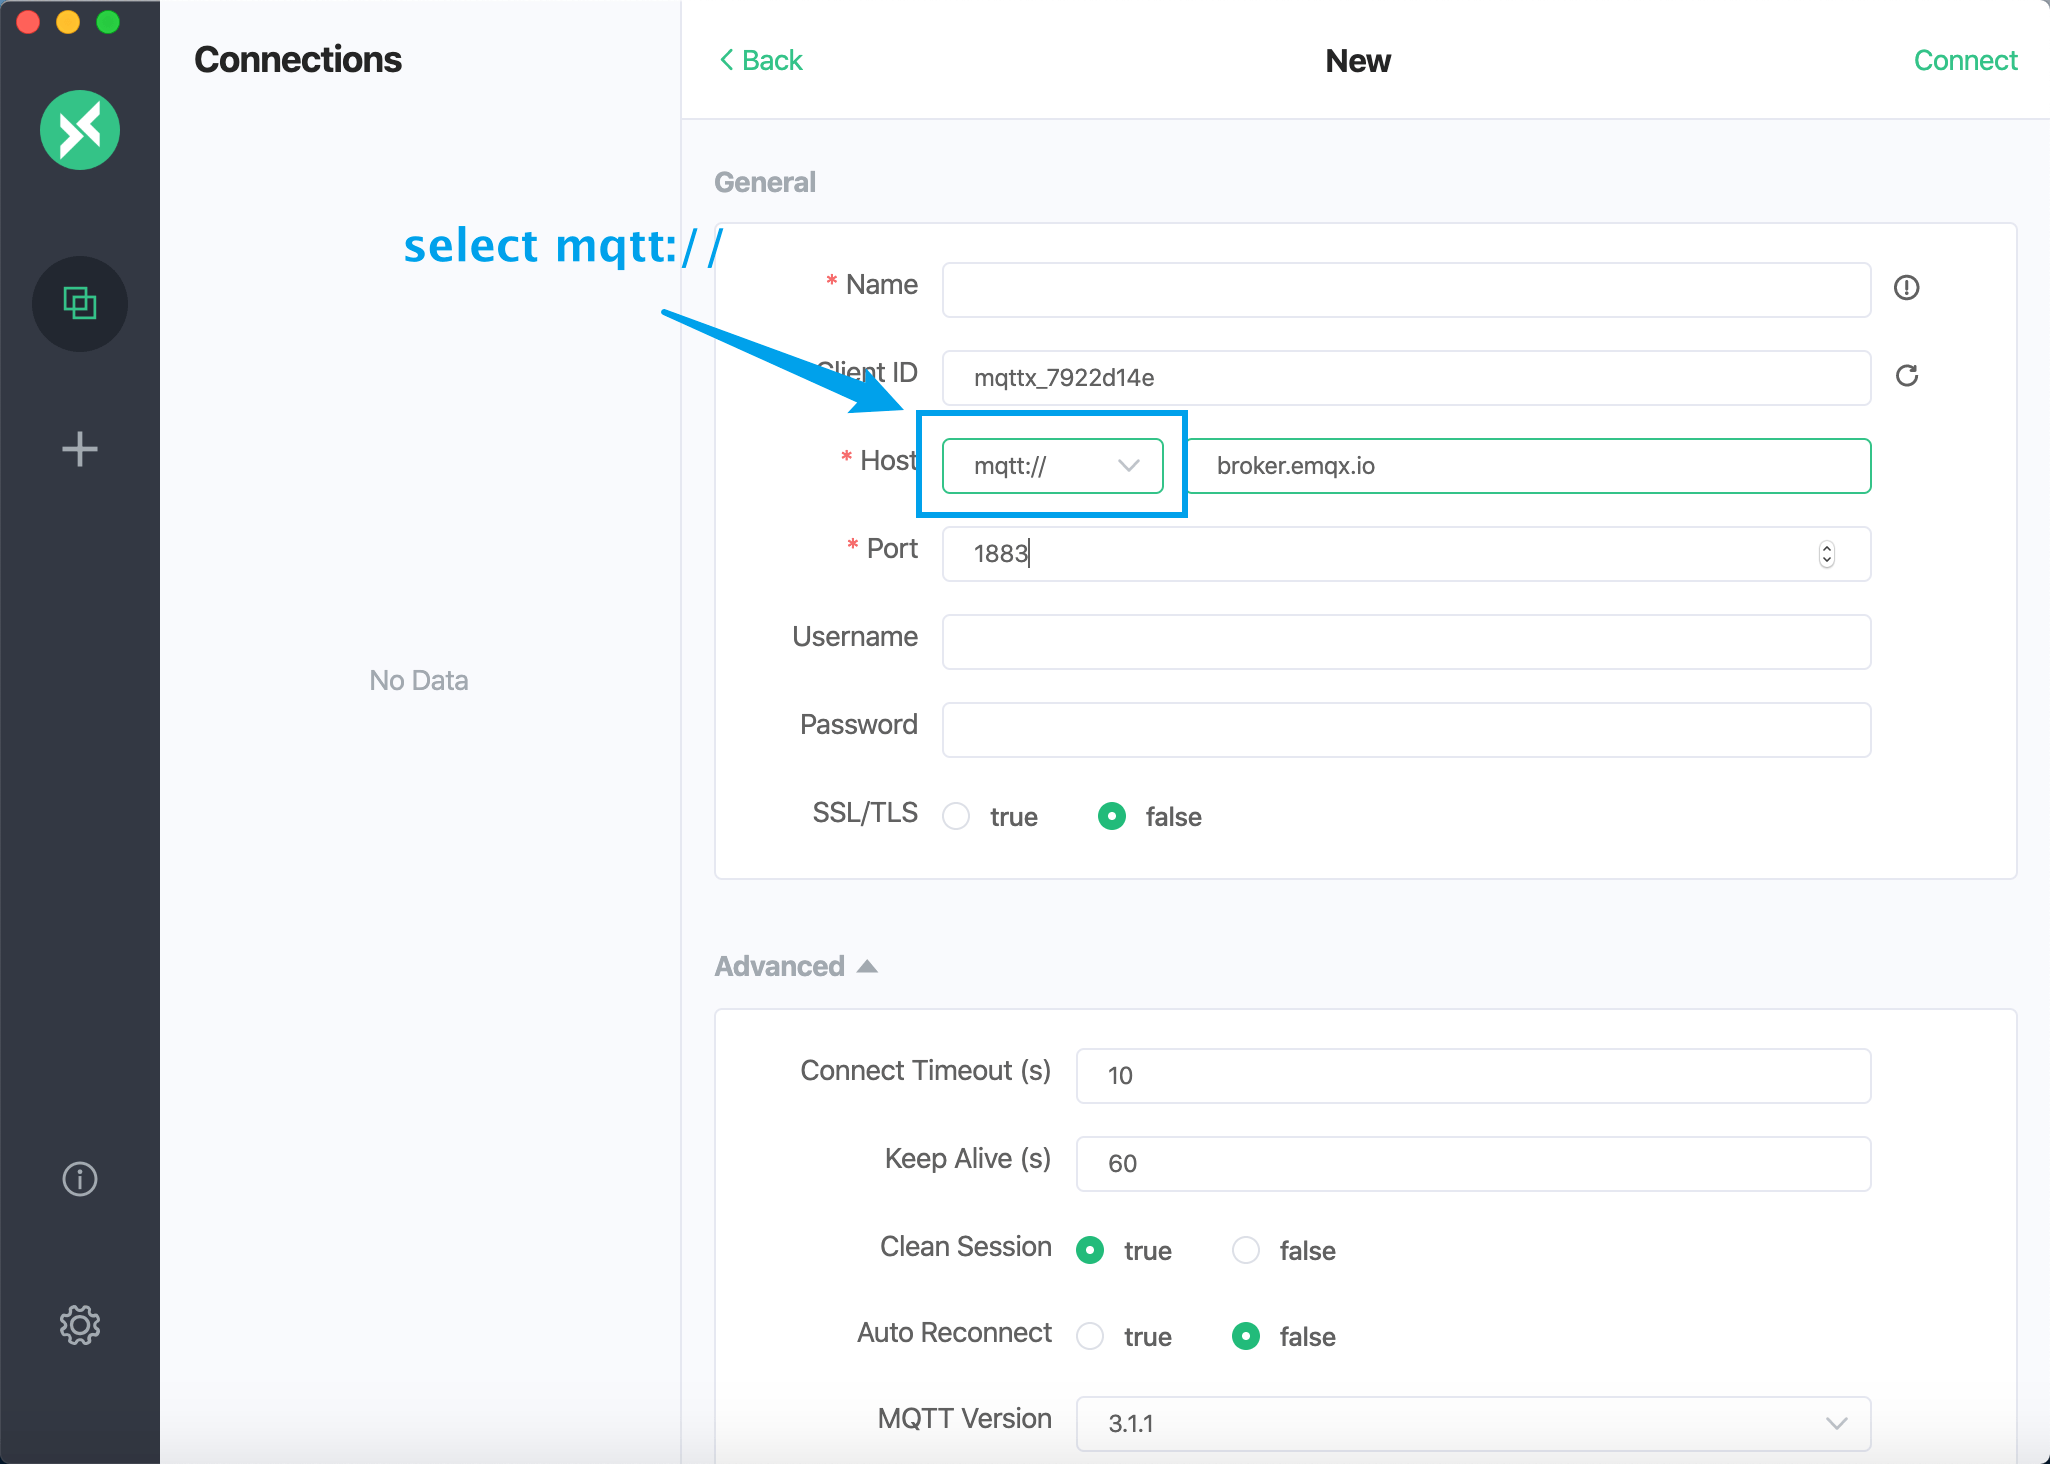
Protocol
- Connect to deployment with MQTT protocol
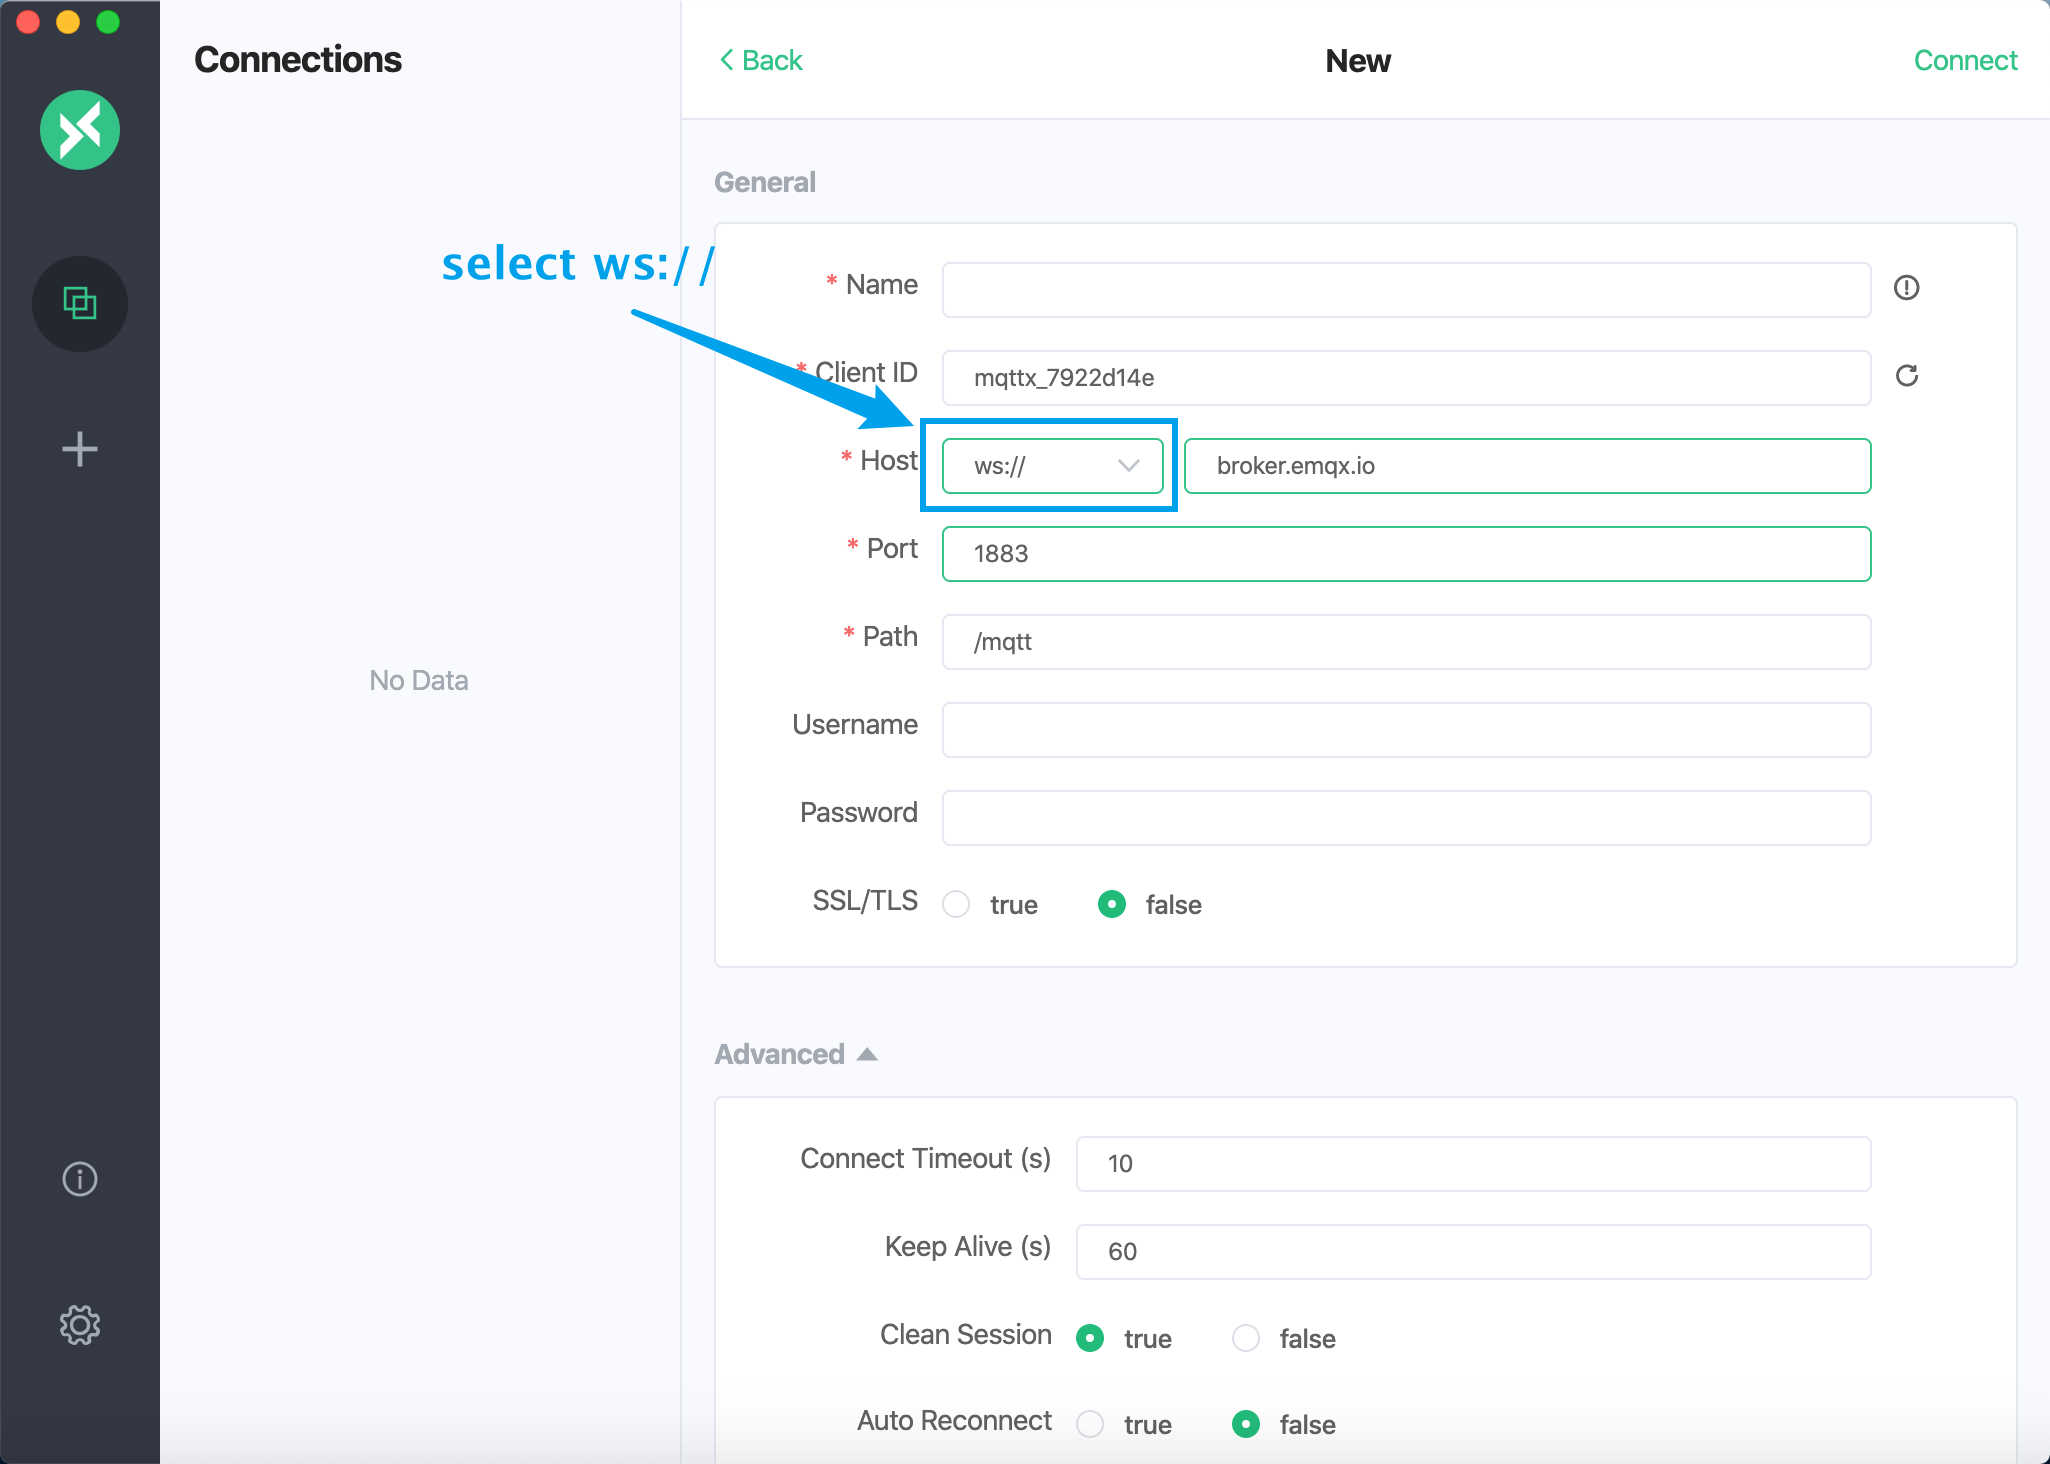
- Connect to the deployment with the WebSocket protocol
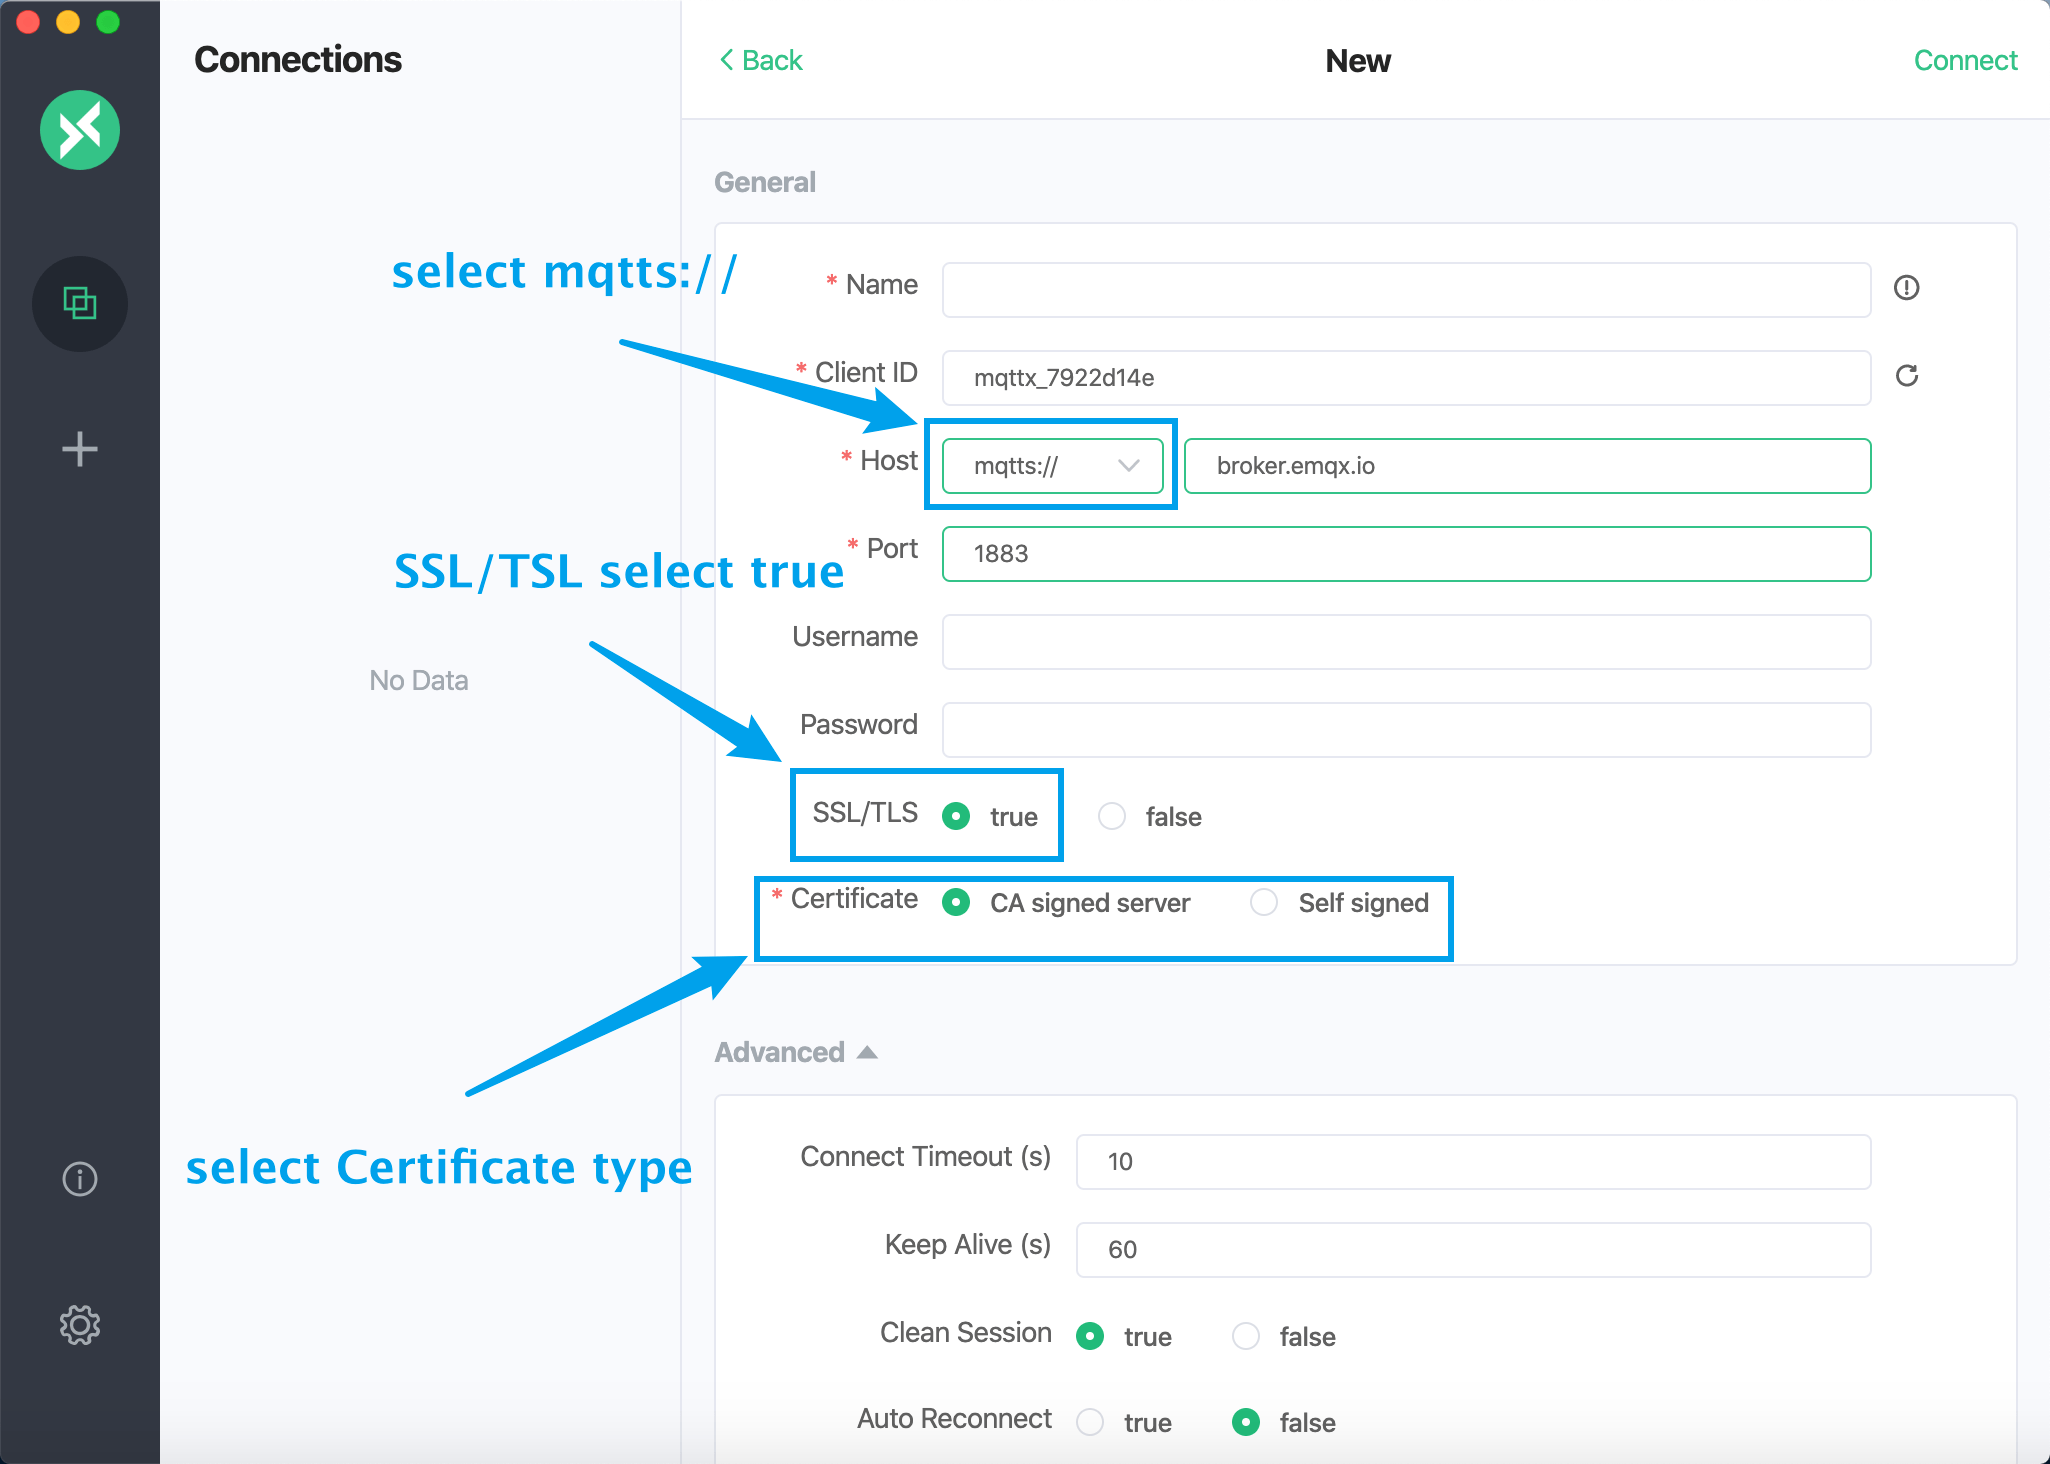
- Connect to deployment with MQTT over TLS/SSL protocol
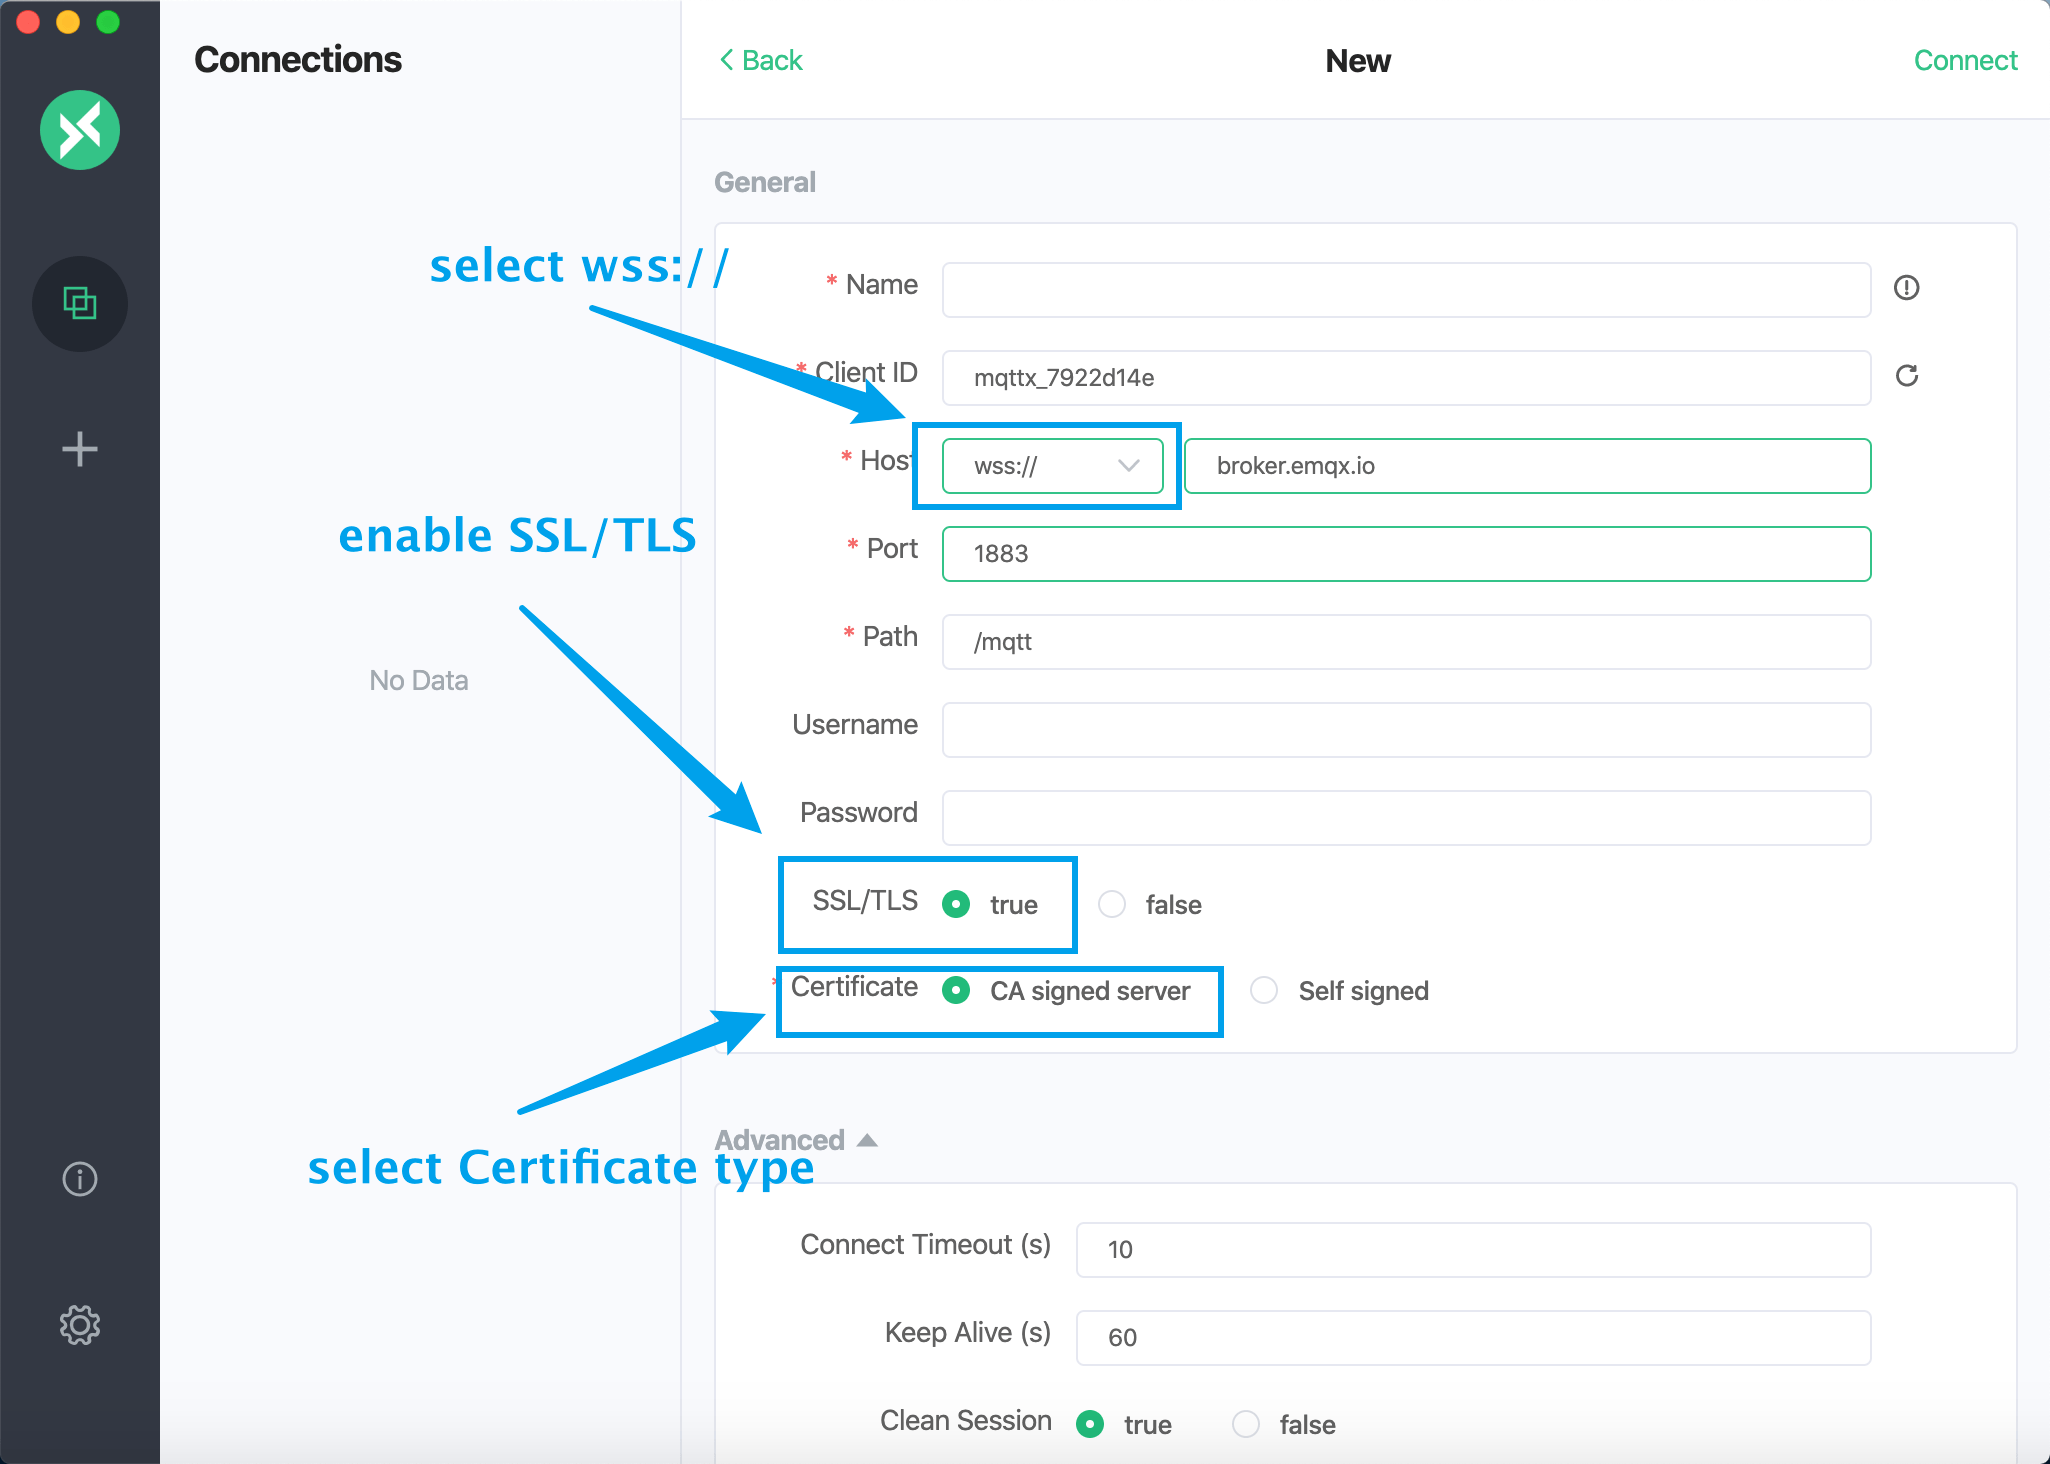
- Connect to deployment with WebSocket over TLS/SSL protocol
Name & Client ID
The name is an identification of this connection, the client ID has been filled in by default, and you can click the refresh icon on the right to refresh. After filling in the appeal information correctly, click the connect button in the upper right corner to connect to the EMQX Cloud deployment.
More
- For more subscription, publishing and other functions, please refer to: MQTTX Guideline
- MQTTX Script Function Tutorial
- MQTTX - an elegant cross-platform MQTT 5.0 desktop client