Migrate from fastmcp to official modelcontextprotocol/python-sdk #13
Conversation
Co-authored-by: primeinc <4395149+primeinc@users.noreply.github.com>
Co-authored-by: primeinc <4395149+primeinc@users.noreply.github.com>
There was a problem hiding this comment.
MCP Python SDK
Python implementation of the Model Context Protocol (MCP)


Table of Contents
- MCP Python SDK
Overview
The Model Context Protocol allows applications to provide context for LLMs in a standardized way, separating the concerns of providing context from the actual LLM interaction. This Python SDK implements the full MCP specification, making it easy to:
- Build MCP clients that can connect to any MCP server
- Create MCP servers that expose resources, prompts and tools
- Use standard transports like stdio, SSE, and Streamable HTTP
- Handle all MCP protocol messages and lifecycle events
Installation
Adding MCP to your python project
We recommend using uv to manage your Python projects.
If you haven't created a uv-managed project yet, create one:
uv init mcp-server-demo
cd mcp-server-demo
Then add MCP to your project dependencies:
uv add "mcp[cli]"Alternatively, for projects using pip for dependencies:
pip install "mcp[cli]"Running the standalone MCP development tools
To run the mcp command with uv:
uv run mcpQuickstart
Let's create a simple MCP server that exposes a calculator tool and some data:
# server.py
from mcp.server.fastmcp import FastMCP

# Create an MCP server
mcp = FastMCP("Demo")


# Add an addition tool
@mcp.tool()
def add(a: int, b: int) -> int:
    """Add two numbers"""
    return a + b


# Add a dynamic greeting resource
@mcp.resource("greeting://{name}")
def get_greeting(name: str) -> str:
    """Get a personalized greeting"""
    return f"Hello, {name}!"
You can install this server in Claude Desktop and interact with it right away by running:
mcp install server.pyAlternatively, you can test it with the MCP Inspector:
mcp dev server.pyWhat is MCP?
The Model Context Protocol (MCP) lets you build servers that expose data and functionality to LLM applications in a secure, standardized way. Think of it like a web API, but specifically designed for LLM interactions. MCP servers can:
- Expose data through Resources (think of these sort of like GET endpoints; they are used to load information into the LLM's context)
- Provide functionality through Tools (sort of like POST endpoints; they are used to execute code or otherwise produce a side effect)
- Define interaction patterns through Prompts (reusable templates for LLM interactions)
- And more!
Core Concepts
Server
The FastMCP server is your core interface to the MCP protocol. It handles connection management, protocol compliance, and message routing:
# Add lifespan support for startup/shutdown with strong typing
from contextlib import asynccontextmanager
from collections.abc import AsyncIterator
from dataclasses import dataclass

from fake_database import Database  # Replace with your actual DB type

from mcp.server.fastmcp import FastMCP

# Create a named server
mcp = FastMCP("My App")

# Specify dependencies for deployment and development
mcp = FastMCP("My App", dependencies=["pandas", "numpy"])


@dataclass
class AppContext:
    db: Database


@asynccontextmanager
async def app_lifespan(server: FastMCP) -> AsyncIterator[AppContext]:
    """Manage application lifecycle with type-safe context"""
    # Initialize on startup
    db = await Database.connect()
    try:
        yield AppContext(db=db)
    finally:
        # Cleanup on shutdown
        await db.disconnect()


# Pass lifespan to server
mcp = FastMCP("My App", lifespan=app_lifespan)


# Access type-safe lifespan context in tools
@mcp.tool()
def query_db() -> str:
    """Tool that uses initialized resources"""
    ctx = mcp.get_context()
    db = ctx.request_context.lifespan_context["db"]
    return db.query()
Resources
Resources are how you expose data to LLMs. They're similar to GET endpoints in a REST API - they provide data but shouldn't perform significant computation or have side effects:
from mcp.server.fastmcp import FastMCP

mcp = FastMCP("My App")


@mcp.resource("config://app", title="Application Configuration")
def get_config() -> str:
    """Static configuration data"""
    return "App configuration here"


@mcp.resource("users://{user_id}/profile", title="User Profile")
def get_user_profile(user_id: str) -> str:
    """Dynamic user data"""
    return f"Profile data for user {user_id}"
Tools
Tools let LLMs take actions through your server. Unlike resources, tools are expected to perform computation and have side effects:
import httpx
from mcp.server.fastmcp import FastMCP

mcp = FastMCP("My App")


@mcp.tool(title="BMI Calculator")
def calculate_bmi(weight_kg: float, height_m: float) -> float:
    """Calculate BMI given weight in kg and height in meters"""
    return weight_kg / (height_m**2)


@mcp.tool(title="Weather Fetcher")
async def fetch_weather(city: str) -> str:
    """Fetch current weather for a city"""
    async with httpx.AsyncClient() as client:
        response = await client.get(f"https://api.weather.com/{city}")
        return response.text
Prompts
Prompts are reusable templates that help LLMs interact with your server effectively:
from mcp.server.fastmcp import FastMCP
from mcp.server.fastmcp.prompts import base

mcp = FastMCP("My App")


@mcp.prompt(title="Code Review")
def review_code(code: str) -> str:
    return f"Please review this code:\n\n{code}"


@mcp.prompt(title="Debug Assistant")
def debug_error(error: str) -> list[base.Message]:
    return [
        base.UserMessage("I'm seeing this error:"),
        base.UserMessage(error),
        base.AssistantMessage("I'll help debug that. What have you tried so far?"),
    ]
Images
FastMCP provides an Image class that automatically handles image data:
from mcp.server.fastmcp import FastMCP, Image
from PIL import Image as PILImage

mcp = FastMCP("My App")


@mcp.tool()
def create_thumbnail(image_path: str) -> Image:
    """Create a thumbnail from an image"""
    img = PILImage.open(image_path)
    img.thumbnail((100, 100))
    return Image(data=img.tobytes(), format="png")
Context
The Context object gives your tools and resources access to MCP capabilities:
from mcp.server.fastmcp import FastMCP, Context

mcp = FastMCP("My App")


@mcp.tool()
async def long_task(files: list[str], ctx: Context) -> str:
    """Process multiple files with progress tracking"""
    for i, file in enumerate(files):
        ctx.info(f"Processing {file}")
        await ctx.report_progress(i, len(files))
        data, mime_type = await ctx.read_resource(f"file://{file}")
    return "Processing complete"
Completions
MCP supports providing completion suggestions for prompt arguments and resource template parameters. With the context parameter, servers can provide completions based on previously resolved values:
Client usage:
from mcp.client.session import ClientSession
from mcp.types import ResourceTemplateReference


async def use_completion(session: ClientSession):
    # Complete without context
    result = await session.complete(
        ref=ResourceTemplateReference(
            type="ref/resource", uri="github://repos/{owner}/{repo}"
        ),
        argument={"name": "owner", "value": "model"},
    )

    # Complete with context - repo suggestions based on owner
    result = await session.complete(
        ref=ResourceTemplateReference(
            type="ref/resource", uri="github://repos/{owner}/{repo}"
        ),
        argument={"name": "repo", "value": "test"},
        context_arguments={"owner": "modelcontextprotocol"},
    )
Server implementation:
from mcp.server import Server
from mcp.types import (
    Completion,
    CompletionArgument,
    CompletionContext,
    PromptReference,
    ResourceTemplateReference,
)

server = Server("example-server")


@server.completion()
async def handle_completion(
    ref: PromptReference | ResourceTemplateReference,
    argument: CompletionArgument,
    context: CompletionContext | None,
) -> Completion | None:
    if isinstance(ref, ResourceTemplateReference):
        if ref.uri == "github://repos/{owner}/{repo}" and argument.name == "repo":
            # Use context to provide owner-specific repos
            if context and context.arguments:
                owner = context.arguments.get("owner")
                if owner == "modelcontextprotocol":
                    repos = ["python-sdk", "typescript-sdk", "specification"]
                    # Filter based on partial input
                    filtered = [r for r in repos if r.startswith(argument.value)]
                    return Completion(values=filtered)
    return None
Elicitation
Request additional information from users during tool execution:
from mcp.server.fastmcp import FastMCP, Context
from mcp.server.elicitation import (
    AcceptedElicitation,
    DeclinedElicitation,
    CancelledElicitation,
)
from pydantic import BaseModel, Field

mcp = FastMCP("Booking System")


@mcp.tool()
async def book_table(date: str, party_size: int, ctx: Context) -> str:
    """Book a table with confirmation"""

    # Schema must only contain primitive types (str, int, float, bool)
    class ConfirmBooking(BaseModel):
        confirm: bool = Field(description="Confirm booking?")
        notes: str = Field(default="", description="Special requests")

    result = await ctx.elicit(
        message=f"Confirm booking for {party_size} on {date}?", schema=ConfirmBooking
    )

    match result:
        case AcceptedElicitation(data=data):
            if data.confirm:
                return f"Booked! Notes: {data.notes or 'None'}"
            return "Booking cancelled"
        case DeclinedElicitation():
            return "Booking declined"
        case CancelledElicitation():
            return "Booking cancelled"
The elicit() method returns an ElicitationResult with:
action: "accept", "decline", or "cancel"data: The validated response (only when accepted)validation_error: Any validation error message
Authentication
Authentication can be used by servers that want to expose tools accessing protected resources.
mcp.server.auth implements an OAuth 2.0 server interface, which servers can use by
providing an implementation of the OAuthAuthorizationServerProvider protocol.
from mcp import FastMCP
from mcp.server.auth.provider import OAuthAuthorizationServerProvider
from mcp.server.auth.settings import (
    AuthSettings,
    ClientRegistrationOptions,
    RevocationOptions,
)


class MyOAuthServerProvider(OAuthAuthorizationServerProvider):
    # See an example on how to implement at `examples/servers/simple-auth`
    ...


mcp = FastMCP(
    "My App",
    auth_server_provider=MyOAuthServerProvider(),
    auth=AuthSettings(
        issuer_url="https://myapp.com",
        revocation_options=RevocationOptions(
            enabled=True,
        ),
        client_registration_options=ClientRegistrationOptions(
            enabled=True,
            valid_scopes=["myscope", "myotherscope"],
            default_scopes=["myscope"],
        ),
        required_scopes=["myscope"],
    ),
)
See OAuthAuthorizationServerProvider for more details.
Running Your Server
Development Mode
The fastest way to test and debug your server is with the MCP Inspector:
mcp dev server.py

# Add dependencies
mcp dev server.py --with pandas --with numpy

# Mount local code
mcp dev server.py --with-editable .
Claude Desktop Integration
Once your server is ready, install it in Claude Desktop:
mcp install server.py

# Custom name
mcp install server.py --name "My Analytics Server"

# Environment variables
mcp install server.py -v API_KEY=abc123 -v DB_URL=postgres://...
mcp install server.py -f .env
Direct Execution
For advanced scenarios like custom deployments:
from mcp.server.fastmcp import FastMCP

mcp = FastMCP("My App")

if __name__ == "__main__":
    mcp.run()
Run it with:
python server.py
# or
mcp run server.py
Note that mcp run or mcp dev only supports server using FastMCP and not the low-level server variant.
Streamable HTTP Transport
Note: Streamable HTTP transport is superseding SSE transport for production deployments.
from mcp.server.fastmcp import FastMCP

# Stateful server (maintains session state)
mcp = FastMCP("StatefulServer")

# Stateless server (no session persistence)
mcp = FastMCP("StatelessServer", stateless_http=True)

# Stateless server (no session persistence, no sse stream with supported client)
mcp = FastMCP("StatelessServer", stateless_http=True, json_response=True)

# Run server with streamable_http transport
mcp.run(transport="streamable-http")
You can mount multiple FastMCP servers in a FastAPI application:
# echo.py
from mcp.server.fastmcp import FastMCP

mcp = FastMCP(name="EchoServer", stateless_http=True)


@mcp.tool(description="A simple echo tool")
def echo(message: str) -> str:
    return f"Echo: {message}"
# math.py
from mcp.server.fastmcp import FastMCP
mcp = FastMCP(name="MathServer", stateless_http=True)
@mcp.tool(description="A simple add tool")
def add_two(n: int) -> int:
return n + 2# main.py
import contextlib
from fastapi import FastAPI
from mcp.echo import echo
from mcp.math import math
# Create a combined lifespan to manage both session managers
@contextlib.asynccontextmanager
async def lifespan(app: FastAPI):
async with contextlib.AsyncExitStack() as stack:
await stack.enter_async_context(echo.mcp.session_manager.run())
await stack.enter_async_context(math.mcp.session_manager.run())
yield
app = FastAPI(lifespan=lifespan)
app.mount("/echo", echo.mcp.streamable_http_app())
app.mount("/math", math.mcp.streamable_http_app())For low level server with Streamable HTTP implementations, see:
- Stateful server:
examples/servers/simple-streamablehttp/ - Stateless server:
examples/servers/simple-streamablehttp-stateless/
The streamable HTTP transport supports:
- Stateful and stateless operation modes
- Resumability with event stores
- JSON or SSE response formats
- Better scalability for multi-node deployments
Mounting to an Existing ASGI Server
Note: SSE transport is being superseded by Streamable HTTP transport.
By default, SSE servers are mounted at /sse and Streamable HTTP servers are mounted at /mcp. You can customize these paths using the methods described below.
You can mount the SSE server to an existing ASGI server using the sse_app method. This allows you to integrate the SSE server with other ASGI applications.
from starlette.applications import Starlette
from starlette.routing import Mount, Host
from mcp.server.fastmcp import FastMCP


mcp = FastMCP("My App")

# Mount the SSE server to the existing ASGI server
app = Starlette(
    routes=[
        Mount('/', app=mcp.sse_app()),
    ]
)

# or dynamically mount as host
app.router.routes.append(Host('mcp.acme.corp', app=mcp.sse_app()))
When mounting multiple MCP servers under different paths, you can configure the mount path in several ways:
from starlette.applications import Starlette
from starlette.routing import Mount
from mcp.server.fastmcp import FastMCP

# Create multiple MCP servers
github_mcp = FastMCP("GitHub API")
browser_mcp = FastMCP("Browser")
curl_mcp = FastMCP("Curl")
search_mcp = FastMCP("Search")

# Method 1: Configure mount paths via settings (recommended for persistent configuration)
github_mcp.settings.mount_path = "/github"
browser_mcp.settings.mount_path = "/browser"

# Method 2: Pass mount path directly to sse_app (preferred for ad-hoc mounting)
# This approach doesn't modify the server's settings permanently

# Create Starlette app with multiple mounted servers
app = Starlette(
    routes=[
        # Using settings-based configuration
        Mount("/github", app=github_mcp.sse_app()),
        Mount("/browser", app=browser_mcp.sse_app()),
        # Using direct mount path parameter
        Mount("/curl", app=curl_mcp.sse_app("/curl")),
        Mount("/search", app=search_mcp.sse_app("/search")),
    ]
)

# Method 3: For direct execution, you can also pass the mount path to run()
if __name__ == "__main__":
    search_mcp.run(transport="sse", mount_path="/search")
For more information on mounting applications in Starlette, see the Starlette documentation.
Examples
Echo Server
A simple server demonstrating resources, tools, and prompts:
from mcp.server.fastmcp import FastMCP

mcp = FastMCP("Echo")


@mcp.resource("echo://{message}")
def echo_resource(message: str) -> str:
    """Echo a message as a resource"""
    return f"Resource echo: {message}"


@mcp.tool()
def echo_tool(message: str) -> str:
    """Echo a message as a tool"""
    return f"Tool echo: {message}"


@mcp.prompt()
def echo_prompt(message: str) -> str:
    """Create an echo prompt"""
    return f"Please process this message: {message}"
SQLite Explorer
A more complex example showing database integration:
import sqlite3

from mcp.server.fastmcp import FastMCP

mcp = FastMCP("SQLite Explorer")


@mcp.resource("schema://main")
def get_schema() -> str:
    """Provide the database schema as a resource"""
    conn = sqlite3.connect("database.db")
    schema = conn.execute("SELECT sql FROM sqlite_master WHERE type='table'").fetchall()
    return "\n".join(sql[0] for sql in schema if sql[0])


@mcp.tool()
def query_data(sql: str) -> str:
    """Execute SQL queries safely"""
    conn = sqlite3.connect("database.db")
    try:
        result = conn.execute(sql).fetchall()
        return "\n".join(str(row) for row in result)
    except Exception as e:
        return f"Error: {str(e)}"
Advanced Usage
Low-Level Server
For more control, you can use the low-level server implementation directly. This gives you full access to the protocol and allows you to customize every aspect of your server, including lifecycle management through the lifespan API:
from contextlib import asynccontextmanager
from collections.abc import AsyncIterator

from fake_database import Database  # Replace with your actual DB type

from mcp.server import Server


@asynccontextmanager
async def server_lifespan(server: Server) -> AsyncIterator[dict]:
    """Manage server startup and shutdown lifecycle."""
    # Initialize resources on startup
    db = await Database.connect()
    try:
        yield {"db": db}
    finally:
        # Clean up on shutdown
        await db.disconnect()


# Pass lifespan to server
server = Server("example-server", lifespan=server_lifespan)


# Access lifespan context in handlers
@server.call_tool()
async def query_db(name: str, arguments: dict) -> list:
    ctx = server.request_context
    db = ctx.lifespan_context["db"]
    return await db.query(arguments["query"
8000
])
The lifespan API provides:
- A way to initialize resources when the server starts and clean them up when it stops
- Access to initialized resources through the request context in handlers
- Type-safe context passing between lifespan and request handlers
import mcp.server.stdio
import mcp.types as types
from mcp.server.lowlevel import NotificationOptions, Server
from mcp.server.models import InitializationOptions

# Create a server instance
server = Server("example-server")


@server.list_prompts()
async def handle_list_prompts() -> list[types.Prompt]:
    return [
        types.Prompt(
            name="example-prompt",
            description="An example prompt template",
            arguments=[
                types.PromptArgument(
                    name="arg1", description="Example argument", required=True
                )
            ],
        )
    ]


@server.get_prompt()
async def handle_get_prompt(
    name: str, arguments: dict[str, str] | None
) -> types.GetPromptResult:
    if name != "example-prompt":
        raise ValueError(f"Unknown prompt: {name}")

    return types.GetPromptResult(
        description="Example prompt",
        messages=[
            types.PromptMessage(
                role="user",
                content=types.TextContent(type="text", text="Example prompt text"),
            )
        ],
    )


async def run():
    async with mcp.server.stdio.stdio_server() as (read_stream, write_stream):
        await server.run(
            read_stream,
            write_stream,
            InitializationOptions(
                server_name="example",
                server_version="0.1.0",
                capabilities=server.get_capabilities(
                    notification_options=NotificationOptions(),
                    experimental_capabilities={},
                ),
            ),
        )


if __name__ == "__main__":
    import asyncio

    asyncio.run(run())
Caution: The mcp run and mcp dev tool doesn't support low-level server.
Writing MCP Clients
The SDK provides a high-level client interface for connecting to MCP servers using various transports:
from mcp import ClientSession, StdioServerParameters, types
from mcp.client.stdio import stdio_client

# Create server parameters for stdio connection
server_params = StdioServerParameters(
    command="python",  # Executable
    args=["example_server.py"],  # Optional command line arguments
    env=None,  # Optional environment variables
)


# Optional: create a sampling callback
async def handle_sampling_message(
    message: types.CreateMessageRequestParams,
) -> types.CreateMessageResult:
    return types.CreateMessageResult(
        role="assistant",
        content=types.TextContent(
            type="text",
            text="Hello, world! from model",
        ),
        model="gpt-3.5-turbo",
        stopReason="endTurn",
    )


async def run():
    async with stdio_client(server_params) as (read, write):
        async with ClientSession(
            read, write, sampling_callback=handle_sampling_message
        ) as session:
            # Initialize the connection
            await session.initialize()

            # List available prompts
            prompts = await session.list_prompts()

            # Get a prompt
            prompt = await session.get_prompt(
                "example-prompt", arguments={"arg1": "value"}
            )

            # List available resources
            resources = await session.list_resources()

            # List available tools
            tools = await session.list_tools()

            # Read a resource
            content, mime_type = await session.read_resource("file://some/path")

            # Call a tool
            result = await session.call_tool("tool-name", arguments={"arg1": "value"})


if __name__ == "__main__":
    import asyncio

    asyncio.run(run())
Clients can also connect using Streamable HTTP transport:
from mcp.client.streamable_http import streamablehttp_client
from mcp import ClientSession


async def main():
    # Connect to a streamable HTTP server
    async with streamablehttp_client("example/mcp") as (
        read_stream,
        write_stream,
        _,
    ):
        # Create a session using the client streams
        async with ClientSession(read_stream, write_stream) as session:
            # Initialize the connection
            await session.initialize()
            # Call a tool
            tool_result = await session.call_tool("echo", {"message": "hello"})
Client Display Utilities
When building MCP clients, the SDK provides utilities to help display human-readable names for tools, resources, and prompts:
from mcp.shared.metadata_utils import get_display_name
from mcp.client.session import ClientSession


async def display_tools(session: ClientSession):
    """Display available tools with human-readable names"""
    tools_response = await session.list_tools()

    for tool in tools_response.tools:
        # get_display_name() returns the title if available, otherwise the name
        display_name = get_display_name(tool)
        print(f"Tool: {display_name}")
        if tool.description:
            print(f"   {tool.description}")


async def display_resources(session: ClientSession):
    """Display available resources with human-readable names"""
    resources_response = await session.list_resources()

    for resource in resources_response.resources:
        display_name = get_display_name(resource)
        print(f"Resource: {display_name} ({resource.uri})")
The get_display_name() function implements the proper precedence rules for displaying names:
- For tools:
title>annotations.title>name - For other objects:
title>name
This ensures your client UI shows the most user-friendly names that servers provide.
OAuth Authentication for Clients
The SDK includes authorization support for connecting to protected MCP servers:
from mcp.client.auth import OAuthClientProvider, TokenStorage
from mcp.client.session import ClientSession
from mcp.client.streamable_http import streamablehttp_client
from mcp.shared.auth import OAuthClientInformationFull, OAuthClientMetadata, OAuthToken


class CustomTokenStorage(TokenStorage):
    """Simple in-memory token storage implementation."""

    async def get_tokens(self) -> OAuthToken | None:
        pass

    async def set_tokens(self, tokens: OAuthToken) -> None:
        pass

    async def get_client_info(self) -> OAuthClientInformationFull | None:
        pass

    async def set_client_info(self, client_info: OAuthClientInformationFull) -> None:
        pass


async def main():
    # Set up OAuth authentication
    oauth_auth = OAuthClientProvider(
        server_url="https://api.example.com",
        client_metadata=OAuthClientMetadata(
            client_name="My Client",
            redirect_uris=["http://localhost:3000/callback"],
            grant_types=["authorization_code", "refresh_token"],
            response_types=["code"],
        ),
        storage=CustomTokenStorage(),
        redirect_handler=lambda url: print(f"Visit: {url}"),
        callback_handler=lambda: ("auth_code", None),
    )

    # Use with streamable HTTP client
    async with streamablehttp_client(
        "https://api.example.com/mcp", auth=oauth_auth
    ) as (read, write, _):
        async with ClientSession(read, write) as session:
            await session.initialize()
            # Authenticated session ready
For a complete working example, see examples/clients/simple-auth-client/.
MCP Primitives
The MCP protocol defines three core primitives that servers can implement:
| Primitive | Control | Description | Example Use |
|---|---|---|---|
| Prompts | User-controlled | Interactive templates invoked by user choice | Slash commands, menu options |
| Resources | Application-controlled | Contextual data managed by the client application | File contents, API responses |
| Tools | Model-controlled | Functions exposed to the LLM to take actions | API calls, data updates |
Server Capabilities
MCP servers declare capabilities during initialization:
| Capability | Feature Flag | Description |
|---|---|---|
prompts |
listChanged |
Prompt template management |
resources |
subscribelistChanged |
Resource exposure and updates |
tools |
listChanged |
Tool discovery and execution |
logging |
- | Server logging configuration |
completion
8000
|
- | Argument completion suggestions |
Documentation
- Model Context Protocol documentation
- Model Context Protocol specification
- Officially supported servers
Contributing
We are passionate about supporting contributors of all levels of experience and would love to see you get involved in the project. See the contributing guide to get started.
License
This project is licensed under the MIT License - see the LICENSE file for details.
Introduction
Get started with the Model Context Protocol (MCP)
MCP is an open protocol that standardizes how applications provide context to LLMs. Think of MCP like a USB-C port for AI applications. Just as USB-C provides a standardized way to connect your devices to various peripherals and accessories, MCP provides a standardized way to connect AI models to different data sources and tools.
Why MCP?
MCP helps you build agents and complex workflows on top of LLMs. LLMs frequently need to integrate with data and tools, and MCP provides:
- A growing list of pre-built integrations that your LLM can directly plug into
- The flexibility to switch between LLM providers and vendors
- Best practices for securing your data within your infrastructure
General architecture
At its core, MCP follows a client-server architecture where a host application can connect to multiple servers:
flowchart LR
    subgraph "Your Computer"
        Host["Host with MCP Client\n(Claude, IDEs, Tools)"]
        S1["MCP Server A"]
        S2["MCP Server B"]
        S3["MCP Server C"]
        Host <-->|"MCP Protocol"| S1
        Host <-->|"MCP Protocol"| S2
        Host <-->|"MCP Protocol"| S3
        S1 <--> D1[("Local\nData Source A")]
        S2 <--> D2[("Local\nData Source B")]
    end
    subgraph "Internet"
        S3 <-->|"Web APIs"| D3[("Remote\nService C")]
    end
- MCP Hosts: Programs like Claude Desktop, IDEs, or AI tools that want to access data through MCP
- MCP Clients: Protocol clients that maintain 1:1 connections with servers
- MCP Servers: Lightweight programs that each expose specific capabilities through the standardized Model Context Protocol
- Local Data Sources: Your computer's files, databases, and services that MCP servers can securely access
- Remote Services: External systems available over the internet (e.g., through APIs) that MCP servers can connect to
Get started
Choose the path that best fits your needs:
Quick Starts
Get started building your own server to use in Claude for Desktop and other clients Get started building your own client that can integrate with all MCP servers Get started using pre-built servers in Claude for DesktopExamples
Check out our gallery of official MCP servers and implementations View the list of clients that support MCP integrationsTutorials
Learn how to use LLMs like Claude to speed up your MCP development Learn how to effectively debug MCP servers and integrations Test and inspect your MCP servers with our interactive debugging tool <iframe src="https://www.youtube.com/embed/kQmXtrmQ5Zg" />Explore MCP
Dive deeper into MCP's core concepts and capabilities:
Understand how MCP connects clients, servers, and LLMs Expose data and content from your servers to LLMs Create reusable prompt templates and workflows Enable LLMs to perform actions through your server Let your servers request completions from LLMs Learn about MCP's communication mechanismContributing
Want to contribute? Check out our Contributing Guide to learn how you can help improve MCP.
Support and Feedback
Here's how to get help or provide feedback:
- For bug reports and feature requests related to the MCP specification, SDKs, or documentation (open source), please create a GitHub issue
- For discussions or Q&A about the MCP specification, use the specification discussions
- For discussions or Q&A about other MCP open source components, use the organization discussions
- For bug reports, feature requests, and questions related to Claude.app and claude.ai's MCP integration, please see Anthropic's guide on How to Get Support
For Server Developers
Get started building your own server to use in Claude for Desktop and other clients.
In this tutorial, we'll build a simple MCP weather server and connect it to a host, Claude for Desktop. We'll start with a basic setup, and then progress to more complex use cases.
What we'll be building
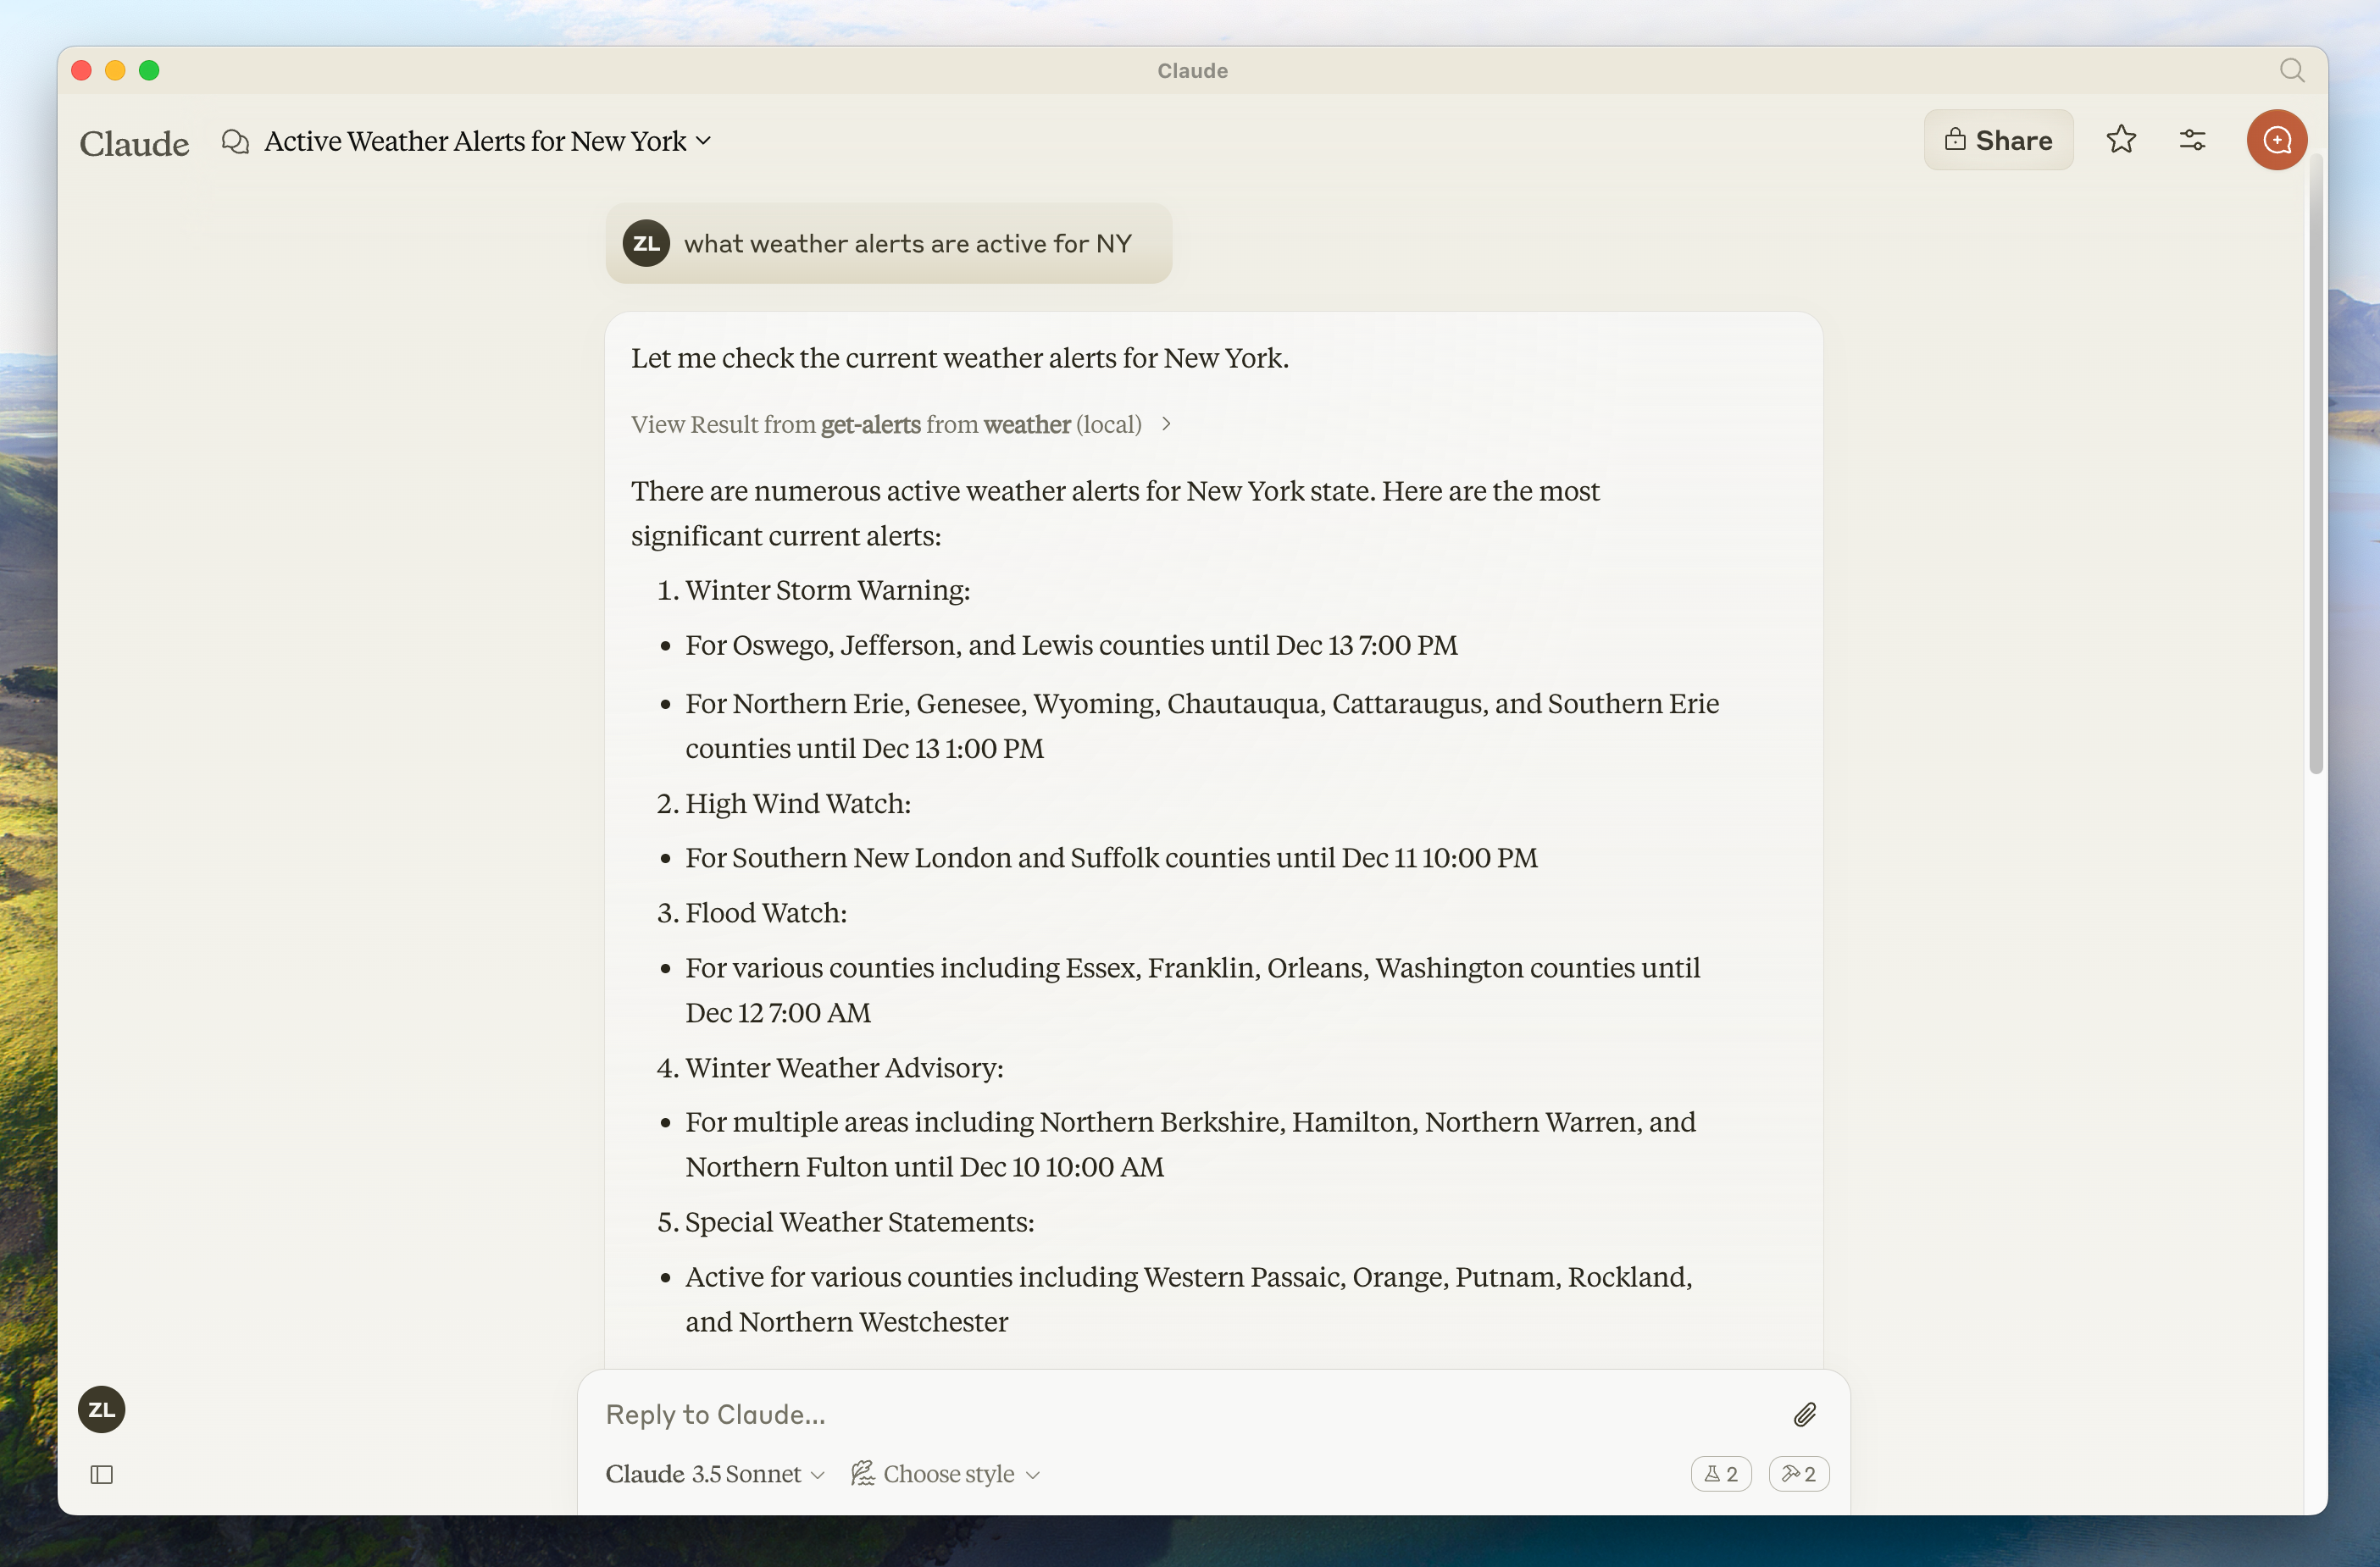
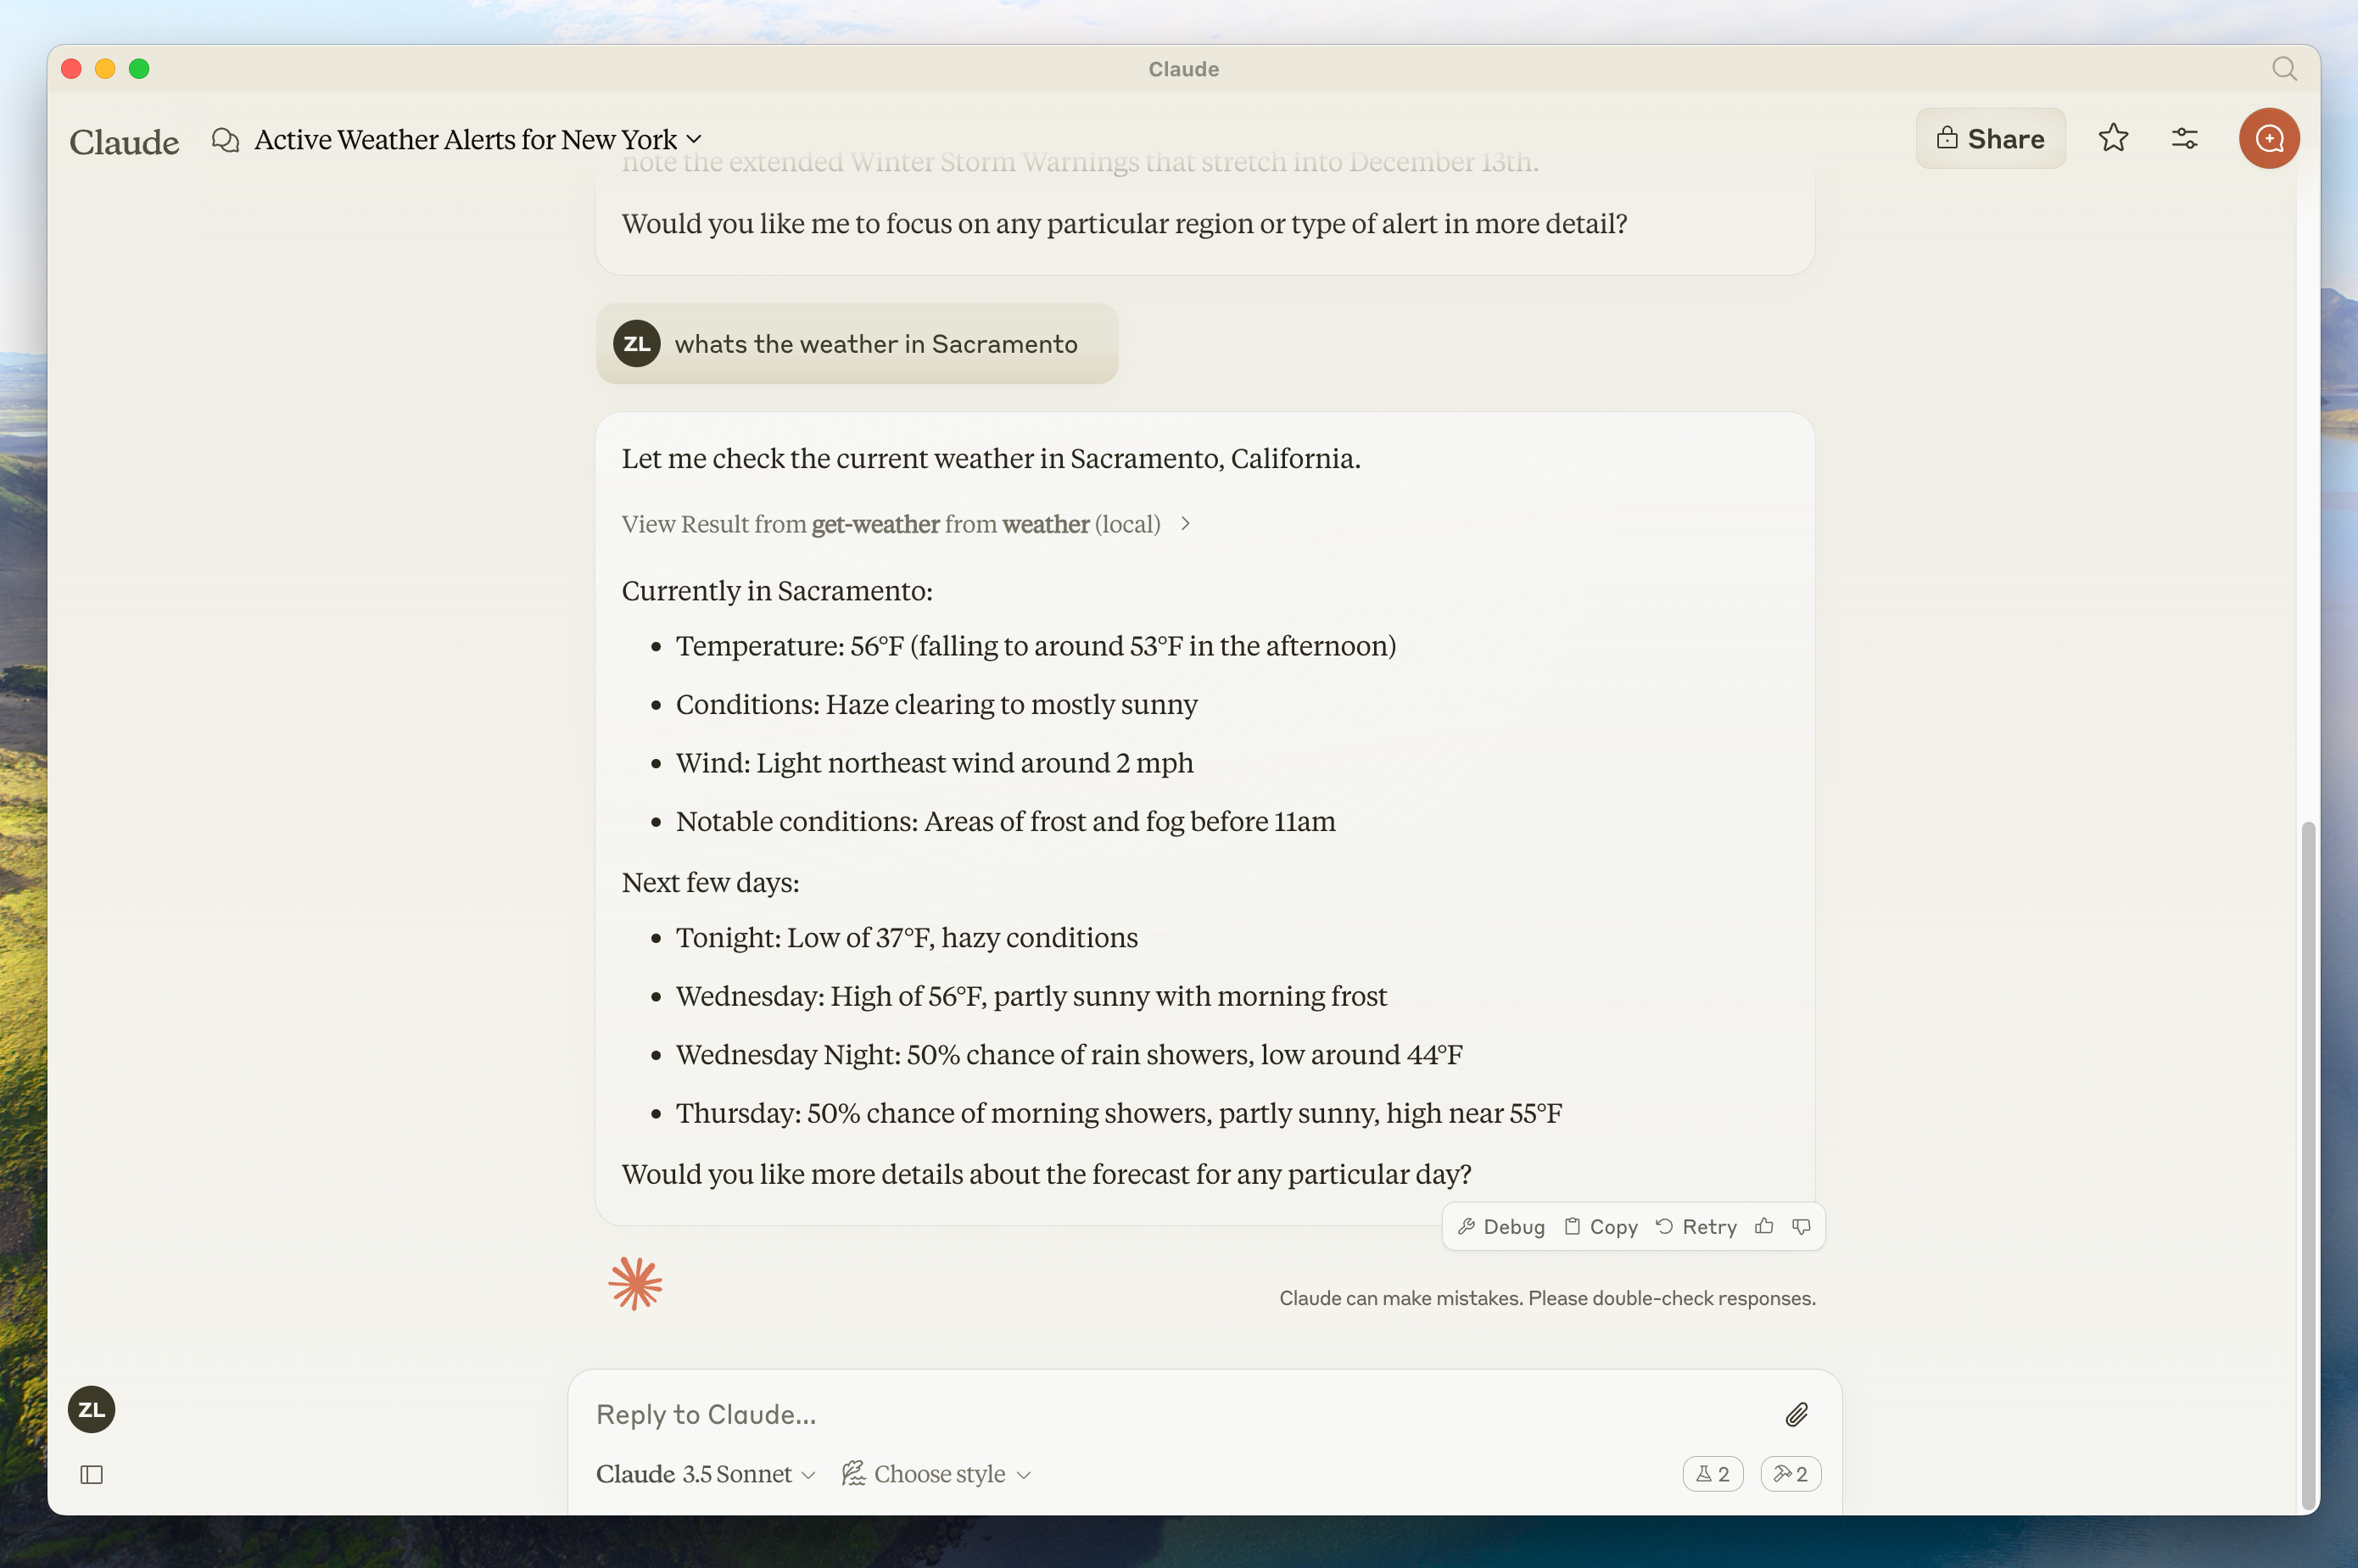
Many LLMs do not currently have the ability to fetch the forecast and severe weather alerts. Let's use MCP to solve that!
We'll build a server that exposes two tools: get-alerts and get-forecast. Then we'll connect the server to an MCP host (in this case, Claude for Desktop):
Core MCP Concepts
MCP servers can provide three main types of capabilities:
- Resources: File-like data that can be read by clients (like API responses or file contents)
- Tools: Functions that can be called by the LLM (with user approval)
- Prompts: Pre-written templates that help users accomplish specific tasks
This tutorial will primarily focus on tools.
Let's get started with building our weather server! [You can find the complete code for what we'll be building here.](https://github.com/modelcontextprotocol/quickstart-resources/tree/main/weather-server-python)### Prerequisite knowledge
This quickstart assumes you have familiarity with:
* Python
* LLMs like Claude
### System requirements
* Python 3.10 or higher installed.
* You must use the Python MCP SDK 1.2.0 or higher.
### Set up your environment
First, let's install `uv` and set up our Python project and environment:
<CodeGroup>
```bash MacOS/Linux
curl -LsSf https://astral.sh/uv/install.sh | sh
```
```powershell Windows
powershell -ExecutionPolicy ByPass -c "irm https://astral.sh/uv/install.ps1 | iex"
```
</CodeGroup>
Make sure to restart your terminal afterwards to ensure that the `uv` command gets picked up.
Now, let's create and set up our project:
<CodeGroup>
```bash MacOS/Linux
# Create a new directory for our project
uv init weather
cd weather
# Create virtual environment and activate it
uv venv
source .venv/bin/activate
# Install dependencies
uv add "mcp[cli]" httpx
# Create our server file
touch weather.py
```
```powershell Windows
# Create a new directory for our project
uv init weather
cd weather
# Create virtual environment and activate it
uv venv
.venv\Scripts\activate
# Install dependencies
uv add mcp[cli] httpx
# Create our server file
new-item weather.py
```
</CodeGroup>
Now let's dive into building your server.
## Building your server
### Importing packages and setting up the instance
Add these to the top of your `weather.py`:
```python
from typing import Any
import httpx
from mcp.server.fastmcp import FastMCP
# Initialize FastMCP server
mcp = FastMCP("weather")
# Constants
NWS_API_BASE = "https://api.weather.gov"
USER_AGENT = "weather-app/1.0"
```
The FastMCP class uses Python type hints and docstrings to automatically generate tool definitions, making it easy to create and maintain MCP tools.
### Helper functions
Next, let's add our helper functions for querying and formatting the data from the National Weather Service API:
```python
async def make_nws_request(url: str) -> dict[str, Any] | None:
"""Make a request to the NWS API with proper error handling."""
headers = {
"User-Agent": USER_AGENT,
"Accept": "application/geo+json"
}
async with httpx.AsyncClient() as client:
try:
response = await client.get(url, headers=headers, timeout=30.0)
response.raise_for_status()
return response.json()
except Exception:
return None
def format_alert(feature: dict) -> str:
"""Format an alert feature into a readable string."""
props = feature["properties"]
return f"""
Event: {props.get('event', 'Unknown')}
Area: {props.get('areaDesc', 'Unknown')}
Severity: {props.get('severity', 'Unknown')}
Description: {props.get('description', 'No description available')}
Instructions: {props.get('instruction', 'No specific instructions provided')}
"""
```
### Implementing tool execution
The tool execution handler is responsible for actually executing the logic of each tool. Let's add it:
```python
@mcp.tool()
async def get_alerts(state: str) -> str:
"""Get weather alerts for a US state.
Args:
state: Two-letter US state code (e.g. CA, NY)
"""
url = f"{NWS_API_BASE}/alerts/active/area/{state}"
data = await make_nws_request(url)
if not data or "features" not in data:
return "Unable to fetch alerts or no alerts found."
if not data["features"]:
return "No active alerts for this state."
alerts = [format_alert(feature) for feature in data["features"]]
return "\n---\n".join(alerts)
@mcp.tool()
async def get_forecast(latitude: float, longitude: float) -> str:
"""Get weather forecast for a location.
Args:
latitude: Latitude of the location
longitude: Longitude of the location
"""
# First get the forecast grid endpoint
points_url = f"{NWS_API_BASE}/points/{latitude},{longitude}"
points_data = await make_nws_request(points_url)
if not points_data:
return "Unable to fetch forecast data for this location."
# Get the forecast URL from the points response
forecast_url = points_data["properties"]["forecast"]
forecast_data = await make_nws_request(forecast_url)
if not forecast_data:
return "Unable to fetch detailed forecast."
# Format the periods into a readable forecast
periods = forecast_data["properties"]["periods"]
forecasts = []
for period in periods[:5]: # Only show next 5 periods
forecast = f"""
{period['name']}:
Temperature: {period['temperature']}°{period['temperatureUnit']}
Wind: {period['windSpeed']} {period['windDirection']}
Forecast: {period['detailedForecast']}
"""
forecasts.append(forecast)
return "\n---\n".join(forecasts)
```
### Running the server
Finally, let's initialize and run the server:
```python
if __name__ == "__main__":
# Initialize and run the server
mcp.run(transport='stdio')
```
Your server is complete! Run `uv run weather.py` to confirm that everything's working.
Let's now test your server from an existing MCP host, Claude for Desktop.
## Testing your server with Claude for Desktop
<Note>
Claude for Desktop is not yet available on Linux. Linux users can proceed to the [Building a client](/quickstart/client) tutorial to build an MCP client that connects to the server we just built.
</Note>
First, make sure you have Claude for Desktop installed. [You can install the latest version
here.](https://claude.ai/download) If you already have Claude for Desktop, **make sure it's updated to the latest version.**
We'll need to configure Claude for Desktop for whichever MCP servers you want to use. To do this, open your Claude for Desktop App configuration at `~/Library/Application Support/Claude/claude_desktop_config.json` in a text editor. Make sure to create the file if it doesn't exist.
For example, if you have [VS Code](https://code.visualstudio.com/) installed:
<Tabs>
<Tab title="MacOS/Linux">
```bash
code ~/Library/Application\ Support/Claude/claude_desktop_config.json
```
</Tab>
<Tab title="Windows">
```powershell
code $env:AppData\Claude\claude_desktop_config.json
```
</Tab>
</Tabs>
You'll then add your servers in the `mcpServers` key. The MCP UI elements will only show up in Claude for Desktop if at least one server is properly configured.
In this case, we'll add our single weather server like so:
<Tabs>
<Tab title="MacOS/Linux">
```json Python
{
"mcpServers": {
"weather": {
"command": "uv",
"args": [
"--directory",
"/ABSOLUTE/PATH/TO/PARENT/FOLDER/weather",
"run",
"weather.py"
]
}
}
}
```
</Tab>
<Tab title="Windows">
```json Python
{
"mcpServers": {
"weather": {
"command": "uv",
"args": [
"--directory",
"C:\\ABSOLUTE\\PATH\\TO\\PARENT\\FOLDER\\weather",
"run",
"weather.py"
]
}
}
}
```
</Tab>
</Tabs>
<Warning>
You may need to put the full path to the `uv` executable in the `command` field. You can get this by running `which uv` on MacOS/Linux or `where uv` on Windows.
</Warning>
<Note>
Make sure you pass in the absolute path to your server.
</Note>
This tells Claude for Desktop:
1. There's an MCP server named "weather"
2. To launch it by running `uv --directory /ABSOLUTE/PATH/TO/PARENT/FOLDER/weather run weather.py`
Save the file, and restart **Claude for Desktop**.
### Prerequisite knowledge

This quickstart assumes you have familiarity with:

* TypeScript
* LLMs like Claude

### System requirements

For TypeScript, make sure you have the latest version of Node installed.

### Set up your environment

First, let's install Node.js and npm if you haven't already. You can download them from [nodejs.org](https://nodejs.org/).
Verify your Node.js installation:

```bash
node --version
npm --version
```

For this tutorial, you'll need Node.js version 16 or higher.

Now, let's create and set up our project:

<CodeGroup>
  ```bash MacOS/Linux
  # Create a new directory for our project
  mkdir weather
  cd weather

  # Initialize a new npm project
  npm init -y

  # Install dependencies
  npm install @modelcontextprotocol/sdk zod
  npm install -D @types/node typescript

  # Create our files
  mkdir src
  touch src/index.ts
  ```

  ```powershell Windows
  # Create a new directory for our project
  md weather
  cd weather

  # Initialize a new npm project
  npm init -y

  # Install dependencies
  npm install @modelcontextprotocol/sdk zod
  npm install -D @types/node typescript

  # Create our files
  md src
  new-item src\index.ts
  ```
</CodeGroup>

Update your package.json to add type: "module" and a build script:

```json package.json
{
  "type": "module",
  "bin": {
    "weather": "./build/index.js"
  },
  "scripts": {
    "build": "tsc && chmod 755 build/index.js"
  },
  "files": ["build"]
}
```

Create a `tsconfig.json` in the root of your project:

```json tsconfig.json
{
  "compilerOptions": {
    "target": "ES2022",
    "module": "Node16",
    "moduleResolution": "Node16",
    "outDir": "./build",
    "rootDir": "./src",
    "strict": true,
    "esModuleInterop": true,
    "skipLibCheck": true,
    "forceConsistentCasingInFileNames": true
  },
  "include": ["src/**/*"],
  "exclude": ["node_modules"]
}
```

Now let's dive into building your server.

## Building your server

### Importing packages and setting up the instance

Add these to the top of your `src/index.ts`:

```typescript
import { McpServer } from "@modelcontextprotocol/sdk/server/mcp.js";
import { StdioServerTransport } from "@modelcontextprotocol/sdk/server/stdio.js";
import { z } from "zod";

const NWS_API_BASE = "https://api.weather.gov";
const USER_AGENT = "weather-app/1.0";

// Create server instance
const server = new McpServer({
  name: "weather",
  version: "1.0.0",
  capabilities: {
    resources: {},
    tools: {},
  },
});
```

### Helper functions

Next, let's add our helper functions for querying and formatting the data from the National Weather Service API:

```typescript
// Helper function for making NWS API requests
async function makeNWSRequest<T>(url: string): Promise<T | null> {
  const headers = {
    "User-Agent": USER_AGENT,
    Accept: "application/geo+json",
  };

  try {
    const response = await fetch(url, { headers });
    if (!response.ok) {
      throw new Error(`HTTP error! status: ${response.status}`);
    }
    return (await response.json()) as T;
  } catch (error) {
    console.error("Error making NWS request:", error);
    return null;
  }
}

interface AlertFeature {
  properties: {
    event?: string;
    areaDesc?: string;
    severity?: string;
    status?: string;
    headline?: string;
  };
}

// Format alert data
function formatAlert(feature: AlertFeature): string {
  const props = feature.properties;
  return [
    `Event: ${props.event || "Unknown"}`,
    `Area: ${props.areaDesc || "Unknown"}`,
    `Severity: ${props.severity || "Unknown"}`,
    `Status: ${props.status || "Unknown"}`,
    `Headline: ${props.headline || "No headline"}`,
    "---",
  ].join("\n");
}

interface ForecastPeriod {
  name?: string;
  temperature?: number;
  temperatureUnit?: string;
  windSpeed?: string;
  windDirection?: string;
  shortForecast?: string;
}

interface AlertsResponse {
  features: AlertFeature[];
}

interface PointsResponse {
  properties: {
    forecast?: string;
  };
}

interface ForecastResponse {
  properties: {
    periods: ForecastPeriod[];
  };
}
```

### Implementing tool execution

The tool execution handler is responsible for actually executing the logic of each tool. Let's add it:

```typescript
// Register weather tools
server.tool(
  "get-alerts",
  "Get weather alerts for a state",
  {
    state: z.string().length(2).describe("Two-letter state code (e.g. CA, NY)"),
  },
  async ({ state }) => {
    const stateCode = state.toUpperCase();
    const alertsUrl = `${NWS_API_BASE}/alerts?area=${stateCode}`;
    const alertsData = await makeNWSRequest<AlertsResponse>(alertsUrl);

    if (!alertsData) {
      return {
        content: [
          {
            type: "text",
            text: "Failed to retrieve alerts data",
          },
        ],
      };
    }

    const features = alertsData.features || [];
    if (features.length === 0) {
      return {
        content: [
          {
            type: "text",
            text: `No active alerts for ${stateCode}`,
          },
        ],
      };
    }

    const formattedAlerts = features.map(formatAlert);
    const alertsText = `Active alerts for ${stateCode}:\n\n${formattedAlerts.join("\n")}`;

    return {
      content: [
        {
          type: "text",
          text: alertsText,
        },
      ],
    };
  },
);

server.tool(
  "get-forecast",
  "Get weather forecast for a location",
  {
    latitude: z.number().min(-90).max(90).describe("Latitude of the location"),
    longitude: z
      .number()
      .min(-180)
      .max(180)
      .describe("Longitude of the location"),
  },
  async ({ latitude, longitude }) => {
    // Get grid point data
    const pointsUrl = `${NWS_API_BASE}/points/${latitude.toFixed(4)},${longitude.toFixed(4)}`;
    const pointsData = await makeNWSRequest<PointsResponse>(pointsUrl);

    if (!pointsData) {
      return {
        content: [
          {
            type: "text",
            text: `Failed to retrieve grid point data for coordinates: ${latitude}, ${longitude}. This location may not be supported by the NWS API (only US locations are supported).`,
          },
        ],
      };
    }

    const forecastUrl = pointsData.properties?.forecast;
    if (!forecastUrl) {
      return {
        content: [
          {
            type: "text",
            text: "Failed to get forecast URL from grid point data",
          },
        ],
      };
    }

    // Get forecast data
    const forecastData = await makeNWSRequest<ForecastResponse>(forecastUrl);
    if (!forecastData) {
      return {
        content: [
          {
            type: "text",
            text: "Failed to retrieve forecast data",
          },
        ],
      };
    }

    const periods = forecastData.properties?.periods || [];
    if (periods.length === 0) {
      return {
        content: [
          {
            type: "text",
            text: "No forecast periods available",
          },
        ],
      };
    }

    // Format forecast periods
    const formattedForecast = periods.map((period: ForecastPeriod) =>
      [
        `${period.name || "Unknown"}:`,
        `Temperature: ${period.temperature || "Unknown"}°${period.temperatureUnit || "F"}`,
        `Wind: ${period.windSpeed || "Unknown"} ${period.windDirection || ""}`,
        `${period.shortForecast || "No forecast available"}`,
        "---",
      ].join("\n"),
    );

    const forecastText = `Forecast for ${latitude}, ${longitude}:\n\n${formattedForecast.join("\n")}`;

    return {
      content: [
        {
          type: "text",
          text: forecastText,
        },
      ],
    };
  },
);
```

### Running the server

Finally, implement the main function to run the server:

```typescript
async function main() {
  const transport = new StdioServerTransport();
  await server.connect(transport);
  console.error("Weather MCP Server running on stdio");
}

main().catch((error) => {
  console.error("Fatal error in main():", error);
  process.exit(1);
});
```

Make sure to run `npm run build` to build your server! This is a very important step in getting your server to connect.

Let's now test your server from an existing MCP host, Claude for Desktop.

## Testing your server with Claude for Desktop

<Note>
  Claude for Desktop is not yet available on Linux. Linux users can proceed to the [Building a client](/quickstart/client) tutorial to build an MCP client that connects to the server we just built.
</Note>

First, make sure you have Claude for Desktop installed. [You can install the latest version
here.](https://claude.ai/download) If you already have Claude for Desktop, **make sure it's updated to the latest version.**

We'll need to configure Claude for Desktop for whichever MCP servers you want to use. To do this, open your Claude for Desktop App configuration at `~/Library/Application Support/Claude/claude_desktop_config.json` in a text editor. Make sure to create the file if it doesn't exist.

For example, if you have [VS Code](https://code.visualstudio.com/) installed:

<Tabs>
  <Tab title="MacOS/Linux">
    ```bash
    code ~/Library/Application\ Support/Claude/claude_desktop_config.json
    ```
  </Tab>

  <Tab title="Windows">
    ```powershell
    code $env:AppData\Claude\claude_desktop_config.json
    ```
  </Tab>
</Tabs>

You'll then add your servers in the `mcpServers` key. The MCP UI elements will only show up in Claude for Desktop if at least one server is properly configured.

In this case, we'll add our single weather server like so:

<Tabs>
  <Tab title="MacOS/Linux">
    <CodeGroup>
      ```json Node
      {
        "mcpServers": {
          "weather": {
            "command": "node",
            "args": ["/ABSOLUTE/PATH/TO/PARENT/FOLDER/weather/build/index.js"]
          }
        }
      }
      ```
    </CodeGroup>
  </Tab>

  <Tab title="Windows">
    <CodeGroup>
      ```json Node
      {
        "mcpServers": {
          "weather": {
            "command": "node",
            "args": ["C:\\PATH\\TO\\PARENT\\FOLDER\\weather\\build\\index.js"]
          }
        }
      }
      ```
    </CodeGroup>
  </Tab>
</Tabs>

This tells Claude for Desktop:

1. There's an MCP server named "weather"
2. Launch it by running `node /ABSOLUTE/PATH/TO/PARENT/FOLDER/weather/build/index.js`

Save the file, and restart **Claude for Desktop**.
Let's get started with building our weather server!
[You can find the complete code for what we'll be building here.](https://github.com/spring-projects/spring-ai-examples/tree/main/model-context-protocol/weather/starter-stdio-server)

For more information, see the [MCP Server Boot Starter](https://docs.spring.io/spring-ai/reference/api/mcp/mcp-server-boot-starter-docs.html) reference documentation.
For manual MCP Server implementation, refer to the [MCP Server Java SDK documentation](/sdk/java/mcp-server).

### System requirements

* Java 17 or higher installed.
* [Spring Boot 3.3.x](https://docs.spring.io/spring-boot/installing.html) or higher

### Set up your environment

Use the [Spring Initializer](https://start.spring.io/) to bootstrap the project.

You will need to add the following dependencies:

<Tabs>
  <Tab title="Maven">
    ```xml
    <dependencies>
          <dependency>
              <groupId>org.springframework.ai</groupId>
              <artifactId>spring-ai-starter-mcp-server</artifactId>
          </dependency>

          <dependency>
              <groupId>org.springframework</groupId>
              <artifactId>spring-web</artifactId>
          </dependency>
    </dependencies>
    ```
  </Tab>

  <Tab title="Gradle">
    ```groovy
    dependencies {
      implementation platform("org.springframework.ai:spring-ai-starter-mcp-server")
      implementation platform("org.springframework:spring-web")
    }
    ```
  </Tab>
</Tabs>

Then configure your application by setting the application properties:

<CodeGroup>
  ```bash application.properties
  spring.main.bannerMode=off
  logging.pattern.console=
  ```

  ```yaml application.yml
  logging:
    pattern:
      console:
  spring:
    main:
      banner-mode: off
  ```
</CodeGroup>

The [Server Configuration Properties](https://docs.spring.io/spring-ai/reference/api/mcp/mcp-server-boot-starter-docs.html#_configuration_properties) documents all available properties.

Now let's dive into building your server.

## Building your server

### Weather Service

Let's implement a [WeatherService.java](https://github.com/spring-projects/spring-ai-examples/blob/main/model-context-protocol/weather/starter-stdio-server/src/main/java/org/springframework/ai/mcp/sample/server/WeatherService.java) that uses a REST client to query the data from the National Weather Service API:

```java
@Service
public class WeatherService {

	private final RestClient restClient;

	public WeatherService() {
		this.restClient = RestClient.builder()
			.baseUrl("https://api.weather.gov")
			.defaultHeader("Accept", "application/geo+json")
			.defaultHeader("User-Agent", "WeatherApiClient/1.0 (your@email.com)")
			.build();
	}

  @Tool(description = "Get weather forecast for a specific latitude/longitude")
  public String getWeatherForecastByLocation(
      double latitude,   // Latitude coordinate
      double longitude   // Longitude coordinate
  ) {
      // Returns detailed forecast including:
      // - Temperature and unit
      // - Wind speed and direction
      // - Detailed forecast description
  }

  @Tool(description = "Get weather alerts for a US state")
  public String getAlerts(
      @ToolParam(description = "Two-letter US state code (e.g. CA, NY)" String state
  ) {
      // Returns active alerts including:
      // - Event type
      // - Affected area
      // - Severity
      // - Description
      // - Safety instructions
  }

  // ......
}
```

The `@Service` annotation with auto-register the service in your application context.
The Spring AI `@Tool` annotation, making it easy to create and maintain MCP tools.

The auto-configuration will automatically register these tools with the MCP server.

### Create your Boot Application

```java
@SpringBootApplication
public class McpServerApplication {

	public static void main(String[] args) {
		SpringApplication.run(McpServerApplication.class, args);
	}

	@Bean
	public ToolCallbackProvider weatherTools(WeatherService weatherService) {
		return  MethodToolCallbackProvider.builder().toolObjects(weatherService).build();
	}
}
```

Uses the the `MethodToolCallbackProvider` utils to convert the `@Tools` into actionable callbacks used by the MCP server.

### Running the server

Finally, let's build the server:

```bash
./mvnw clean install
```

This will generate a `mcp-weather-stdio-server-0.0.1-SNAPSHOT.jar` file within the `target` folder.

Let's now test your server from an existing MCP host, Claude for Desktop.

## Testing your server with Claude for Desktop

<Note>
  Claude for Desktop is not yet available on Linux.
</Note>

First, make sure you have Claude for Desktop installed.
[You can install the latest version here.](https://claude.ai/download) If you already have Claude for Desktop, **make sure it's updated to the latest version.**

We'll need to configure Claude for Desktop for whichever MCP servers you want to use.
To do this, open your Claude for Desktop App configuration at `~/Library/Application Support/Claude/claude_desktop_config.json` in a text editor.
Make sure to create the file if it doesn't exist.

For example, if you have [VS Code](https://code.visualstudio.com/) installed:

<Tabs>
  <Tab title="MacO
10000
S/Linux">
    ```bash
    code ~/Library/Application\ Support/Claude/claude_desktop_config.json
    ```
  </Tab>

  <Tab title="Windows">
    ```powershell
    code $env:AppData\Claude\claude_desktop_config.json
    ```
  </Tab>
</Tabs>

You'll then add your servers in the `mcpServers` key.
The MCP UI elements will only show up in Claude for Desktop if at least one server is properly configured.

In this case, we'll add our single weather server like so:

<Tabs>
  <Tab title="MacOS/Linux">
    ```json java
    {
      "mcpServers": {
        "spring-ai-mcp-weather": {
          "command": "java",
          "args": [
            "-Dspring.ai.mcp.server.stdio=true",
            "-jar",
            "/ABSOLUTE/PATH/TO/PARENT/FOLDER/mcp-weather-stdio-server-0.0.1-SNAPSHOT.jar"
          ]
        }
      }
    }
    ```
  </Tab>

  <Tab title="Windows">
    ```json java
    {
      "mcpServers": {
        "spring-ai-mcp-weather": {
          "command": "java",
          "args": [
            "-Dspring.ai.mcp.server.transport=STDIO",
            "-jar",
            "C:\\ABSOLUTE\\PATH\\TO\\PARENT\\FOLDER\\weather\\mcp-weather-stdio-server-0.0.1-SNAPSHOT.jar"
          ]
        }
      }
    }
    ```
  </Tab>
</Tabs>

<Note>
  Make sure you pass in the absolute path to your server.
</Note>

This tells Claude for Desktop:

1. There's an MCP server named "my-weather-server"
2. To launch it by running `java -jar /ABSOLUTE/PATH/TO/PARENT/FOLDER/mcp-weather-stdio-server-0.0.1-SNAPSHOT.jar`

Save the file, and restart **Claude for Desktop**.

## Testing your server with Java client

### Create a MCP Client manually

Use the `McpClient` to connect to the server:

```java
var stdioParams = ServerParameters.builder("java")
  .args("-jar", "/ABSOLUTE/PATH/TO/PARENT/FOLDER/mcp-weather-stdio-server-0.0.1-SNAPSHOT.jar")
  .build();

var stdioTransport = new StdioClientTransport(stdioParams);

var mcpClient = McpClient.sync(stdioTransport).build();

mcpClient.initialize();

ListToolsResult toolsList = mcpClient.listTools();

CallToolResult weather = mcpClient.callTool(
  new CallToolRequest("getWeatherForecastByLocation",
      Map.of("latitude", "47.6062", "longitude", "-122.3321")));

CallToolResult alert = mcpClient.callTool(
  new CallToolRequest("getAlerts", Map.of("state", "NY")));

mcpClient.closeGracefully();
```

### Use MCP Client Boot Starter

Create a new boot starter application using the `spring-ai-starter-mcp-client` dependency:

```xml
<dependency>
    <groupId>org.springframework.ai</groupId>
    <artifactId>spring-ai-starter-mcp-client</artifactId>
</dependency>
```

and set the `spring.ai.mcp.client.stdio.servers-configuration` property to point to your `claude_desktop_config.json`.
You can reuse the existing Anthropic Desktop configuration:

```properties
spring.ai.mcp.client.stdio.servers-configuration=file:PATH/TO/claude_desktop_config.json
```

When you start your client application, the auto-configuration will create, automatically MCP clients from the claude\_desktop\_config.json.

For more information, see the [MCP Client Boot Starters](https://docs.spring.io/spring-ai/reference/api/mcp/mcp-server-boot-client-docs.html) reference documentation.

## More Java MCP Server examples

The [starter-webflux-server](https://github.com/spring-projects/spring-ai-examples/tree/main/model-context-protocol/weather/starter-webflux-server) demonstrates how to create a MCP server using SSE transport.
It showcases how to define and register MCP Tools, Resources, and Prompts, using the Spring Boot's auto-configuration capabilities.
### Prerequisite knowledge

This quickstart assumes you have familiarity with:

* Kotlin
* LLMs like Claude

### System requirements

* Java 17 or higher installed.

### Set up your environment

First, let's install `java` and `gradle` if you haven't already.
You can download `java` from [official Oracle JDK website](https://www.oracle.com/java/technologies/downloads/).
Verify your `java` installation:

```bash
java --version
```

Now, let's create and set up your project:

<CodeGroup>
  ```bash MacOS/Linux
  # Create a new directory for our project
  mkdir weather
  cd weather

  # Initialize a new kotlin project
  gradle init
  ```

  ```powershell Windows
  # Create a new directory for our project
  md weather
  cd weather

  # Initialize a new kotlin project
  gradle init
  ```
</CodeGroup>

After running `gradle init`, you will be presented with options for creating your project.
Select **Application** as the project type, **Kotlin** as the programming language, and **Java 17** as the Java version.

Alternatively, you can create a Kotlin application using the [IntelliJ IDEA project wizard](https://kotlinlang.org/docs/jvm-get-started.html).

After creating the project, add the following dependencies:

<CodeGroup>
  ```kotlin build.gradle.kts
  val mcpVersion = "0.4.0"
  val slf4jVersion = "2.0.9"
  val ktorVersion = "3.1.1"

  dependencies {
      implementation("io.modelcontextprotocol:kotlin-sdk:$mcpVersion")
      implementation("org.slf4j:slf4j-nop:$slf4jVersion")
      implementation("io.ktor:ktor-client-content-negotiation:$ktorVersion")
      implementation("io.ktor:ktor-serialization-kotlinx-json:$ktorVersion")
  }
  ```

  ```groovy build.gradle
  def mcpVersion = '0.3.0'
  def slf4jVersion = '2.0.9'
  def ktorVersion = '3.1.1'

  dependencies {
      implementation "io.modelcontextprotocol:kotlin-sdk:$mcpVersion"
      implementation "org.slf4j:slf4j-nop:$slf4jVersion"
      implementation "io.ktor:ktor-client-content-negotiation:$ktorVersion"
      implementation "io.ktor:ktor-serialization-kotlinx-json:$ktorVersion"
  }
  ```
</CodeGroup>

Also, add the following plugins to your build script:

<CodeGroup>
  ```kotlin build.gradle.kts
  plugins {
      kotlin("plugin.serialization") version "your_version_of_kotlin"
      id("com.github.johnrengelman.shadow") version "8.1.1"
  }
  ```

  ```groovy build.gradle
  plugins {
      id 'org.jetbrains.kotlin.plugin.serialization' version 'your_version_of_kotlin'
      id 'com.github.johnrengelman.shadow' version '8.1.1'
  }
  ```
</CodeGroup>

Now let’s dive into building your server.

## Building your server

### Setting up the instance

Add a server initialization function:

```kotlin
// Main function to run the MCP server
fun `run mcp server`() {
    // Create the MCP Server instance with a basic implementation
    val server = Server(
        Implementation(
            name = "weather", // Tool name is "weather"
            version = "1.0.0" // Version of the implementation
        ),
        ServerOptions(
            capabilities = ServerCapabilities(tools = ServerCapabilities.Tools(listChanged = true))
        )
    )

    // Create a transport using standard IO for server communication
    val transport = StdioServerTransport(
        System.`in`.asInput(),
        System.out.asSink().buffered()
    )

    runBlocking {
        server.connect(transport)
        val done = Job()
        server.onClose {
            done.complete()
        }
        done.join()
    }
}
```

### Weather API helper functions

Next, let's add functions and data classes for querying and converting responses from the National Weather Service API:

```kotlin
// Extension function to fetch forecast information for given latitude and longitude
suspend fun HttpClient.getForecast(latitude: Double, longitude: Double): List<String> {
    val points = this.get("/points/$latitude,$longitude").body<Points>()
    val forecast = this.get(points.properties.forecast).body<Forecast>()
    return forecast.properties.periods.map { period ->
        """
            ${period.name}:
            Temperature: ${period.temperature} ${period.temperatureUnit}
            Wind: ${period.windSpeed} ${period.windDirection}
            Forecast: ${period.detailedForecast}
        """.trimIndent()
    }
}

// Extension function to fetch weather alerts for a given state
suspend fun HttpClient.getAlerts(state: String): List<String> {
    val alerts = this.get("/alerts/active/area/$state").body<Alert>()
    return alerts.features.map { feature ->
        """
            Event: ${feature.properties.event}
            Area: ${feature.properties.areaDesc}
            Severity: ${feature.properties.severity}
            Description: ${feature.properties.description}
            Instruction: ${feature.properties.instruction}
        """.trimIndent()
    }
}

@Serializable
data class Points(
    val properties: Properties
) {
    @Serializable
    data class Properties(val forecast: String)
}

@Serializable
data class Forecast(
    val properties: Properties
) {
    @Serializable
    data class Properties(val periods: List<Period>)

    @Serializable
    data class Period(
        val number: Int, val name: String, val startTime: String, val endTime: String,
        val isDaytime: Boolean, val temperature: Int, val temperatureUnit: String,
        val temperatureTrend: String, val probabilityOfPrecipitation: JsonObject,
        val windSpeed: String, val windDirection: String,
        val shortForecast: String, val detailedForecast: String,
    )
}

@Serializable
data class Alert(
    val features: List<Feature>
) {
    @Serializable
    data class Feature(
        val properties: Properties
    )

    @Serializable
    data class Properties(
        val event: String, val areaDesc: String, val severity: String,
        val description: String, val instruction: String?,
    )
}
```

### Implementing tool execution

The tool execution handler is responsible for actually executing the logic of each tool. Let's add it:

```kotlin
// Create an HTTP client with a default request configuration and JSON content negotiation
val httpClient = HttpClient {
    defaultRequest {
        url("https://api.weather.gov")
        headers {
            append("Accept", "application/geo+json")
            append("User-Agent", "WeatherApiClient/1.0")
        }
        contentType(ContentType.Application.Json)
    }
    // Install content negotiation plugin for JSON serialization/deserialization
    install(ContentNegotiation) { json(Json { ignoreUnknownKeys = true }) }
}

// Register a tool to fetch weather alerts by state
server.addTool(
    name = "get_alerts",
    description = """
        Get weather alerts for a US state. Input is Two-letter US state code (e.g. CA, NY)
    """.trimIndent(),
    inputSchema = Tool.Input(
        properties = buildJsonObject {
            putJsonObject("state") {
                put("type", "string")
                put("description", "Two-letter US state code (e.g. CA, NY)")
            }
        },
        required = listOf("state")
    )
) { request ->
    val state = request.arguments["state"]?.jsonPrimitive?.content
    if (state == null) {
        return@addTool CallToolResult(
            content = listOf(TextContent("The 'state' parameter is required."))
        )
    }

    val alerts = httpClient.getAlerts(state)

    CallToolResult(content = alerts.map { TextContent(it) })
}

// Register a tool to fetch weather forecast by latitude and longitude
server.addTool(
    name = "get_forecast",
    description = """
        Get weather forecast for a specific latitude/longitude
    """.trimIndent(),
    inputSchema = Tool.Input(
        properties = buildJsonObject {
            putJsonObject("latitude") { put("type", "number") }
            putJsonObject("longitude") { put("type", "number") }
        },
        required = listOf("latitude", "longitude")
    )
) { request ->
    val latitude = request.arguments["latitude"]?.jsonPrimitive?.doubleOrNull
    val longitude = request.arguments["longitude"]?.jsonPrimitive?.doubleOrNull
    if (latitude == null || longitude == null) {
        return@addTool CallToolResult(
            content = listOf(TextContent("The 'latitude' and 'longitude' parameters are required."))
        )
    }

    val forecast = httpClient.getForecast(latitude, longitude)

    CallToolResult(content = forecast.map { TextContent(it) })
}
```

### Running the server

Finally, implement the main function to run the server:

```kotlin
fun main() = `run mcp server`()
```

Make sure to run `./gradlew build` to build your server. This is a very important step in getting your server to connect.

Let's now test your server from an existing MCP host, Claude for Desktop.

## Testing your server with Claude for Desktop

<Note>
  Claude for Desktop is not yet available on Linux. Linux users can proceed to the [Building a client](/quickstart/client) tutorial to build an MCP client that connects to the server we just built.
</Note>

First, make sure you have Claude for Desktop installed. [You can install the latest version
here.](https://claude.ai/download) If you already have Claude for Desktop, **make sure it's updated to the latest version.**

We'll need to configure Claude for Desktop for whichever MCP servers you want to use.
To do this, open your Claude for Desktop App configuration at `~/Library/Application Support/Claude/claude_desktop_config.json` in a text editor.
Make sure to create the file if it doesn't exist.

For example, if you have [VS Code](https://code.visualstudio.com/) installed:

<CodeGroup>
  ```bash MacOS/Linux
  code ~/Library/Application\ Support/Claude/claude_desktop_config.json
  ```

  ```powershell Windows
  code $env:AppData\Claude\claude_desktop_config.json
  ```
</CodeGroup>

You'll then add your servers in the `mcpServers` key.
The MCP UI elements will only show up in Claude for Desktop if at least one server is properly configured.

In this case, we'll add our single weather server like so:

<CodeGroup>
  ```json MacOS/Linux
  {
    "mcpServers": {
      "weather": {
        "command": "java",
        "args": [
          "-jar",
          "/ABSOLUTE/PATH/TO/PARENT/FOLDER/weather/build/libs/weather-0.1.0-all.jar"
        ]
      }
    }
  }
  ```

  ```json Windows
  {
    "mcpServers": {
      "weather": {
        "command": "java",
        "args": [
          "-jar",
          "C:\\PATH\\TO\\PARENT\\FOLDER\\weather\\build\\libs\\weather-0.1.0-all.jar"
        ]
      }
    }
  }
  ```
</CodeGroup>

This tells Claude for Desktop:

1. There's an MCP server named "weather"
2. Launch it by running `java -jar /ABSOLUTE/PATH/TO/PARENT/FOLDER/weather/build/libs/weather-0.1.0-all.jar`

Save the file, and restart **Claude for Desktop**.
### Prerequisite knowledge

This quickstart assumes you have familiarity with:

* C#
* LLMs like Claude
* .NET 8 or higher

### System requirements

* [.NET 8 SDK](https://dotnet.microsoft.com/download/dotnet/8.0) or higher installed.

### Set up your environment

First, let's install `dotnet` if you haven't already. You can download `dotnet` from [official Microsoft .NET website](https://dotnet.microsoft.com/download/). Verify your `dotnet` installation:

```bash
dotnet --version
```

Now, let's create and set up your project:

<CodeGroup>
  ```bash MacOS/Linux
  # Create a new directory for our project
  mkdir weather
  cd weather
  # Initialize a new C# project
  dotnet new console
  ```

  ```powershell Windows
  # Create a new directory for our project
  mkdir weather
  cd weather
  # Initialize a new C# project
  dotnet new console
  ```
</CodeGroup>

After running `dotnet new console`, you will be presented with a new C# project.
You can open the project in your favorite IDE, such as [Visual Studio](https://visualstudio.microsoft.com/) or [Rider](https://www.jetbrains.com/rider/).
Alternatively, you can create a C# application using the [Visual Studio project wizard](https://learn.microsoft.com/en-us/visualstudio/get-started/csharp/tutorial-console?view=vs-2022).
After creating the project, add NuGet package for the Model Context Protocol SDK and hosting:

```bash
# Add the Model Context Protocol SDK NuGet package
dotnet add package ModelContextProtocol --prerelease
# Add the .NET Hosting NuGet package
dotnet add package Microsoft.Extensions.Hosting
```

Now let’s dive into building your server.

## Building your server

Open the `Program.cs` file in your project and replace its contents with the following code:

```csharp
using Microsoft.Extensions.DependencyInjection;
using Microsoft.Extensions.Hosting;
using ModelContextProtocol;
using System.Net.Http.Headers;

var builder = Host.CreateEmptyApplicationBuilder(settings: null);

builder.Services.AddMcpServer()
    .WithStdioServerTransport()
    .WithToolsFromAssembly();

builder.Services.AddSingleton(_ =>
{
    var client = new HttpClient() { BaseAddress = new Uri("https://api.weather.gov") };
    client.DefaultRequestHeaders.UserAgent.Add(new ProductInfoHeaderValue("weather-tool", "1.0"));
    return client;
});

var app = builder.Build();

await app.RunAsync();
```

<Note>
  When creating the `ApplicationHostBuilder`, ensure you use `CreateEmptyApplicationBuilder` instead of `CreateDefaultBuilder`. This ensures that the server does not write any additional messages to the console. This is only necessary for servers using STDIO transport.
</Note>

This code sets up a basic console application that uses the Model Context Protocol SDK to create an MCP server with standard I/O transport.

### Weather API helper functions

Create an extension class for `HttpClient` which helps simplify JSON request handling:

```csharp
using System.Text.Json;

internal static class HttpClientExt
{
    public static async Task<JsonDocument> ReadJsonDocumentAsync(this HttpClient client, string requestUri)
    {
        using var response = await client.GetAsync(requestUri);
        response.EnsureSuccessStatusCode();
        return await JsonDocument.ParseAsync(await response.Content.ReadAsStreamAsync());
    }
}
```

Next, define a class with the tool execution handlers for querying and converting responses from the National Weather Service API:

```csharp
using ModelContextProtocol.Server;
using System.ComponentModel;
using System.Globalization;
using System.Text.Json;

namespace QuickstartWeatherServer.Tools;

[McpServerToolType]
public static class WeatherTools
{
    [McpServerTool, Description("Get weather alerts for a US state.")]
    public static async Task<string> GetAlerts(
        HttpClient client,
        [Description("The US state to get alerts for.")] string state)
    {
        using var jsonDocument = await client.ReadJsonDocumentAsync($"/alerts/active/area/{state}");
        var jsonElement = jsonDocument.RootElement;
        var alerts = jsonElement.GetProperty("features").EnumerateArray();

        if (!alerts.Any())
        {
            return "No active alerts for this state.";
        }

        return string.Join("\n--\n", alerts.Select(alert =>
        {
            JsonElement properties = alert.GetProperty("properties");
            return $"""
                    Event: {properties.GetProperty("event").GetString()}
                    Area: {properties.GetProperty("areaDesc").GetString()}
                    Severity: {properties.GetProperty("severity").GetString()}
                    Description: {properties.GetProperty("description").GetString()}
                    Instruction: {properties.GetProperty("instruction").GetString()}
                    """;
        }));
    }

    [McpServerTool, Description("Get weather forecast for a location.")]
    public static async Task<string> GetForecast(
        HttpClient client,
        [Description("Latitude of the location.")] double latitude,
        [Description("Longitude of the location.")] double longitude)
    {
        var pointUrl = string.Create(CultureInfo.InvariantCulture, $"/points/{latitude},{longitude}");
        using var jsonDocument = await client.ReadJsonDocumentAsync(pointUrl);
        var forecastUrl = jsonDocument.RootElement.GetProperty("properties").GetProperty("forecast").GetString()
            ?? throw new Exception($"No forecast URL provided by {client.BaseAddress}points/{latitude},{longitude}");

        using var forecastDocument = await client.ReadJsonDocumentAsync(forecastUrl);
        var periods = forecastDocument.RootElement.GetProperty("properties").GetProperty("periods").EnumerateArray();

        return string.Join("\n---\n", periods.Select(period => $"""
                {period.GetProperty("name").GetString()}
                Temperature: {period.GetProperty("temperature").GetInt32()}°F
                Wind: {period.GetProperty("windSpeed").GetString()} {period.GetProperty("windDirection").GetString()}
                Forecast: {period.GetProperty("detailedForecast").GetString()}
                """));
    }
}
```

### Running the server

Finally, run the server using the following command:

```bash
dotnet run
```

This will start the server and listen for incoming requests on standard input/output.

## Testing your server with Claude for Desktop

<Note>
  Claude for Desktop is not yet available on Linux. Linux users can proceed to the [Building a client](/quickstart/client) tutorial to build an MCP client that connects to the server we just built.
</Note>

First, make sure you have Claude for Desktop installed. [You can install the latest version
here.](https://claude.ai/download) If you already have Claude for Desktop, **make sure it's updated to the latest version.**
We'll need to configure Claude for Desktop for whichever MCP servers you want to use. To do this, open your Claude for Desktop App configuration at `~/Library/Application Support/Claude/claude_desktop_config.json` in a text editor. Make sure to create the file if it doesn't exist.
For example, if you have [VS Code](https://code.visualstudio.com/) installed:

<Tabs>
  <Tab title="MacOS/Linux">
    ```bash
    code ~/Library/Application\ Support/Claude/claude_desktop_config.json
    ```
  </Tab>

  <Tab title="Windows">
    ```powershell
    code $env:AppData\Claude\claude_desktop_config.json
    ```
  </Tab>
</Tabs>

You'll then add your servers in the `mcpServers` key. The MCP UI elements will only show up in Claude for Desktop if at least one server is properly configured.
In this case, we'll add our single weather server like so:

<Tabs>
  <Tab title="MacOS/Linux">
    ```json
    {
      "mcpServers": {
        "weather": {
          "command": "dotnet",
          "args": ["run", "--project", "/ABSOLUTE/PATH/TO/PROJECT", "--no-build"]
        }
      }
    }
    ```
  </Tab>

  <Tab title="Windows">
    ```json
    {
      "mcpServers": {
        "weather": {
          "command": "dotnet",
          "args": [
            "run",
            "--project",
            "C:\\ABSOLUTE\\PATH\\TO\\PROJECT",
            "--no-build"
          ]
        }
      }
    }
    ```
  </Tab>
</Tabs>

This tells Claude for Desktop:

1. There's an MCP server named "weather"
2. Launch it by running `dotnet run /ABSOLUTE/PATH/TO/PROJECT`
   Save the file, and restart **Claude for Desktop**.
Test with commands
Let's make sure Claude for Desktop is picking up the two tools we've exposed in our weather server. You can do this by looking for the "Search and tools" <img src="https://mintlify.s3.us-west-1.amazonaws.com/mcp/images/claude-desktop-mcp-slider.svg" style={{display: 'inline', margin: 0, height: '1.3em'}} /> icon:
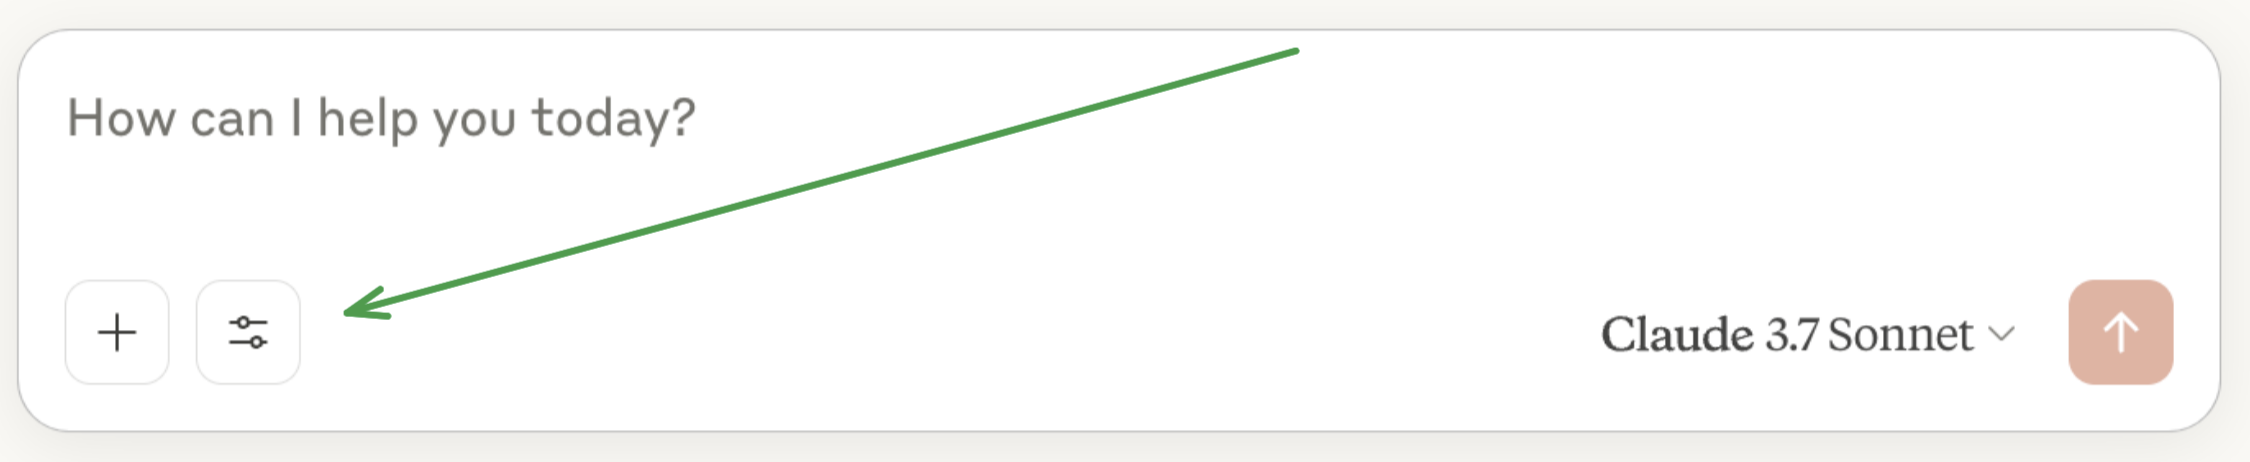
After clicking on the slider icon, you should see two tools listed:
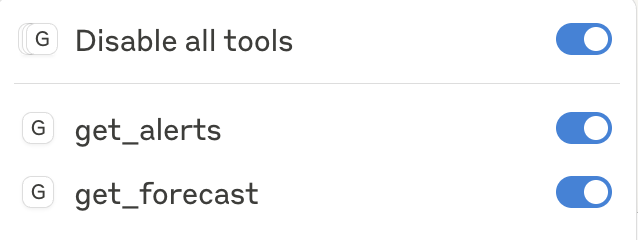
If your server isn't being picked up by Claude for Desktop, proceed to the Troubleshooting section for debugging tips.
If the tool settings icon has shown up, you can now test your server by running the following commands in Claude for Desktop:
- What's the weather in Sacramento?
- What are the active weather alerts in Texas?
What's happening under the hood
When you ask a question:
- The client sends your question to Claude
- Claude analyzes the available tools and decides which one(s) to use
- The client executes the chosen tool(s) through the MCP server
- The results are sent back to Claude
- Claude formulates a natural language response
- The response is displayed to you!
Troubleshooting
**Getting logs from Claude for Desktop**Claude.app logging related to MCP is written to log files in `~/Library/Logs/Claude`:
* `mcp.log` will contain general logging about MCP connections and connection failures.
* Files named `mcp-server-SERVERNAME.log` will contain error (stderr) logging from the named server.
You can run the following command to list recent logs and follow along with any new ones:
```bash
# Check Claude's logs for errors
tail -n 20 -f ~/Library/Logs/Claude/mcp*.log
```
**Server not showing up in Claude**
1. Check your `claude_desktop_config.json` file syntax
2. Make sure the path to your project is absolute and not relative
3. Restart Claude for Desktop completely
**Tool calls failing silently**
If Claude attempts to use the tools but they fail:
1. Check Claude's logs for errors
2. Verify your server builds and runs without errors
3. Try restarting Claude for Desktop
**None of this is working. What do I do?**
Please refer to our [debugging guide](/docs/tools/debugging) for better debugging tools and more detailed guidance.
This usually means either:

1. The coordinates are outside the US
2. The NWS API is having issues
3. You're being rate limited

Fix:

* Verify you're using US coordinates
* Add a small delay between requests
* Check the NWS API status page

**Error: No active alerts for \[STATE]**

This isn't an error - it just means there are no current weather alerts for that state. Try a different state or check during severe weather.
Next steps
Learn how to build your own MCP client that can connect to your server Check out our gallery of official MCP servers and implementations Learn how to effectively debug MCP servers and integrations Learn how to use LLMs like Claude to speed up your MCP developmentExample Servers
A list of example servers and implementations
This page showcases various Model Context Protocol (MCP) servers that demonstrate the protocol's capabilities and versatility. These servers enable Large Language Models (LLMs) to securely access tools and data sources.
Reference implementations
These official reference servers demonstrate core MCP features and SDK usage:
Current reference servers
- Filesystem - Secure file operations with configurable access controls
- Fetch - Web content fetching and conversion optimized for LLM usage
- Memory - Knowledge graph-based persistent memory system
- Sequential Thinking - Dynamic problem-solving through thought sequences
Archived servers (historical reference)
Data and file systems
- PostgreSQL - Read-only database access with schema inspection capabilities
- SQLite - Database interaction and business intelligence features
- Google Drive - File access and search capabilities for Google Drive
Development tools
- Git - Tools to read, search, and manipulate Git repositories
- GitHub - Repository management, file operations, and GitHub API integration
- GitLab - GitLab API integration enabling project management
- Sentry - Retrieving and analyzing issues from Sentry.io
Web and browser automation
- Brave Search - Web and local search using Brave's Search API
- Puppeteer - Browser automation and web scraping capabilities
Productivity and communication
- Slack - Channel management and messaging capabilities
- Google Maps - Location services, directions, and place details
AI and specialized tools
- EverArt - AI image generation using various models
- AWS KB Retrieval - Retrieval from AWS Knowledge Base using Bedrock Agent Runtime
Official integrations
Visit the MCP Servers Repository (Official Integrations section) for a list of MCP servers maintained by companies for their platforms.
Community implementations
Visit the MCP Servers Repository (Community section) for a list of MCP servers maintained by community members.
Getting started
Using reference servers
TypeScript-based servers can be used directly with npx:
npx -y @modelcontextprotocol/server-memoryPython-based servers can be used with uvx (recommended) or pip:
# Using uvx
uvx mcp-server-git

# Using pip
pip install mcp-server-git
python -m mcp_server_git
Configuring with Claude
To use an MCP server with Claude, add it to your configuration:
{
  "mcpServers": {
    "memory": {
      "command": "npx",
      "args": ["-y", "@modelcontextprotocol/server-memory"]
    },
    "filesystem": {
      "command": "npx",
      "args": [
        "-y",
        "@modelcontextprotocol/server-filesystem",
        "/path/to/allowed/files"
      ]
    },
    "github": {
      "command": "npx",
      "args": ["-y", "@modelcontextprotocol/server-github"],
      "env": {
        "GITHUB_PERSONAL_ACCESS_TOKEN": "<YOUR_TOKEN>"
      }
    }
  }
}
Additional resources
Visit the MCP Servers Repository (Resources section) for a collection of other resources and projects related to MCP.
Visit our GitHub Discussions to engage with the MCP community.
Core architecture
Understand how MCP connects clients, servers, and LLMs
The Model Context Protocol (MCP) is built on a flexible, extensible architecture that enables seamless communication between LLM applications and integrations. This document covers the core architectural components and concepts.
Overview
MCP follows a client-server architecture where:
- Hosts are LLM applications (like Claude Desktop or IDEs) that initiate connections
- Clients maintain 1:1 connections with servers, inside the host application
- Servers provide context, tools, and prompts to clients
flowchart LR
    subgraph "Host"
        client1[MCP Client]
        client2[MCP Client]
    end
    subgraph "Server Process"
        server1[MCP Server]
    end
    subgraph "Server Process"
        server2[MCP Server]
    end

    client1 <-->|Transport Layer| server1
    client2 <-->|Transport Layer| server2
Core components
Protocol layer
The protocol layer handles message framing, request/response linking, and high-level communication patterns.
```typescript class Protocol { // Handle incoming requests setRequestHandler(schema: T, handler: (request: T, extra: RequestHandlerExtra) => Promise): void // Handle incoming notifications
setNotificationHandler<T>(schema: T, handler: (notification: T) => Promise<void>): void
// Send requests and await responses
request<T>(request: Request, schema: T, options?: RequestOptions): Promise<T>
// Send one-way notifications
notification(notification: Notification): Promise<void>
}
```
    async def send_notification(
        self,
        notification: NotificationT
    ) -> None:
        """Send one-way notification that doesn't expect response."""
        # Notification handling implementation

    async def _received_request(
        self,
        responder: RequestResponder[ReceiveRequestT, ResultT]
    ) -> None:
        """Handle incoming request from other side."""
        # Request handling implementation

    async def _received_notification(
        self,
        notification: ReceiveNotificationT
    ) -> None:
        """Handle incoming notification from other side."""
        # Notification handling implementation
```
Key classes include:
ProtocolClientServer
Transport layer
The transport layer handles the actual communication between clients and servers. MCP supports multiple transport mechanisms:
-
Stdio transport
- Uses standard input/output for communication
- Ideal for local processes
-
Streamable HTTP transport
- Uses HTTP with optional Server-Sent Events for streaming
- HTTP POST for client-to-server messages
All transports use JSON-RPC 2.0 to exchange messages. See the specification for detailed information about the Model Context Protocol message format.
Message types
MCP has these main types of messages:
-
Requests expect a response from the other side:
interface Request {
  method: string;
  params?: { ... };
}
-
Results are successful responses to requests:
interface Result {
  [key: string]: unknown;
}
-
Errors indicate that a request failed:
interface Error {
  code: number;
  message: string;
  data?: unknown;
}
-
Notifications are one-way messages that don't expect a response:
interface Notification {
  method: string;
  params?: { ... };
}
Connection lifecycle
1. Initialization
sequenceDiagram
    participant Client
    participant Server

    Client->>Server: initialize request
    Server->>Client: initialize response
    Client->>Server: initialized notification

    Note over Client,Server: Connection ready for use
- Client sends
initializerequest with protocol version and capabilities - Server responds with its protocol version and capabilities
- Client sends
initializednotification as acknowledgment - Normal message exchange begins
2. Message exchange
After initialization, the following patterns are supported:
- Request-Response: Client or server sends requests, the other responds
- Notifications: Either party sends one-way messages
3. Termination
Either party can terminate the connection:
- Clean shutdown via
close() - Transport disconnection
- Error conditions
Error handling
MCP defines these standard error codes:
enum ErrorCode {
  // Standard JSON-RPC error codes
  ParseError = -32700,
  InvalidRequest = -32600,
  MethodNotFound = -32601,
  InvalidParams = -32602,
  InternalError = -32603,
}
SDKs and applications can define their own error codes above -32000.
Errors are propagated through:
- Error responses to requests
- Error events on transports
- Protocol-level error handlers
Implementation example
Here's a basic example of implementing an MCP server:
```typescript import { Server } from "@modelcontextprotocol/sdk/server/index.js"; import { StdioServerTransport } from "@modelcontextprotocol/sdk/server/stdio.js";const server = new Server({
name: "example-server",
version: "1.0.0"
}, {
capabilities: {
resources: {}
}
});
// Handle requests
server.setRequestHandler(ListResourcesRequestSchema, async () => {
return {
resources: [
{
uri: "example://resource",
name: "Example Resource"
}
]
};
});
// Connect transport
const transport = new StdioServerTransport();
await server.connect(transport);
```
app = Server("example-server")

@app.list_resources()
async def list_resources() -> list[types.Resource]:
    return [
        types.Resource(
            uri="example://resource",
            name="Example Resource"
        )
    ]

async def main():
    async with stdio_server() as streams:
        await app.run(
            streams[0],
            streams[1],
            app.create_initialization_options()
        )

if __name__ == "__main__":
    asyncio.run(main())
```
Best practices
Transport selection
-
Local communication
- Use stdio transport for local processes
- Efficient for same-machine communication
- Simple process management
-
Remote communication
- Use Streamable HTTP for scenarios requiring HTTP compatibility
- Consider security implications including authentication and authorization
Message handling
-
Request processing
- Validate inputs thoroughly
- Use type-safe schemas
- Handle errors gracefully
- Implement timeouts
-
Progress reporting
- Use progress tokens for long operations
- Report progress incrementally
- Include total progress when known
-
Error management
- Use appropriate error codes
- Include helpful error messages
- Clean up resources on errors
Security considerations
-
Transport security
- Use TLS for remote connections
- Validate connection origins
- Implement authentication when needed
-
Message validation
- Validate all incoming messages
- Sanitize inputs
- Check message size limits
- Verify JSON-RPC format
-
Resource protection
- Implement access controls
- Validate resource paths
- Monitor resource usage
- Rate limit requests
-
Error handling
- Don't leak sensitive information
- Log security-relevant errors
- Implement proper cleanup
- Handle DoS scenarios
Debugging and monitoring
-
Logging
- Log protocol events
- Track message flow
- Monitor performance
- Record errors
-
Diagnostics
- Implement health checks
- Monitor connection state
- Track resource usage
- Profile performance
-
Testing
- Test different transports
- Verify error handling
- Check edge cases
- Load test servers
Tools
Enable LLMs to perform actions through your server
Tools are a powerful primitive in the Model Context Protocol (MCP) that enable servers to expose executable functionality to clients. Through tools, LLMs can interact with external systems, perform computations, and take actions in the real world.
Tools are designed to be **model-controlled**, meaning that tools are exposed from servers to clients with the intention of the AI model being able to automatically invoke them (with a human in the loop to grant approval).Overview
Tools in MCP allow servers to expose executable functions that can be invoked by clients and used by LLMs to perform actions. Key aspects of tools include:
- Discovery: Clients can obtain a list of available tools by sending a
tools/listrequest - Invocation: Tools are called using the
tools/callrequest, where servers perform the requested operation and return results - Flexibility: Tools can range from simple calculations to complex API interactions
Like resources, tools are identified by unique names and can include descriptions to guide their usage. However, unlike resources, tools represent dynamic operations that can modify state or interact with external systems.
Tool definition structure
Each tool is defined with the following structure:
{
  name: string;          // Unique identifier for the tool
  description?: string;  // Human-readable description
  inputSchema: {         // JSON Schema for the tool's parameters
    type: "object",
    properties: { ... }  // Tool-specific parameters
  },
  annotations?: {        // Optional hints about tool behavior
    title?: string;      // Human-readable title for the tool
    readOnlyHint?: boolean;    // If true, the tool does not modify its environment
    destructiveHint?: boolean; // If true, the tool may perform destructive updates
    idempotentHint?: boolean;  // If true, repeated calls with same args have no additional effect
    openWorldHint?: boolean;   // If true, tool interacts with external entities
  }
}
Implementing tools
Here's an example of implementing a basic tool in an MCP server:
```typescript const server = new Server({ name: "example-server", version: "1.0.0" }, { capabilities: { tools: {} } });// Define available tools
server.setRequestHandler(ListToolsRequestSchema, async () => {
return {
tools: [{
name: "calculate_sum",
description: "Add two numbers together",
inputSchema: {
type: "object",
properties: {
a: { type: "number" },
b: { type: "number" }
},
required: ["a", "b"]
}
}]
};
});
// Handle tool execution
server.setRequestHandler(CallToolRequestSchema, async (request) => {
if (request.params.name === "calculate_sum") {
const { a, b } = request.params.arguments;
return {
content: [
{
type: "text",
text: String(a + b)
}
]
};
}
throw new Error("Tool not found");
});
```
@app.list_tools()
async def list_tools() -> list[types.Tool]:
    return [
        types.Tool(
            name="calculate_sum",
            description="Add two numbers together",
            inputSchema={
                "type": "object",
                "properties": {
                    "a": {"type": "number"},
                    "b": {"type": "number"}
                },
                "required": ["a", "b"]
            }
        )
    ]

@app.call_tool()
async def call_tool(
    name: str,
    arguments: dict
) -> list[types.TextContent | types.ImageContent | types.EmbeddedResource]:
    if name == "calculate_sum":
        a = arguments["a"]
        b = arguments["b"]
        result = a + b
        return [types.TextContent(type="text", text=str(result))]
    raise ValueError(f"Tool not found: {name}")
```
Example tool patterns
Here are some examples of types of tools that a server could provide:
System operations
Tools that interact with the local system:
{
  name: "execute_command",
  description: "Run a shell command",
  inputSchema: {
    type: "object",
    properties: {
      command: { type: "string" },
      args: { type: "array", items: { type: "string" } }
    }
  }
}
API integrations
Tools that wrap external APIs:
{
  name: "github_create_issue",
  description: "Create a GitHub issue",
  inputSchema: {
    type: "object",
    properties: {
      title: { type: "string" },
      body: { type: "string" },
      labels: { type: "array", items: { type: "string" } }
    }
  }
}
Data processing
Tools that transform or analyze data:
{
  name: "analyze_csv",
  description: "Analyze a CSV file",
  inputSchema: {
    type: "object",
    properties: {
      filepath: { type: "string" },
      operations: {
        type: "array",
        items: {
          enum: ["sum", "average", "count"]
        }
      }
    }
  }
}
Best practices
When implementing tools:
- Provide clear, descriptive names and descriptions
- Use detailed JSON Schema definitions for parameters
- Include examples in tool descriptions to demonstrate how the model should use them
- Implement proper error handling and validation
- Use progress reporting for long operations
- Keep tool operations focused and atomic
- Document expected return value structures
- Implement proper timeouts
- Consider rate limiting for resource-intensive operations
- Log tool usage for debugging and monitoring
Security considerations
When exposing tools:
Input validation
- Validate all parameters against the schema
- Sanitize file paths and system commands
- Validate URLs and external identifiers
- Check parameter sizes and ranges
- Prevent command injection
Access control
- Implement authentication where needed
- Use appropriate authorization checks
- Audit tool usage
- Rate limit requests
- Monitor for abuse
Error handling
- Don't expose internal errors to clients
- Log security-relevant errors
- Handle timeouts appropriately
- Clean up resources after errors
- Validate return values
Tool discovery and updates
MCP supports dynamic tool discovery:
- Clients can list available tools at any time
- Servers can notify clients when tools change using
notifications/tools/list_changed - Tools can be added or removed during runtime
- Tool definitions can be updated (though this should be done carefully)
Error handling
Tool errors should be reported within the result object, not as MCP protocol-level errors. This allows the LLM to see and potentially handle the error. When a tool encounters an error:
- Set
isErrortotruein the result - Include error details in the
contentarray
Here's an example of proper error handling for tools:
```typescript try { // Tool operation const result = performOperation(); return { content: [ { type: "text", text: `Operation successful: ${result}` } ] }; } catch (error) { return { isError: true, content: [ { type: "text", text: `Error: ${error.message}` } ] }; } ``` ```python try: # Tool operation result = perform_operation() return types.CallToolResult( content=[ types.TextContent( type="text", text=f"Operation successful: {result}" ) ] ) except Exception as error: return types.CallToolResult( isError=True, content=[ types.TextContent( type="text", text=f"Error: {str(error)}" ) ] ) ```This approach allows the LLM to see that an error occurred and potentially take corrective action or request human intervention.
Tool annotations
Tool annotations provide additional metadata about a tool's behavior, helping clients understand how to present and manage tools. These annotations are hints that describe the nature and impact of a tool, but should not be relied upon for security decisions.
Purpose of tool annotations
Tool annotations serve several key purposes:
- Provide UX-specific information without affecting model context
- Help clients categorize and present tools appropriately
- Convey information about a tool's potential side effects
- Assist in developing intuitive interfaces for tool approval
Available tool annotations
The MCP specification defines the following annotations for tools:
| Annotation | Type | Default | Description |
|---|---|---|---|
title |
string | - | A human-readable title for the tool, useful for UI display |
readOnlyHint |
boolean | false | If true, indicates the tool does not modify its environment |
destructiveHint |
boolean | true | If true, the tool may perform destructive updates (only meaningful when readOnlyHint is false) |
idempotentHint |
boolean | false | If true, calling the tool repeatedly with the same arguments has no additional effect (only meaningful when readOnlyHint is false) |
openWorldHint |
boolean | true | If true, the tool may interact with an "open world" of external entities |
Example usage
Here's how to define tools with annotations for different scenarios:
// A read-only search tool
{
  name: "web_search",
  description: "Search the web for information",
  inputSchema: {
    type: "object",
    properties: {
      query: { type: "string" }
    },
    required: ["query"]
  },
  annotations: {
    title: "Web Search",
    readOnlyHint: true,
    openWorldHint: true
  }
}

// A destructive file deletion tool
{
  name: "delete_file",
  description: "Delete a file from the filesystem",
  inputSchema: {
    type: "object",
    properties: {
      path: { type: "string" }
    },
    required: ["path"]
  },
  annotations: {
    title: "Delete File",
    readOnlyHint: false,
    destructiveHint: true,
    idempotentHint: true,
    openWorldHint: false
  }
}

// A non-destructive database record creation tool
{
  name: "create_record",
  description: "Create a new record in the database",
  inputSchema: {
    type: "object",
    properties: {
      table: { type: "string" },
      data: { type: "object" }
    },
    required: ["table", "data"]
  },
  annotations: {
    title: "Create Database Record",
    readOnlyHint: false,
    destructiveHint: false,
    idempotentHint: false,
    openWorldHint: false
  }
}
Integrating annotations in server implementation
```typescript server.setRequestHandler(ListToolsRequestSchema, async () => { return { tools: [{ name: "calculate_sum", description: "Add two numbers together", inputSchema: { type: "object", properties: { a: { type: "number" }, b: { type: "number" } }, required: ["a", "b"] }, annotations: { title: "Calculate Sum", readOnlyHint: true, openWorldHint: false } }] }; }); ``` ```python from mcp.server.fastmcp import FastMCPmcp = FastMCP("example-server")
@mcp.tool(
annotations={
"title": "Calculate Sum",
"readOnlyHint": True,
"openWorldHint": False
}
)
async def calculate_sum(a: float, b: float) -> str:
"""Add two numbers together.
Args:
a: First number to add
b: Second number to add
"""
result = a + b
return str(result)
```
Best practices for tool annotations
-
Be accurate about side effects: Clearly indicate whether a tool modifies its environment and whether those modifications are destructive.
-
Use descriptive titles: Provide human-friendly titles that clearly describe the tool's purpose.
-
Indicate idempotency properly: Mark tools as idempotent only if repeated calls with the same arguments truly have no additional effect.
-
Set appropriate open/closed world hints: Indicate whether a tool interacts with a closed system (like a database) or an open system (like the web).
-
Remember annotations are hints: All properties in ToolAnnotations are hints and not guaranteed to provide a faithful description of tool behavior. Clients should never make security-critical decisions based solely on annotations.
Testing tools
A comprehensive testing strategy for MCP tools should cover:
- Functional testing: Verify tools execute correctly with valid inputs and handle invalid inputs appropriately
- Integration testing: Test tool interaction with external systems using both real and mocked dependencies
- Security testing: Validate authentication, authorization, input sanitization, and rate limiting
- Performance testing: Check behavior under load, timeout handling, and resource cleanup
- Error handling: Ensure tools properly report errors through the MCP protocol and clean up resources
Specification
Model Context Protocol (MCP) is an open protocol that
enables seamless integration between LLM applications and external data sources and
tools. Whether you're building an AI-powered IDE, enhancing a chat interface, or creating
custom AI workflows, MCP provides a standardized way to connect LLMs with the context
they need.
This specification defines the authoritative protocol requirements, based on the
TypeScript schema in
schema.ts.
For implementation guides and examples, visit
modelcontextprotocol.io.
The key words "MUST", "MUST NOT", "REQUIRED", "SHALL", "SHALL NOT", "SHOULD", "SHOULD
NOT", "RECOMMENDED", "NOT RECOMMENDED", "MAY", and "OPTIONAL" in this document are to be
interpreted as described in BCP 14
[RFC2119]
[RFC8174] when, and only when, they
appear in all capitals, as shown here.
Overview
MCP provides a standardized way for applications to:
- Share contextual information with language models
- Expose tools and capabilities to AI systems
- Build composable integrations and workflows
The protocol uses JSON-RPC 2.0 messages to establish
communication between:
- Hosts: LLM applications that initiate connections
- Clients: Connectors within the host application
- Servers: Services that provide context and capabilities
MCP takes some inspiration from the
Language Server Protocol, which
standardizes how to add support for programming languages across a whole ecosystem of
development tools. In a similar way, MCP standardizes how to integrate additional context
and tools into the ecosystem of AI applications.
Key Details
Base Protocol
- JSON-RPC message format
- Stateful connections
- Server and client capability negotiation
Features
Servers offer any of the following features to clients:
- Resources: Context and data, for the user or the AI model to use
- Prompts: Templated messages and workflows for users
- Tools: Functions for the AI model to execute
Clients may offer the following feature to servers:
- Sampling: Server-initiated agentic behaviors and recursive LLM interactions
Additional Utilities
- Configuration
- Progress tracking
- Cancellation
- Error reporting
- Logging
Security and Trust & Safety
The Model Context Protocol enables powerful capabilities through arbitrary data access
and code execution paths. With this power comes important security and trust
considerations that all implementors must carefully address.
Key Principles
-
User Consent and Control
- Users must explicitly consent to and understand all data access and operations
- Users must retain control over what data is shared and what actions are taken
- Implementors should provide clear UIs for reviewing and authorizing activities
-
Data Privacy
- Hosts must obtain explicit user consent before exposing user data to servers
- Hosts must not transmit resource data elsewhere without user consent
- User data should be protected with appropriate access controls
-
Tool Safety
- Tools represent arbitrary code execution and must be treated with appropriate
caution.- In particular, descriptions of tool behavior such as annotations should be
considered untrusted, unless obtained from a trusted server.
- In particular, descriptions of tool behavior such as annotations should be
- Hosts must obtain explicit user consent before invoking any tool
- Users should understand what each tool does before authorizing its use
- Tools represent arbitrary code execution and must be treated with appropriate
-
LLM Sampling Controls
- Users must explicitly approve any LLM sampling requests
- Users should control:
- Whether sampling occurs at all
- The actual prompt that will be sent
- What results the server can see
- The protocol intentionally limits server visibility into prompts
Implementation Guidelines
While MCP itself cannot enforce these security principles at the protocol level,
implementors SHOULD:
- Build robust consent and authorization flows into their applications
- Provide clear documentation of security implications
- Implement appropriate access controls and data protections
- Follow security best practices in their integrations
- Consider privacy implications in their feature designs
Learn More
Explore the detailed specification for each protocol component:
Key Changes
This document lists changes made to the Model Context Protocol (MCP) specification since
the previous revision, 2024-11-05.
Major changes
- Added a comprehensive authorization framework
based on OAuth 2.1 (PR
#133) - Replaced the previous HTTP+SSE transport with a more flexible Streamable HTTP
transport (PR
#206) - Added support for JSON-RPC batching
(PR #228) - Added comprehensive tool annotations for better describing tool behavior, like
whether it is read-only or destructive (PR
#185)
Other schema changes
- Added
messagefield toProgressNotificationto provide descriptive status updates - Added support for audio data, joining the existing text and image content types
- Added
completionscapability to explicitly indicate support for argument
autocompletion suggestions
See
the updated schema
for more details.
Full changelog
For a complete list of all changes that have been made since the last protocol revision,
see GitHub.
Specification
Model Context Protocol (MCP) is an open protocol that
enables seamless integration between LLM applications and external data sources and
tools. Whether you're building an AI-powered IDE, enhancing a chat interface, or creating
custom AI workflows, MCP provides a standardized way to connect LLMs with the context
they need.
This specification defines the authoritative protocol requirements, based on the
TypeScript schema in
schema.ts.
For implementation guides and examples, visit
modelcontextprotocol.io.
The key words "MUST", "MUST NOT", "REQUIRED", "SHALL", "SHALL NOT", "SHOULD", "SHOULD
NOT", "RECOMMENDED", "NOT RECOMMENDED", "MAY", and "OPTIONAL" in this document are to be
interpreted as described in BCP 14
[RFC2119]
[RFC8174] when, and only when, they
appear in all capitals, as shown here.
Overview
MCP provides a standardized way for applications to:
- Share contextual information with language models
- Expose tools and capabilities to AI systems
- Build composable integrations and workflows
The protocol uses JSON-RPC 2.0 messages to establish
communication between:
- Hosts: LLM applications that initiate connections
- Clients: Connectors within the host application
- Servers: Services that provide context and capabilities
MCP takes some inspiration from the
Language Server Protocol, which
standardizes how to add support for programming languages across a whole ecosystem of
development tools. In a similar way, MCP standardizes how to integrate additional context
and tools into the ecosystem of AI applications.
Key Details
Base Protocol
- JSON-RPC message format
- Stateful connections
- Server and client capability negotiation
Features
Servers offer any of the following features to clients:
- Resources: Context and data, for the user or the AI model to use
- Prompts: Templated messages and workflows for users
- Tools: Functions for the AI model to execute
Clients may offer the following features to servers:
- Sampling: Server-initiated agentic behaviors and recursive LLM interactions
- Roots: Server-initiated inquiries into uri or filesystem boundaries to operate in
- Elicitation: Server-initiated requests for additional information from users
Additional Utilities
- Configuration
- Progress tracking
- Cancellation
- Error reporting
- Logging
Security and Trust & Safety
The Model Context Protocol enables powerful capabilities through arbitrary data access
and code execution paths. With this power comes important security and trust
considerations that all implementors must carefully address.
Key Principles
-
User Consent and Control
- Users must explicitly consent to and understand all data access and operations
- Users must retain control over what data is shared and what actions are taken
- Implementors should provide clear UIs for reviewing and authorizing activities
-
Data Privacy
- Hosts must obtain explicit user consent before exposing user data to servers
- Hosts must not transmit resource data elsewhere without user consent
- User data should be protected with appropriate access controls
-
Tool Safety
- Tools represent arbitrary code execution and must be treated with appropriate
caution.- In particular, descriptions of tool behavior such as annotations should be
considered untrusted, unless obtained from a trusted server.
- In particular, descriptions of tool behavior such as annotations should be
- Hosts must obtain explicit user consent before invoking any tool
- Users should understand what each tool does before authorizing its use
- Tools represent arbitrary code execution and must be treated with appropriate
-
LLM Sampling Controls
- Users must explicitly approve any LLM sampling requests
- Users should control:
- Whether sampling occurs at all
- The actual prompt that will be sent
- What results the server can see
- The protocol intentionally limits server visibility into prompts
Implementation Guidelines
While MCP itself cannot enforce these security principles at the protocol level,
implementors SHOULD:
- Build robust consent and authorization flows into their applications
- Provide clear documentation of security implications
- Implement appropriate access controls and data protections
- Follow security best practices in their integrations
- Consider privacy implications in their feature designs
Learn More
Explore the detailed specification for each protocol component:
Key Changes
This document lists changes made to the Model Context Protocol (MCP) specification since
the previous revision, 2025-03-26.
Major changes
- Remove support for JSON-RPC batching
(PR #416) - Add support for structured tool output
(PR #371) - Classify MCP servers as OAuth Resource Servers,
adding protected resource metadata to discover the corresponding Authorization server.
(PR #338) - Require MCP clients to implement Resource Indicators as described in RFC 8707 to prevent
malicious servers from obtaining access tokens.
(PR #734) - Clarify security considerations and best practices
in the authorization spec and in a new security best practices page. - Add support for elicitation, enabling servers to request additional
information from users during interactions.
(PR #382) - Add support for resource links in
tool call results. (PR #603) - Require negotiated protocol version to be specified
viaMCP-Protocol-Versionheader in subsequent requests when using HTTP (PR #548).
Other schema changes
- Add
_metafield to additional interface types (PR #710),
and specify proper usage. - Add
contextfield toCompletionRequest, providing for completion requests to include
previously-resolved variables (PR #598). - Add
titlefield for human-friendly display names, so thatnamecan be used as a programmatic
identifier (PR #663)
Full changelog
For a complete list of all changes that have been made since the last protocol revision,
see GitHub.
Architecture
The Model Context Protocol (MCP) follows a client-host-server architecture where each
host can run multiple client instances. This architecture enables users to integrate AI
capabilities across applications while maintaining clear security boundaries and
isolating concerns. Built on JSON-RPC, MCP provides a stateful session protocol focused
on context exchange and sampling coordination between clients and servers.
Core Components
graph LR
    subgraph "Application Host Process"
        H[Host]
        C1[Client 1]
        C2[Client 2]
        C3[Client 3]
        H --> C1
        H --> C2
        H --> C3
    end

    subgraph "Local machine"
        S1[Server 1<br>Files & Git]
        S2[Server 2<br>Database]
        R1[("Local<br>Resource A")]
        R2[("Local<br>Resource B")]

        C1 --> S1
        C2 --> S2
        S1 <--> R1
        S2 <--> R2
    end

    subgraph "Internet"
        S3[Server 3<br>External APIs]
        R3[("Remote<br>Resource C")]

        C3 --> S3
        S3 <--> R3
    end
Host
The host process acts as the container and coordinator:
- Creates and manages multiple client instances
- Controls client connection permissions and lifecycle
- Enforces security policies and consent requirements
- Handles user authorization decisions
- Coordinates AI/LLM integration and sampling
- Manages context aggregation across clients
Clients
Each client is created by the host and maintains an isolated server connection:
- Establishes one stateful session per server
- Handles protocol negotiation and capability exchange
- Routes protocol messages bidirectionally
- Manages subscriptions and notifications
- Maintains security boundaries between servers
A host application creates and manages multiple clients, with each client having a 1:1
relationship with a particular server.
Servers
Servers provide specialized context and capabilities:
- Expose resources, tools and prompts via MCP primitives
- Operate independently with focused responsibilities
- Request sampling through client interfaces
- Must respect security constraints
- Can be local processes or remote services
Design Principles
MCP is built on several key design principles that inform its architecture and
implementation:
-
Servers should be extremely easy to build
- Host applications handle complex orchestration responsibilities
- Servers focus on specific, well-defined capabilities
- Simple interfaces minimize implementation overhead
- Clear separation enables maintainable code
-
Servers should be highly composable
- Each server provides focused functionality in isolation
- Multiple servers can be combined seamlessly
- Shared protocol enables interoperability
- Modular design supports extensibility
-
Servers should not be able to read the whole conversation, nor "see into" other
servers- Servers receive only necessary contextual information
- Full conversation history stays with the host
- Each server connection maintains isolation
- Cross-server interactions are controlled by the host
- Host process enforces security boundaries
-
Features can be added to servers and clients progressively
- Core protocol provides minimal required functionality
- Additional capabilities can be negotiated as needed
- Servers and clients evolve independently
- Protocol designed for future extensibility
- Backwards compatibility is maintained
Capability Negotiation
The Model Context Protocol uses a capability-based negotiation system where clients and
servers explicitly declare their supported features during initialization. Capabilities
determine which protocol features and primitives are available during a session.
- Servers declare capabilities like resource subscriptions, tool support, and prompt
templates - Clients declare capabilities like sampling support and notification handling
- Both parties must respect declared capabilities throughout the session
- Additional capabilities can be negotiated through extensions to the protocol
sequenceDiagram
    participant Host
    participant Client
    participant Server

    Host->>+Client: Initialize client
    Client->>+Server: Initialize session with capabilities
    Server-->>Client: Respond with supported capabilities

    Note over Host,Server: Active Session with Negotiated Features

    loop Client Requests
        Host->>Client: User- or model-initiated action
        Client->>Server: Request (tools/resources)
        Server-->>Client: Response
        Client-->>Host: Update UI or respond to model
    end

    loop Server Requests
        Server->>Client: Request (sampling)
        Client->>Host: Forward to AI
        Host-->>Client: AI response
        Client-->>Server: Response
    end

    loop Notifications
        Server--)Client: Resource updates
        Client--)Server: Status changes
    end

    Host->>Client: Terminate
    Client->>-Server: End session
    deactivate Server
Each capability unlocks specific protocol features for use during the session. For
example:
- Implemented server features must be advertised in the
server's capabilities - Emitting resource subscription notifications requires the server to declare
subscription support - Tool invocation requires the server to declare tool capabilities
- Sampling requires the client to declare support in its
capabilities
This capability negotiation ensures clients and servers have a clear understanding of
supported functionality while maintaining protocol extensibility.
Tools
Protocol Revision: draft
The Model Context Protocol (MCP) allows servers to expose tools that can be invoked by
language models. Tools enable models to interact with external systems, such as querying
databases, calling APIs, or performing computations. Each tool is uniquely identified by
a name and includes metadata describing its schema.
User Interaction Model
Tools in MCP are designed to be model-controlled, meaning that the language model can
discover and invoke tools automatically based on its contextual understanding and the
user's prompts.
However, implementations are free to expose tools through any interface pattern that
suits their needs—the protocol itself does not mandate any specific user
interaction model.
Applications SHOULD:
- Provide UI that makes clear which tools are being exposed to the AI model
- Insert clear visual indicators when tools are invoked
- Present confirmation prompts to the user for operations, to ensure a human is in the
loop
Capabilities
Servers that support tools MUST declare the tools capability:
{
  "capabilities": {
    "tools": {
      "listChanged": true
    }
  }
}
listChanged indicates whether the server will emit notifications when the list of
available tools changes.
Protocol Messages
Listing Tools
To discover available tools, clients send a tools/list request. This operation supports
pagination.
Request:
{
  "jsonrpc": "2.0",
  "id": 1,
  "method": "tools/list",
  "params": {
    "cursor": "optional-cursor-value"
  }
}
Response:
{
  "jsonrpc": "2.0",
  "id": 1,
  "result": {
    "tools": [
      {
        "name": "get_weather",
        "title": "Weather Information Provider",
        "description": "Get current weather information for a location",
        "inputSchema": {
          "type": "object",
          "properties": {
            "location": {
              "type": "string",
              "description": "City name or zip code"
            }
          },
          "required": ["location"]
        }
      }
    ],
    "nextCursor": "next-page-cursor"
  }
}
Calling Tools
To invoke a tool, clients send a tools/call request:
Request:
{
  "jsonrpc": "2.0",
  "id": 2,
  "method": "tools/call",
  "params": {
    "name": "get_weather",
    "arguments": {
      "location": "New York"
    }
  }
}
Response:
{
  "jsonrpc": "2.0",
  "id": 2,
  "result": {
    "content": [
      {
        "type": "text",
        "text": "Current weather in New York:\nTemperature: 72°F\nConditions: Partly cloudy"
      }
    ],
    "isError": false
  }
}
List Changed Notification
When the list of available tools changes, servers that declared the listChanged
capability SHOULD send a notification:
{
  "jsonrpc": "2.0",
  "method": "notifications/tools/list_changed"
}
Message Flow
sequenceDiagram
    participant LLM
    participant Client
    participant Server

    Note over Client,Server: Discovery
    Client->>Server: tools/list
    Server-->>Client: List of tools

    Note over Client,LLM: Tool Selection
    LLM->>Client: Select tool to use

    Note over Client,Server: Invocation
    Client->>Server: tools/call
    Server-->>Client: Tool result
    Client->>LLM: Process result

    Note over Client,Server: Updates
    Server--)Client: tools/list_changed
    Client->>Server: tools/list
    Server-->>Client: Updated tools
Data Types
Tool
A tool definition includes:
name: Unique identifier for the tooltitle: Optional human-readable name of the tool for display purposes.description: Human-readable description of functionalityinputSchema: JSON Schema defining expected parametersoutputSchema: Optional JSON Schema defining expected output structureannotations: optional properties describing tool behavior
Tool Result
Tool results may contain structured or unstructured content.
Unstructured content is returned in the content field of a result, and can contain multiple content items of different types:
Text Content
{
  "type": "text",
  "text": "Tool result text"
}
Image Content
{
  "type": "image",
  "data": "base64-encoded-data",
  "mimeType": "image/png"
}
Audio Content
{
  "type": "audio",
  "data": "base64-encoded-audio-data",
  "mimeType": "audio/wav"
}
Resource Links
A tool MAY return links to Resources, to provide additional context
or data. In this case, the tool will return a URI that can be subscribed to or fetched by the client:
{
  "type": "resource_link",
  "uri": "file:///project/src/main.rs",
  "name": "main.rs",
  "description": "Primary application entry point",
  "mimeType": "text/x-rust"
}Embedded Resources
Resources MAY be embedded to provide additional context
or data using a suitable URI scheme. Servers that use embedded resources SHOULD implement the resources capability:
{
  "type": "resource",
  "resource": {
    "uri": "file:///project/src/main.rs",
    "title": "Project Rust Main File",
    "mimeType": "text/x-rust",
    "text": "fn main() {\n    println!(\"Hello world!\");\n}"
  }
}
Structured Content
Structured content is returned as a JSON object in the structuredContent field of a result.
For backwards compatibility, a tool that returns structured content SHOULD also return functionally equivalent unstructured content.
(For example, serialized JSON can be returned in a TextContent block.)
Output Schema
Tools may also provide an output schema for validation of structured results.
If an output schema is provided:
- Servers MUST provide structured results that conform to this schema.
- Clients SHOULD validate structured results against this schema.
Example tool with output schema:
{
  "name": "get_weather_data",
  "title": "Weather Data Retriever",
  "description": "Get current weather data for a location",
  "inputSchema": {
    "type": "object",
    "properties": {
      "location": {
        "type": "string",
        "description": "City name or zip code"
      }
    },
    "required": ["location"]
  },
  "outputSchema": {
    "type": "object",
    "properties": {
      "temperature": {
        "type": "number",
        "description": "Temperature in celsius"
      },
      "conditions": {
        "type": "string",
        "description": "Weather conditions description"
      },
      "humidity": {
        "type": "number",
        "description": "Humidity percentage"
      }
    },
    "required": ["temperature", "conditions", "humidity"]
  }
}
Example valid response for this tool:
{
  "jsonrpc": "2.0",
  "id": 5,
  "result": {
    "content": [
      {
        "type": "text",
        "text": "{\"temperature\": 22.5, \"conditions\": \"Partly cloudy\", \"humidity\": 65}"
      }
    ],
    "structuredContent": {
      "temperature": 22.5,
      "conditions": "Partly cloudy",
      "humidity": 65
    }
  }
}
Providing an output schema helps clients and LLMs understand and properly handle structured tool outputs by:
- Enabling strict schema validation of responses
- Providing type information for better integration with programming languages
- Guiding clients and LLMs to properly parse and utilize the returned data
- Supporting better documentation and developer experience
Error Handling
Tools use two error reporting mechanisms:
-
Protocol Errors: Standard JSON-RPC errors for issues like:
- Unknown tools
- Invalid arguments
- Server errors
-
Tool Execution Errors: Reported in tool results with
isError: true:- API failures
- Invalid input data
- Business logic errors
Example protocol error:
{
  "jsonrpc": "2.0",
  "id": 3,
  "error": {
    "code": -32602,
    "message": "Unknown tool: invalid_tool_name"
  }
}
Example tool execution error:
{
  "jsonrpc": "2.0",
  "id": 4,
  "result": {
    "content": [
      {
        "type": "text",
        "text": "Failed to fetch weather data: API rate limit exceeded"
      }
    ],
    "isError": true
  }
}
Security Considerations
-
Servers MUST:
- Validate all tool inputs
- Implement proper access controls
- Rate limit tool invocations
- Sanitize tool outputs
-
Clients SHOULD:
- Prompt for user confirmation on sensitive operations
- Show tool inputs to the user before calling the server, to avoid malicious or
accidental data exfiltration - Validate tool results before passing to LLM
- Implement timeouts for tool calls
- Log tool usage for audit purposes
Completion
Protocol Revision: draft
The Model Context Protocol (MCP) provides a standardized way for servers to offer
argument autocompletion suggestions for prompts and resource URIs. This enables rich,
IDE-like experiences where users receive contextual suggestions while entering argument
values.
User Interaction Model
Completion in MCP is designed to support interactive user experiences similar to IDE code
completion.
For example, applications may show completion suggestions in a dropdown or popup menu as
users type, with the ability to filter and select from available options.
However, implementations are free to expose completion through any interface pattern that
suits their needs—the protocol itself does not mandate any specific user
interaction model.
Capabilities
Servers that support completions MUST declare the completions capability:
{
  "capabilities": {
    "completions": {}
  }
}
Protocol Messages
Requesting Completions
To get completion suggestions, clients send a completion/complete request specifying
what is being completed through a reference type:
Request:
{
  "jsonrpc": "2.0",
  "id": 1,
  "method": "completion/complete",
  "params": {
    "ref": {
      "type": "ref/prompt",
      "name": "code_review"
    },
    "argument": {
      "name": "language",
      "value": "py"
    }
  }
}
Response:
{
  "jsonrpc": "2.0",
  "id": 1,
  "result": {
    "completion": {
      "values": ["python", "pytorch", "pyside"],
      "total": 10,
      "hasMore": true
    }
  }
}
For prompts or URI templates with multiple arguments, clients should include previous completions in the context.arguments object to provide context for subsequent requests.
Request:
{
  "jsonrpc": "2.0",
  "id": 1,
  "method": "completion/complete",
  "params": {
    "ref": {
      "type": "ref/prompt",
      "name": "code_review"
    },
    "argument": {
      "name": "framework",
      "value": "fla"
    },
    "context": {
      "arguments": {
        "language": "python"
      }
    }
  }
}
Response:
{
  "jsonrpc": "2.0",
  "id": 1,
  "result": {
    "completion": {
      "values": ["flask"],
      "total": 1,
      "hasMore": false
    }
  }
}
Reference Types
The protocol supports two types of completion references:
| Type | Description | Example |
|---|---|---|
ref/prompt |
References a prompt by name | {"type": "ref/prompt", "name": "code_review"} |
ref/resource |
References a resource URI | {"type": "ref/resource", "uri": "file:///{path}"} |
Completion Results
Servers return an array of completion values ranked by relevance, with:
- Maximum 100 items per response
- Optional total number of available matches
- Boolean indicating if additional results exist
Message Flow
sequenceDiagram
    participant Client
    participant Server

    Note over Client: User types argument
    Client->>Server: completion/complete
    Server-->>Client: Completion suggestions

    Note over Client: User continues typing
    Client->>Server: completion/complete
    Server-->>Client: Refined suggestions
Data Types
CompleteRequest
ref: APromptReferenceorResourceReferenceargument: Object containing:name: Argument namevalue: Current value
context: Object containing:arguments: A mapping of already-resolved argument names to their values.
CompleteResult
completion: Object containing:values: Array of suggestions (max 100)total: Optional total matcheshasMore: Additional results flag
Error Handling
Servers SHOULD return standard JSON-RPC errors for common failure cases:
- Method not found:
-32601(Capability not supported) - Invalid prompt name:
-32602(Invalid params) - Missing required arguments:
-32602(Invalid params) - Internal errors:
-32603(Internal error)
Implementation Considerations
-
Servers SHOULD:
- Return suggestions sorted by relevance
- Implement fuzzy matching where appropriate
- Rate limit completion requests
- Validate all inputs
-
Clients SHOULD:
- Debounce rapid completion requests
- Cache completion results where appropriate
- Handle missing or partial results gracefully
Security
Implementations MUST:
- Validate all completion inputs
- Implement appropriate rate limiting
- Control access to sensitive suggestions
- Prevent completion-based information disclosure
Logging
Protocol Revision: draft
The Model Context Protocol (MCP) provides a standardized way for servers to send
structured log messages to clients. Clients can control logging verbosity by setting
minimum log levels, with servers sending notifications containing severity levels,
optional logger names, and arbitrary JSON-serializable data.
User Interaction Model
Implementations are free to expose logging through any interface pattern that suits their
needs—the protocol itself does not mandate any specific user interaction model.
Capabilities
Servers that emit log message notifications MUST declare the logging capability:
{
  "capabilities": {
    "logging": {}
  }
}
Log Levels
The protocol follows the standard syslog severity levels specified in
RFC 5424:
| Level | Description | Example Use Case |
|---|---|---|
| debug | Detailed debugging information | Function entry/exit points |
| info | General informational messages | Operation progress updates |
| notice | Normal but significant events | Configuration changes |
| warning | Warning conditions | Deprecated feature usage |
| error | Error conditions | Operation failures |
| critical | Critical conditions | System component failures |
| alert | Action must be taken immediately | Data corruption detected |
| emergency | System is unusable | Complete system failure |
Protocol Messages
Setting Log Level
To configure the minimum log level, clients MAY send a logging/setLevel request:
Request:
{
  "jsonrpc": "2.0",
  "id": 1,
  "method": "logging/setLevel",
  "params": {
    "level": "info"
  }
}
Log Message Notifications
Servers send log messages using notifications/message notifications:
{
  "jsonrpc": "2.0",
  "method": "notifications/message",
  "params": {
    "level": "error",
    "logger": "database",
    "data": {
      "error": "Connection failed",
      "details": {
        "host": "localhost",
        "port": 5432
      }
    }
  }
}
Message Flow
sequenceDiagram
    participant Client
    participant Server

    Note over Client,Server: Configure Logging
    Client->>Server: logging/setLevel (info)
    Server-->>Client: Empty Result

    Note over Client,Server: Server Activity
    Server--)Client: notifications/message (info)
    Server--)Client: notifications/message (warning)
    Server--)Client: notifications/message (error)

    Note over Client,Server: Level Change
    Client->>Server: logging/setLevel (error)
    Server-->>Client: Empty Result
    Note over Server: Only sends error level<br/>and above
Error Handling
Servers SHOULD return standard JSON-RPC errors for common failure cases:
- Invalid log level:
-32602(Invalid params) - Configuration errors:
-32603(Internal error)
Implementation Considerations
-
Servers SHOULD:
- Rate limit log messages
- Include relevant context in data field
- Use consistent logger names
- Remove sensitive information
-
Clients MAY:
- Present log messages in the UI
- Implement log filtering/search
- Display severity visually
- Persist log messages
Security
-
Log messages MUST NOT contain:
- Credentials or secrets
- Personal identifying information
- Internal system details that could aid attacks
-
Implementations SHOULD:
- Rate limit messages
- Validate all data fields
- Control log access
- Monitor for sensitive content
Overview
This PR migrates the Telnyx MCP Server from the
fastmcppackage to the official modelcontextprotocol/python-sdk as requested in the issue. This ensures better protocol compliance, future ecosystem alignment, and reduces external dependencies while preserving all existing functionality.Changes Made
Core Migration
fastmcp>=0.4.0,<0.5.0, now usingmcp>=1.3.0(official SDK)fastmcp.FastMCPtomcp.server.FastMCPget_tools()→list_tools()to match official SDKBug Fixes
set_enabled_tools(None)when resetting tool filtersDocumentation
MIGRATION.mdwith upgrade notesPreserved Functionality ✅
All requirements from the issue have been met:
run_streamable_http_async--tools,--exclude-tools) fully functionalTesting Results
Comprehensive verification confirms zero breaking changes:
Verification Status:
Migration Impact
For End Users: Zero breaking changes - all configurations and CLI arguments work identically.
For Developers: Only import changes needed:
Benefits
Files Changed
This migration achieves the objective through minimal, surgical changes while maintaining complete backward compatibility and improving the codebase's foundation for future development.
💡 You can make Copilot smarter by setting up custom instructions, customizing its development environment and configuring Model Context Protocol (MCP) servers. Learn more Copilot coding agent tips in the docs.