Our team created an application of a budget request system for Texas A&M Kappa Upsilon Chi organization. This application enables each member to track refunds to Student Organization Finance Center (SOFC) by logging in to their TAMU email account and creating their profile to create a form and upload receipts. Once the member uploaded their form, officers can review the form to approve or deny it and make comments.
This code has been run and tested on:
Environment
- Docker Engine
- Docker Container
- Heroku 7.60.2
- Nodejs v16.15.0
- Yarn 1.22.18
Program
- Ruby - 3.1.2p20
- Rails - 7.0.8
- Ruby Gems - Listed in
Gemfile - PostgreSQL - 13.3
- Docker (Latest Container)
Tools
- GitHub
- RuboCop 1.60.2
- Simplecov 0.22.0
- Brakeman 5.2.3
- Jira
- AWS S3 Bucket
- Docker - Download latest version at https://www.docker.com/products/docker-desktop
- Heroku CLI - Download latest version at https://devcenter.heroku.com/articles/heroku-cli
- Git - Downloat latest version at https://git-scm.com/book/en/v2/Getting-Started-Installing-Git
- GitHub Desktop (Not needed, but HELPFUL) at https://desktop.github.com/
Our product and sprint backlog can be found in Jira, with organization name Kappa Upsilon Chi and project name kappa upsilon chi
Document
- Data Design v1
- UX Design v1
- User's Manual v1
- Others
Data
- Test Data v1
Download this code repository by using git:
git clone https://github.com/CSCE431-Software-Engineering/sprint-1-kappaupsilonchi
An RSpec test suite is available and can be ran using:
rspec spec/
You can run all the test cases by running rspec .. This will run both the unit and integration tests.
Run the following code in Powershell if using windows or the terminal using Linux/Mac
cd sprint-1-kappaupsilonchi
docker run --rm -it --volume "$(pwd):/rails_app" -e DATABASE_USER=test_app -e DATABASE_PASSWORD=test_password -p 3000:3000 dmartinez05/ruby_rails_postgresql:latest
Install the app
bundle install && rails webpacker:install && rails db:create && db:migrate
Run the app
rails server --binding:0.0.0.0
The application can be seen using a browser and navigating to http://localhost:3000/
We have environment variables setup for Authentication. The tutorial can be found here: https://medium.com/craft-academy/encrypted-credentials-in-ruby-on-rails-9db1f36d8570
The tutorial above will help you understand how we encrypted the admin page's username and password!
- For this assignment you should work with your github repository environment_test that you created previously. It should contain the test_app that we built in lab 1 and 2.
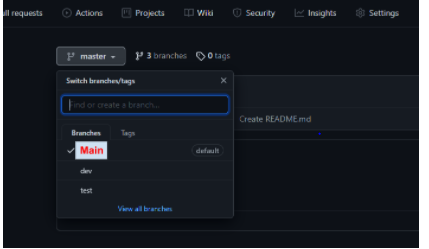
- (Start your docker and work in your terminal) Make sure you have dev, test and main branches. However, since we’re not really going to develop any new features, we won’t be using the dev branch in the assignment. We’ll be using test and main branches. First, use $ git status to see if your git is tracking the current dir. If you haven’t created dev and test branches, please do it now. For example, commands to create a test branch with git:
Note: $ git checkout -b will create and switch to the new branch $ git checkout will only switch to the branch You don’t need to create a new branch in Github in advance, because $ git push origin will do it for you if Github doesn’t have a corresponding branch.
After you create all three branches, your Github should look like this:
- Switch to the test branch. Command - $ git checkout test
- We want to run the migration on each deploy automatically. Create a file named Procfile in the root dir with this line of code
- Create a root route in config/routes.rb
-
Save the changes and push it to origin/test $ git add . $ git commit -m “add Procfile and route” $ git push origin test
-
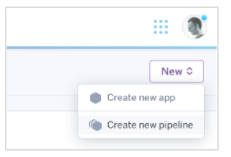
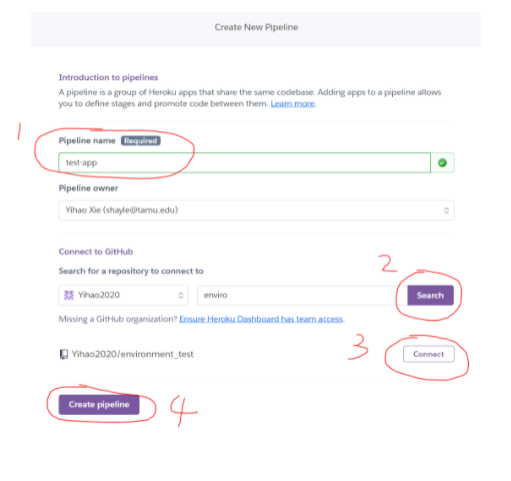
From the Heroku Dashboard Click the New button in the top r 86AE ight of your app list and select Create new pipeline:
Note: if there’s no app in a pipeline, the pipeline will disappear. Therefore we need to configure some apps as default.
- Enable Review Apps. Do NOT select any options for this assignment. Click “Enable Review Apps” right away.
- Click “New app” in Review Apps. Choose the test branch. After you click “Create”, Heroku will start deploying immediately. Every time you make changes to the test branch, it triggers automatic deployment.
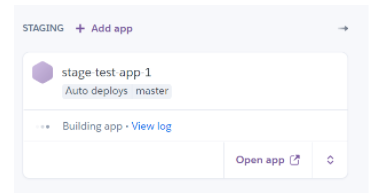
- We also need to create an app for staging.
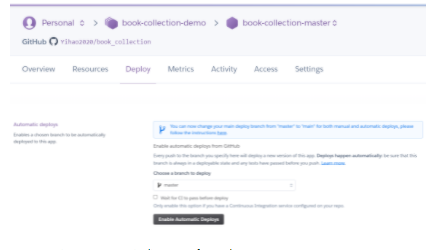
- Click on the stage-test-app-1. Click Deploy. Choose the main branch for Automatic Deploys.
Great! You just created a pipeline ready for deployment!
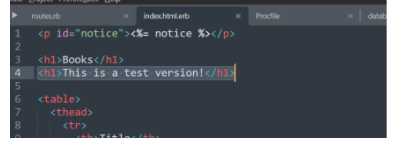
- Let’s make a small change to our app to see how Heroku pipeline works. You should remain in the test branch ($ git checkout test). You can be creative and change/add something that won’t break your app. For example, I add something into app/views/books/index.html.erb. Then save the changes and push to the remote test branch. Commands are the same as step 6. You’ll see that Heroku starts automatic deployment in the review app. After the deployment is done, open the app and see if it works.
- Next, go to the Github website. Create a pull request and merge the changes from test to main
- After the merge, you’ll see that Heroku is automatically deploying the staging app.
- When the staging app is ready, open the app and check if everything looks good. Then promote it to the production area.
- After your review app and production app are both deployed, take a screenshot of your pipeline interface. Include the screenshot and links to both apps in the submission report.
For continuous development, we set up Heroku to automatically deploy our apps when their respective github branches are updated.
Review app: test branch
Production app: main branch
For continuous integration, we set up a Github action to run our specs, security checks, linter, etc. after every push or pull-request in here -> https://github.com/CSCE431-Software-Engineering/sprint-1-kappaupsilonchi/actions/runs/8150923677/job/22277985728. This allows us to automatically ensure that our code is working as intended.
The support of this app has been officially closed. There is nothing more important left to develop. We made sure that all documentation is available from the application as online help. The only standalone documentation is the admin documentation on how to install/set-up/restart the system, otherwise all other admin documentation is also available as online help.
Please contact Pauline Wade paulinewade@tamu.edu for help on Lab assignments which will teach you in more depth.

