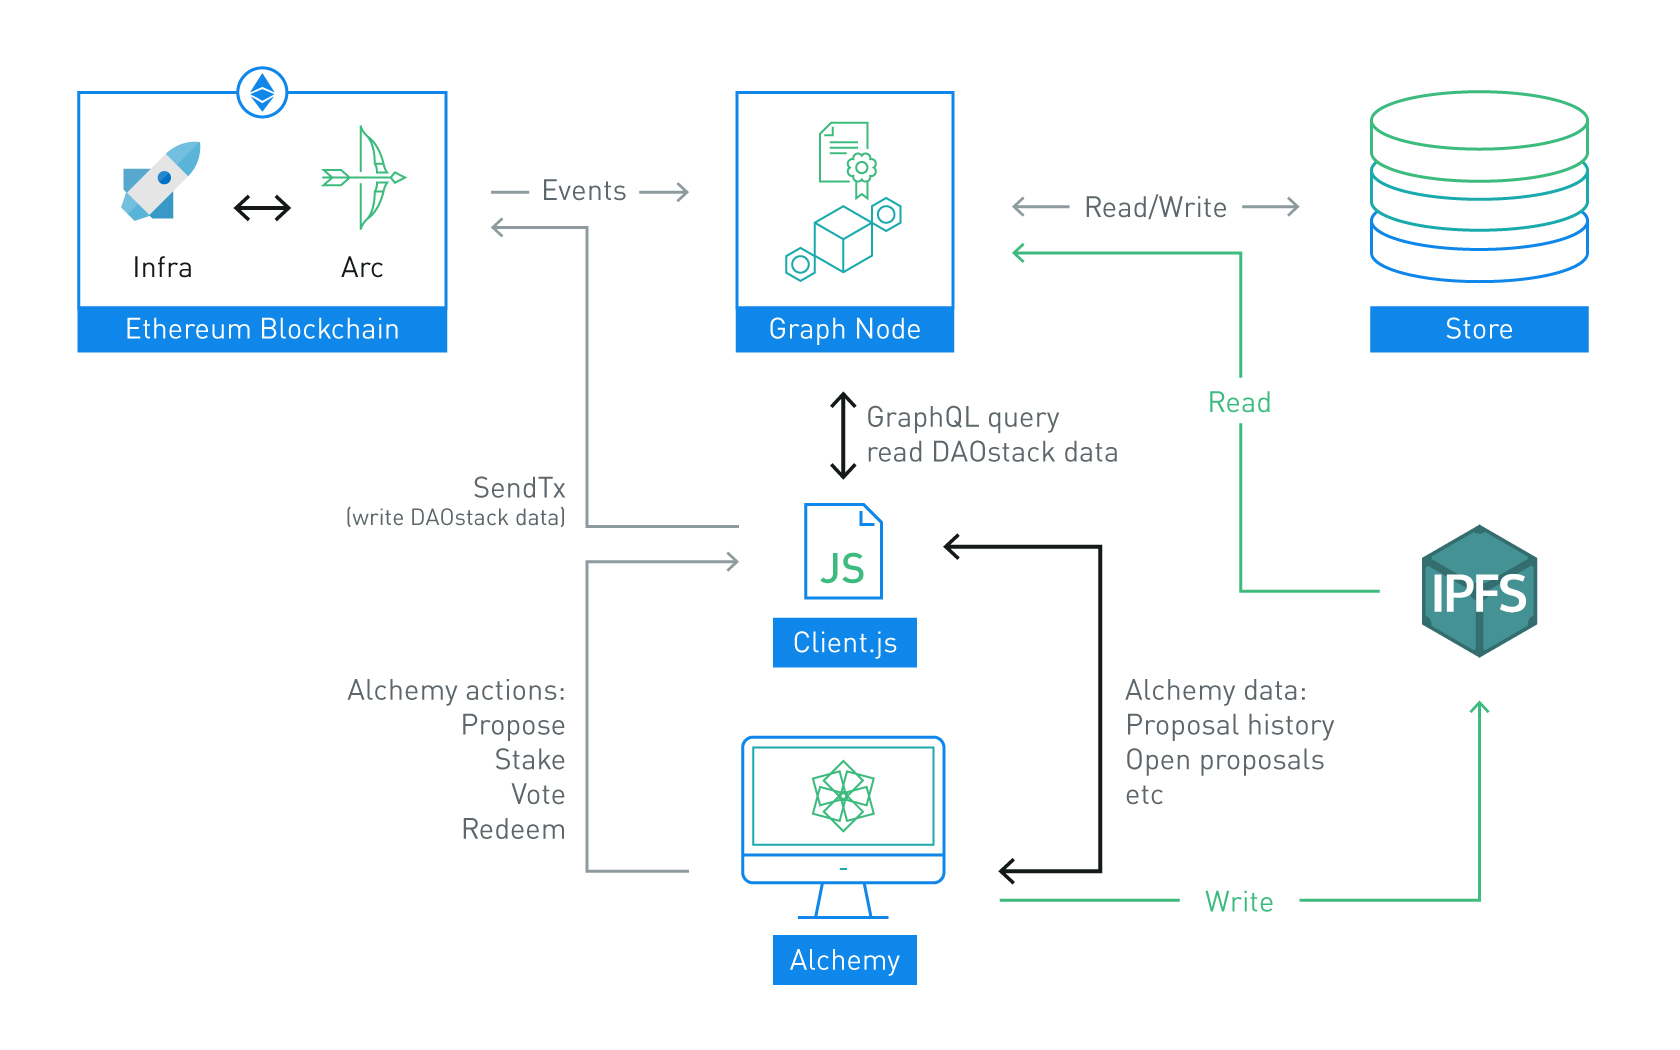
DEVELOPMENT OF THIS PACKAGE HAS MOVED TO: https://github.com/daostack/alchemy-monorepo/tree/dev/packages/subgraph
DAOstack subgraph for TheGraph project. A feature article is available here.
Our latest gratest master branch subgraph.
git clone https://github.com/daostack/subgraph.git && cd subgraphnpm install
Run the tests in the host container:
npm run docker:run
npm run test
npm run docker:stop
The tests are run with jest, which takes a number of options that may be useful when developing:
npm run test -- --watch # re-run the tests after each change
npm run test -- test/integration/Avatar.spec.js # run a single test filemigrate- migrate contracts to ganache and write result tomigration.json.codegen- (requiresmigration.json) automatically generate abi, subgraph, schema and type definitions for required contracts.test- run integration test.deploy- deploy subgraph.deploy:watch- redeploy on file change.
Docker commands (requires installing docker and
docker-compose):
docker <command>- start a command running inside the docker container. Example:npm run docker test(run intergation tests).docker:stop- stop all running docker services.docker:rebuild <command>- rebuild the docker container after changes topackage.json.docker:logs <subgraph|graph-node|ganache|ipfs|postgres>- display logs from a running docker service.docker:run- run all services in detached mode (i.e. in the background).
After running a command with docker-compose, the following endpoints will be exposed on your local machine:
http://localhost:8000/subgraphs/name/daostack- GraphiQL graphical user interface.http://localhost:8000/subgraphs/name/daostack/graphql- GraphQL api endpoint.http://localhost:8001/subgraphs/name/daostack- graph-node's websockets endpointhttp://localhost:8020- graph-node's RPC endpointhttp://localhost:5001- ipfs endpoint.- (if using development)
http://localhost:8545- ganache RPC endpoint. http://localhost:5432- postgresql connection endpoint.
In order to add support for a new contract follow these steps:
-
Create a new directory
src/mappings/<contract name>/ -
Create 4 files:
src/mappings/<contract name>/mapping.ts- mapping code.src/mappings/<contract name>/schema.graphql- GraphQL schema for that contract.src/mappings/<contract name>/datasource.yaml- a yaml fragment with:abis- optional - list of contract names that are required by the mapping.entities- list of entities that are written by the the mapping.eventHandlers- map of solidity event signatures to event handlers in mapping code.
test/integration/<contract name>.spec.ts
-
Add your contract to
ops/mappings.json. Under the JSON object for the network your contract is located at, under the"mappings"JSON array, add the following.-
If your contract information is in the
migration.jsonfile specified (default is the file under@daostack/migrationfolder, as defined in theops/settings.jsfile):{ "name": "<contract name as appears in `abis/arcVersion` folder>", "contractName": "<contract name as appears in migration.json file>", "dao": "<section label where contract is defined in migration.json file (base/ dao/ test/ organs)>", "mapping": "<contract name from step 2>", "arcVersion": "<contract arc version>" }, -
If your contract does not appear in the migration file:
{
   "name": "<contract name as appears in `abis/arcVersion` folder>",
   "dao": "address",
   "mapping": "<contract name from step 2>",
   "arcVersion": "<contract arc version under which the abi is located in the `abis` folder>",
   "address": "<the contract address>"
},
-
-
(Optionally) add a deployment step for your contract in
ops/migrate.jsthat will run before testing.
To index a DAO please follow the instructions here: https://github.com/daostack/subgraph/blob/master/documentations/Deployment.md#indexing-a-new-dao
Datasource templates allow you to index blockchain data from addresses the subgraph finds out about at runtime. This is used to dynamically index newly deployed DAOs. To add a new contract ABI that can be used as a template within your mappings, modify the ops/templates.json file like so:
{
   "templates": [
      ...,
      {
         "name": "<contract name as appears in `abis/arcVersion` folder>",
         "mapping": "<name of the `src/mappings/...` folder to be used with this contract>",
         "start_arcVersion": "<contract arc version under which the abi is located in the `abis` folder>",
         "end_arcVersion": "(optional) <contract arc version under which the abi is located in the `abis` folder> if not given, all future versions of this `name`'s contract ABI will be added as a template for this mapping"
      }
   ]
}To deploy the subgraph, please follow the instructions below:
-
If you are deploying to The Graph for the first time, start with installing the Graph CLI:
npm install -g @graphprotocol/graph-cliThen follow this by logging into your Graph Explorer account using:graph auth https://api.thegraph.com/deploy/ <ACCESS_TOKEN>It is also recommended to read this guide: https://thegraph.com/docs/deploy-a-subgraph
-
Create a
.envfile containing the following:network="<TARGET_NETWORK>" subgraph="<YOUR_SUBGAPH_NAME>" # Not necessary for Docker deployment graph_node="https://api.thegraph.com/deploy/" ipfs_node="https://api.thegraph.com/ipfs/" access_token=<YOUR_ACCESS_TOKEN> # Not necessary for The Graph server postgres_password=<YOUR_PASSWORD> ethereum_node="https://<TARGET_NETWORK>.infura.io/<INFURA-KEY>" start_block=<START INDEX BLOCK> (default is 0)
-
Run:
npm run deploy
The repository provides a release.sh script that will:
- (re)start the docker containers and deploy the subgraph
- commit the images for ipfs and postgres and push these to docker hub
The docker images are available as:
daostack/subgraph-postgres:${network}-${migration-version}-${subgraph-version}
daostack/subgraph-ipfs:${network}-${migration-version}-${subgraph-version}
Add the DAO's Avatar address to the ops/blacklist.json file in the proper network array. For example, blacklisting 0xF7074b67B4B7830694a6f58Df06375F00365d2c2 on mainnet would look like:
{
  "private": [],
  "kovan": [],
  "rinkeby": [],
  "mainnet": [
     "0xF7074b67B4B7830694a6f58Df06375F00365d2c2"
  ]
}