RISC-V online/CLI emulator in Rust.
The online emulator is available here:
- rvemu.app: Run an arbitrary RISC-V binary you uploaded.
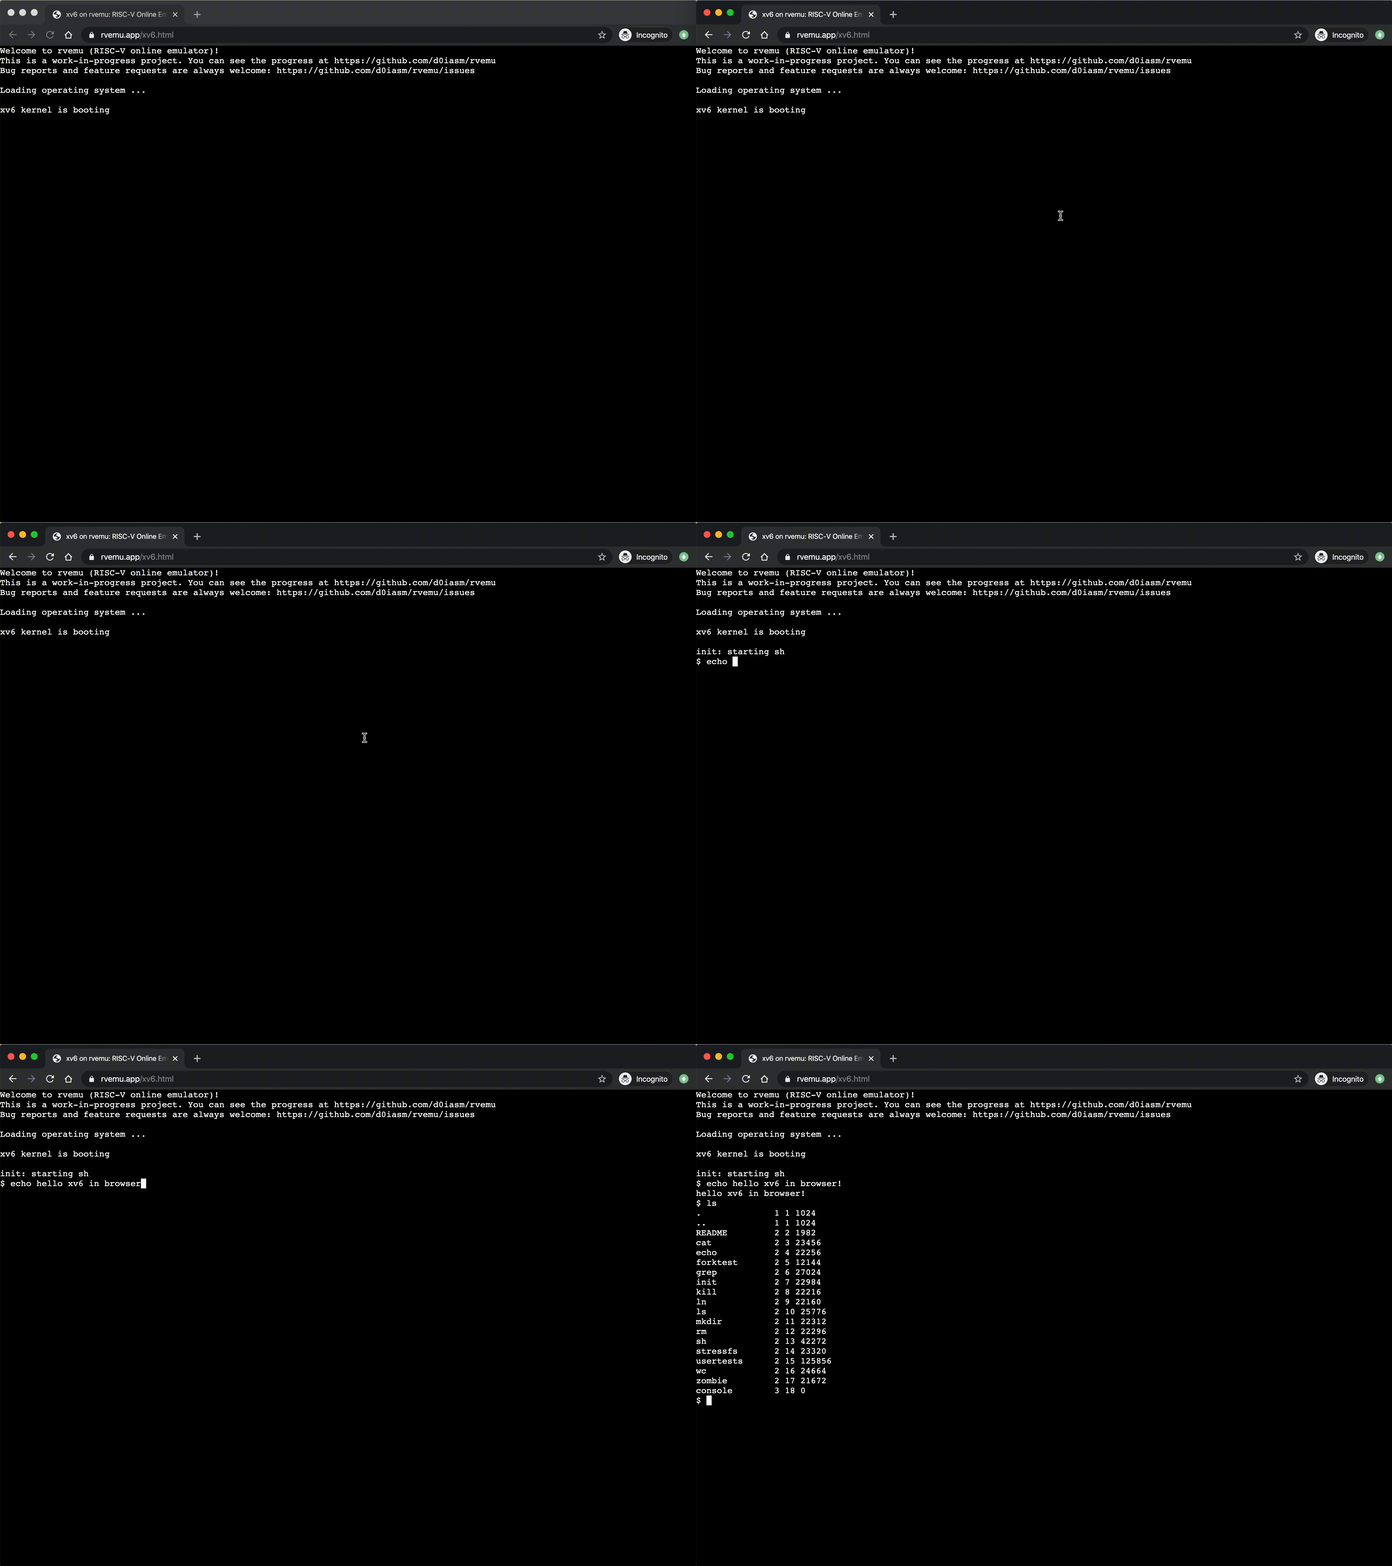
- rvemu.app/xv6: Run
xv6automatically once you visit the page.
The emulator supports RV64GC ISA (RV64IMAFD, Zicsr, Zifencei, RV64C), privileged ISA, CSRs, virtual memory system (Sv39), peripheral devices (UART, CLINT, PLIC, Virtio), and device tree. See the "Features List" section for the details of features.
These features are compliant with "The RISC-V Instruction Set Manual Volume I: Unprivileged ISA Document Version 20191214-draft" and "The RISC-V Instruction Set Manual Volume II: Privileged Architecture Document Version 1.12-draft" in the RISC-V specifications.
The emulator can run both in your browser and in your terminal. Also, the emulator can be embedded in your project by the crate registry.
You can run xv6, a simple Unix-like
operating system, in rvemu.app/xv6.
You also be able to run an arbitrary RISC-V binary in rvemu.app. The online emulator supports the following commands:
- upload: Upload local RISC-V binaries for the execution on the emulator.
- ls: List the files you uploaded.
- run [file]: Execute a file which you uploaded or some files are already embedded.
- help: Print all commands you can use.
See the "Build RISC-V binary" section for more information to build RISC-V binary.
The option --kernel or -k specifies a kernel image, and --file or -f
specifies a root filesystem image.
Linux
$ ./target/release/rvemu-cli -k bin/linux/bbl.bin -f bin/linux/busybear.bin
xv6
$ ./target/release/rvemu-cli -k bin/xv6/kernel.bin -f bin/xv6/fs.img
Bare-metal binary
You can use an arbitrary RISC-V binary and you can skip the -f option. An ELF
binary should have no headers.
$ ./target/release/rvemu-cli -k <your-binary>
The wasm-pack build command generates a pkg directory and makes Rust
source code into .wasm binary. It also generates the JavaScript API for
using our Rust-generated WebAssembly. The toolchain's supported target is
wasm32-unknown-unknown. You need to execute this command whenever you change
your Rust code.
// This is the alias of
// `wasm-pack build lib/rvemu-wasm --out-dir <path-to-rvemu>/public/pkg --target web --no-typescript`.
$ make rvemu-wasm
This command installs dependencies in the node_modules directory. Need npm install --save in the public directory at the first time and whenever you
change dependencies in package.json.
$ npm install --save // at the public directory
You can see the website via http://localhost:8000. npm start is the alias of
python3 -m http.server so you need Python3 in your environment.
$ npm start // at the public directory
Build the emulator as a CLI tool.
$ make rvemu-cli
You might need to build RISC-V toolchain.
$ git clone --recursive git@github.com:riscv/riscv-gnu-toolchain.git
$ cd riscv-gnu-toolchain
$ ./configure --prefix=/opt/riscv --with-arch=rv64gc
$ make
$ make linux
You need to make an ELF file without headers, which starts at the address 0x8000_0000 by the following instructions:
// Make an assembly file from a C file.
$ riscv64-unknown-elf-gcc -S -nostdlib foo.c

// Make a binary file from an assembly file with start position 0x8000_0000.
$ riscv64-unknown-elf-gcc -Wl,-Ttext=0x80000000 -nostdlib -o foo foo.s

// Remove headers from a binary file.
$ riscv64-unknown-elf-objcopy -O binary foo foo.text
For build:
// Linux
$ git clone https://github.com/torvalds/linux/
$ git checkout tags/v4.19-rc3 -b v4.19-rc3
$ make ARCH=riscv CROSS_COMPILE=riscv64-unknown-linux-gnu- defconfig
$ make ARCH=riscv CROSS_COMPILE=riscv64-unknown-linux-gnu- -j $(nproc)

// riscv-pk
$ git clone https://github.com/riscv/riscv-pk
$ cd riscv-pk
$ mkdir build
$ cd build
$ ../configure --prefix=$RISCV --host=riscv64-unknown-elf \
  --with-payload=../../linux/vmlinux --enable-logo
$ make
$ make install

// busybear-linux
$ git clone https://github.com/michaeljclark/busybear-linux
$ cd busybear-linux
$ ./scripts/build.sh
If a compile error happens, you may need to:
- update
CC := gcctoCC := riscv64-unknown-elf-gccinriscv-pk/build/Makefile - comment out the "build bbl" part in
busybear-linux/scripts/build.sh
because the build script for cross compiling in riscv-pk is broken. See
https://github.com/riscv/riscv-pk/blob/master/configure#L1146-L1148
You can see the binaries for unit testings in riscv/riscv-tests.
$ make test
$ perf record -F99 --call-graph dwarf ./target/release/rvemu-cli -k bin/xv6/kernel.bin -f bin/xv6/fs.img
$ perf report
The site is hosted by a firebase.
$ firebase deploy
The emulator supports the following features:
- RV64G ISA
- RV64I (v2.1): supports 52/52 instructions (
fencedoes nothing for now) - RV64M (v2.0): supports 13/13 instructions
- RV64A (v2.1): supports 22/22 instructions (No atomicity for now)
- RV64F (v2.2): supports 30/30 instructions
- RV64D (v2.2): supports 32/32 instructions
- Zifencei (v2.0): supports 1/1 instructions (
fence.idoes nothing for now) - Zicsr (v2.0): supports 6/6 instructions (No atomicity for now)
- RV64I (v2.1): supports 52/52 instructions (
- RV64C ISA (v2.0): support 36/36 instructions
- Privileged ISA: supports 7/7 instructions (
sfence.vma,hfence.bvma, andhfence.gvmado nothing for now) - Control and status registers (CSRs)
- Machine-level CSRs
- Supervisor-level CSRs
- User-level CSRs
- Virtual memory system (Sv39)
- Devices
- UART: universal asynchronous receiver-transmitter
- CLINT: core local interruptor
- PLIC: platform level interrupt controller
- Virtio: virtual I/O
- Device tree
- Nightly Rust
- Python3
- wasm-pack
- npm
- xterm
- xterm-addon-fit
- dtc: device tree compiler
dtc can be installed by apt install device-tree-compiler on Ubuntu.


