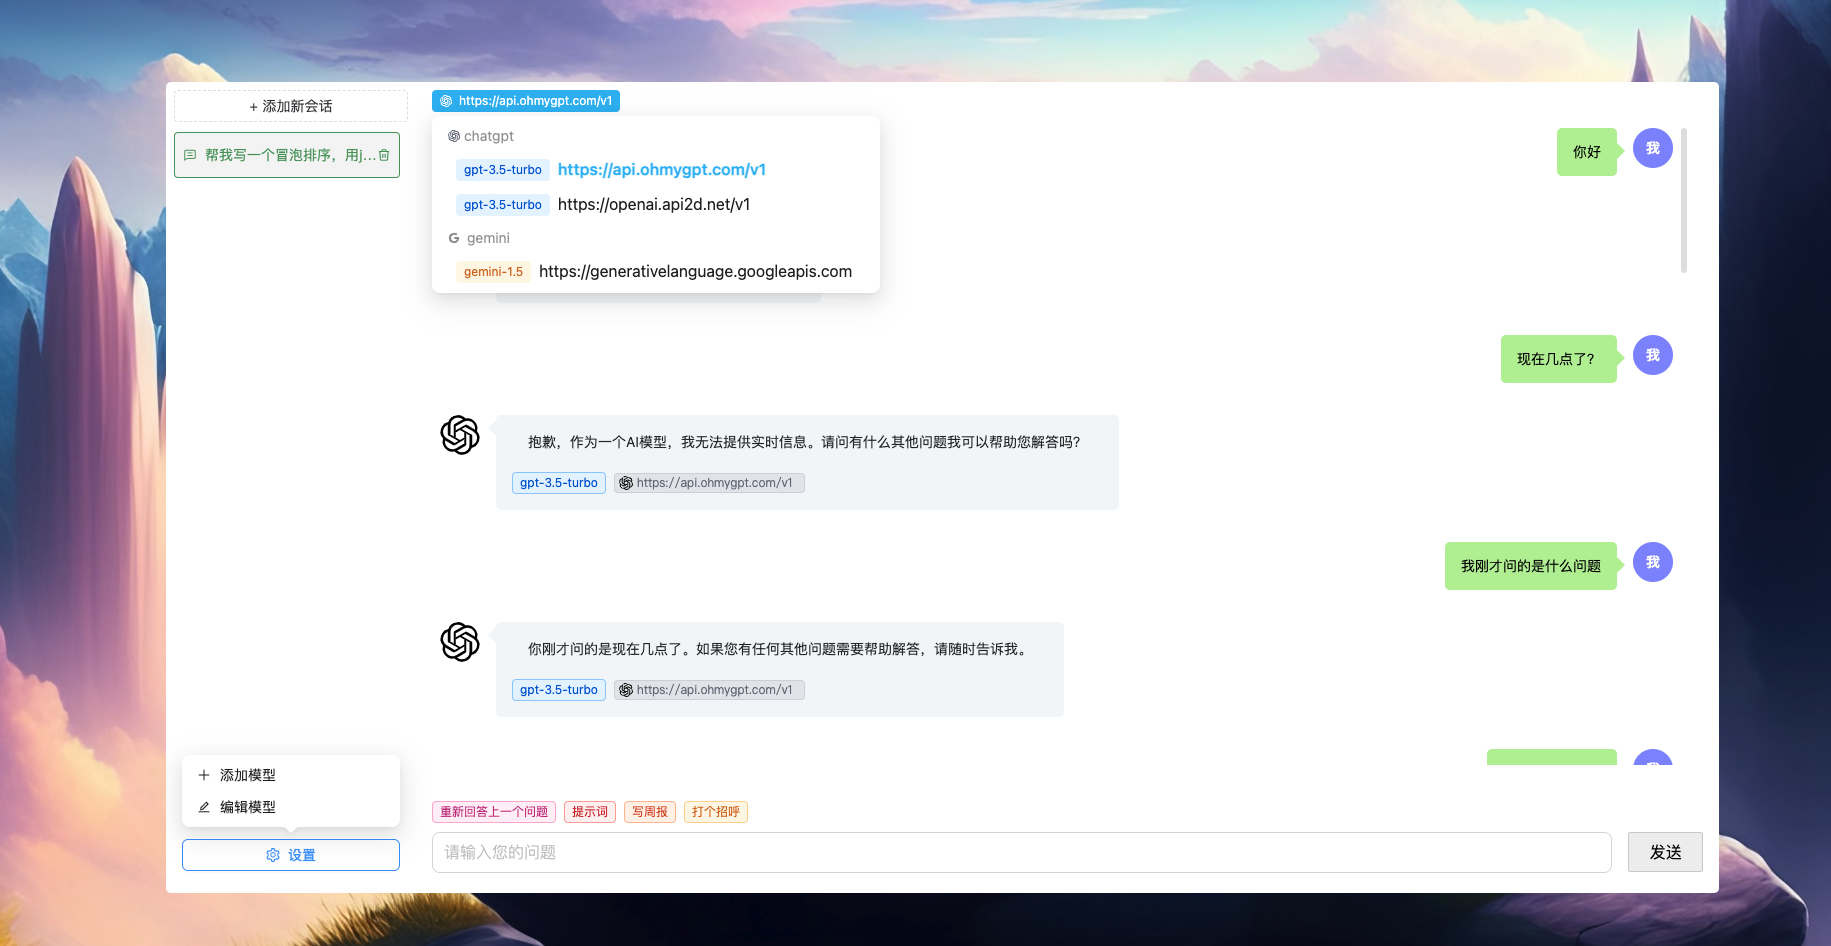
This is an AI project that integrates various open source AI capabilities.
Let everyone have the ability to use AI.
Node version >= 18 is required.
In root directory, copy an .env.example file and rename it to .env, then modify its fields:
# Server Port, eg: 3000
SERVER_PORT=3000

# TIMEOUT Time,eg: 2 * 60 * 1000
REQUEST_TIMEOUT=2 * 60 * 1000

# check api request timeout, eg: 10 * 1000
CHECK_REQUEST_TIMEOUT=10 * 1000

# ==== vendor config start ===

# api2d station url
VENDOR_api2d_net_url=https://api.api2d.com
# api2d station user profile url
VENDOR_api2d_net_userProfileUrl=/user/profile
# api2d api token, detial in https://api2d.com/wiki/siteapi
VENDOR_api2d_net_apiToken=xxx

# ==== vendor config end ===

# CUSTOM_PROXY represents an http proxy. If left blank or not passed any value,
# it means that the http proxy is not enabled.
# eg: http://127.0.0.1:7890
CUSTOM_PROXY=
CUSTOM_PROXY: represents an http proxy. If left blank or not passed any value, it means that the http proxy is not enabled.SERVER_PORT: server port, eg: 3000REQUEST_TIMEOUT: flow request timeout, eg: 2 * 60 * 1000CHECK_REQUEST_TIMEOUT: normal response api request timeout, eg: 10 * 1000VENDOR_api2d_net_url: api2d station url, eg: https://api.api2d.comVENDOR_api2d_net_userProfileUrl: api2d station user profile url, eg: /user/profileVENDOR_api2d_net_apiToken: api2d api token, detial in https://api2d.com/wiki/siteapi
- Add a new .env file locally and configure the corresponding parameters.
- First install dependencies, install code using
pnpm iin the root directory. - Start the project: execute
npm run devin the root directory. - Access the project address:
http://localhost:3000.
Execute npm start in the root directory.
- Start front-end:
pnpm run dev:fe. - Start back-end:
pnpm run dev:be. - Access front-end project address, eg:
http://localhost:8000.
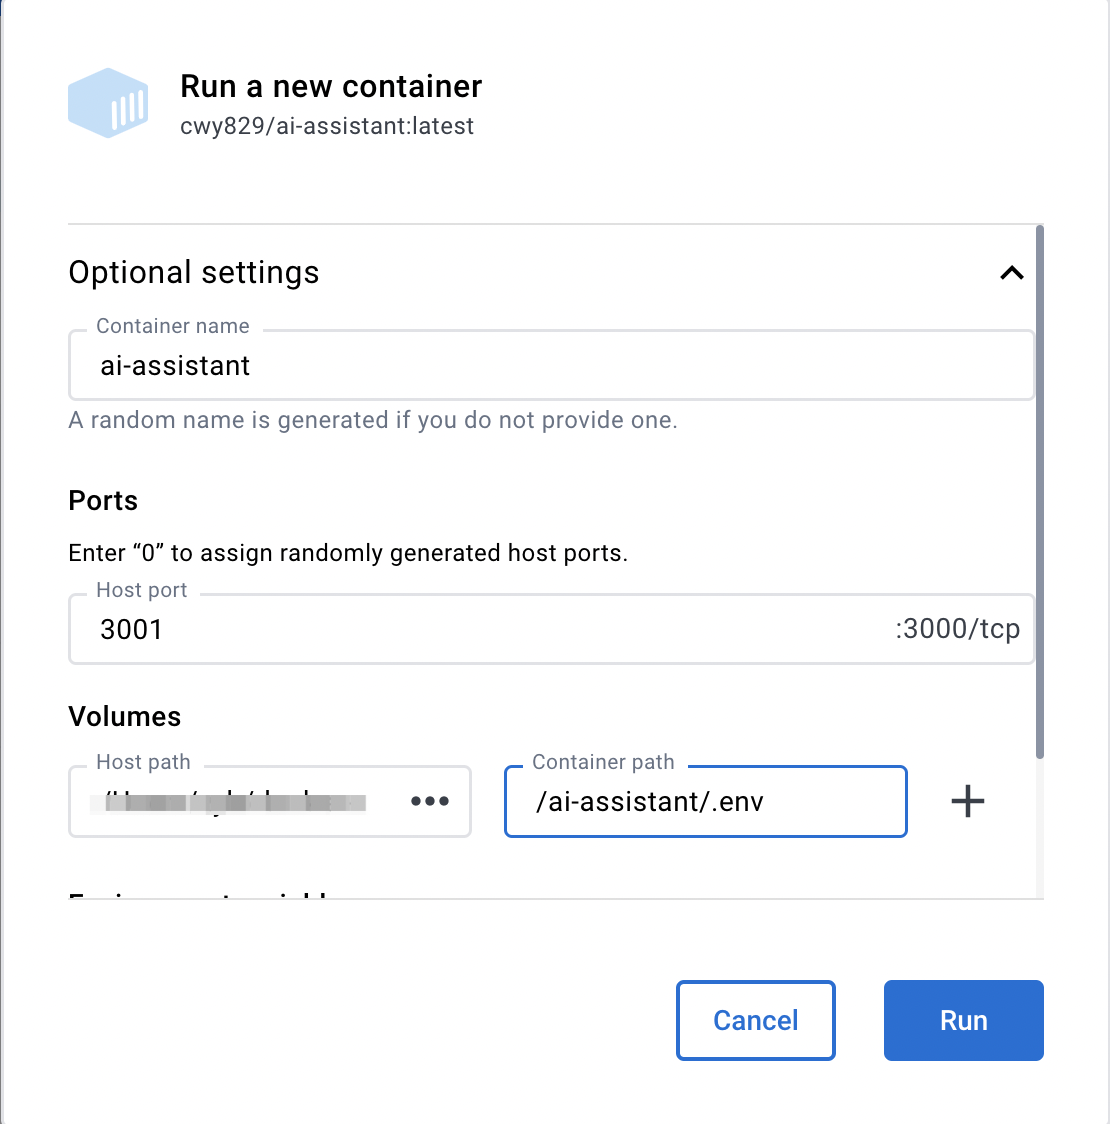
docker image pull cwy829/ai-assistant
In the command below,
~/docker-data/.envneeds to be replaced with the address where your.envfile is located. For more information on.env, please refer to here.
docker run -d -p 3000:3000 -v ~/docker-data/.env:/ai-assistant/.env --name ai-assistant cwy829/ai-assistant
For more information about Docker, please refer to the documentation.

