Meshroom DFM is a Meshroom implementation of the Deep Feature Matching Algorithm from ufukefe.
Explore the wiki »
Table of Contents
MeshroomDFM is a project designed for Alicevision Meshroom, that employs a Convolutional Neural Network to generate and refine feature matches between multiple images. The goal of this project is to replace the classical Photogrammetry Pipeline Nodes for Feature Extraction, Image Matching and Feature Matching with an all-in-one solution.
Part of the project focuses on evaluation of different Feature Matching Algorithms using the HPatches dataset and the customized Image Matching Evaluation repository.
Since Developer Documentation for creating custom Meshroom Nodes is hard to come by, this project will also give you step by step instructions for building and deploying Meshroom Nodes using python and pyinstaller.
- You can install the precompiled binaries for linux in the Installation step
- If you wish to build the binaries yourself, follow Building from Source
| Operating System | Installation | Requirements |
|---|---|---|
| Linux | Latest Release | Meshroom Requirements |
| Windows | Building from Source | Meshroom Requirements |
-
Download the project
git clone https://github.com/PIX3LFLUX/MeshroomDFM.git
-
Navigate to the project directory
cd MeshroomDFM -
Create a new virtual environment with the required packages
conda env create -f environment.yml
-
Activate the virtual environment
conda activate MeshroomDFM
-
Execute pyinstaller to build the binaries
pyinstaller dfm_wrapper.spec      # build the Deep Feature Matching Program
pyinstaller dfm_analyzer.spec     # build Deep Feature Matching Analyzer
[!NOTE]
Pyinstaller only allows to build binaries for the platform you're running on. If you wish to build the binaries for windows, you have to execute pyinstaller on a windows machine. -
Copy the files to your meshroom directory (Replace <your_meshroom_folder> with the path to your meshroom folder)
cp dist/* <your_meshroom_folder>/aliceVision/bin/     # move the binaries to meshroom
cp DeepFeatureMatching.py DeepFeatureMatchingAnalyzer.py DFMImageTree.py <your_meshroom_folder>/lib/meshroom/nodes/aliceVision/     # move the python nodes to meshroom
- start Meshroom
- right click in the pipeline area and search for the DeepFeatureMatching, DeepFeatureMatchingAnalyzer and DFMImageTree nodes
- you can add them by left clicking
- To use the DFM Algorithm in Meshroom, create a pipeline as shown above. The DeepFeatureMatchingAnalyzer Node is not necessary.
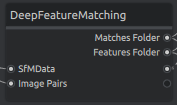
The DeepFeatureMatching node uses the DFM: A Performance Baseline for Deep Feature Matching algorithm to match features between two images. The idea is to replace the FeatureExtraction, ImageMatching and FeatureMatching Nodes from Meshroom with an all-in-one solution.
The Convolutional Neural Network, that is based on the VGG-19 architecture employs multiple convolutional layers, each of which matches and refines features between two images. Therefore each extracted feature of image A is automatically matched to a feature of image B, without having to use a feature matching algorithm.
| Inputs | Example | Description |
|---|---|---|
| sfmData | cameraInit.sfm | A sfm file defining metadata about the images, such as filepath, sensor size, etc. |
| imagePairs | imagePairs.txt | A text file containing the IDs of images to match in a pyramid order |
| minMatches | The minimum number of matches between to images to save. The features and matches of image pairs with less than minMatches matches don't get saved |
| Outputs | Example | Description |
|---|---|---|
| matchesFolder | matches.txt | The output folder for the matches files |
| featuresFolder | features.feat | The output folder for the features files |
cameraInit.sfm Example
{
"version": [
    "1",
    "2",
    "3"
],
"views": [
    {
        "viewId": "112703995",
        "poseId": "112703995",
        "frameId": "102211",
        "intrinsicId": "1927486790",
        "path": "/path/to/image.png",
        "width": "4000",
        "height": "3000",
        "metadata": {
            "AliceVision:SensorWidth": "6.400000",
            "DateTime": "2023:05:03 10:22:12",
            "Exif:ApertureValue": "1.44",
            "Exif:BrightnessValue": "0.48",
            "Exif:ColorSpace": "1",
            "Exif:DateTimeDigitized": "2023:05:03 10:22:12",
            "Exif:DateTimeOriginal": "2023:05:03 10:22:12",
            "Exif:ExifVersion": "0220",
            "Exif:ExposureBiasValue": "0",
            "Exif:ExposureMode": "0",
            "Exif:ExposureProgram": "2",
            "Exif:Flash": "16",
            "Exif:FlashPixVersion": "0100",
            "Exif:FocalLength": "4.755",
            "Exif:FocalLengthIn35mmFilm": "27",
            "Exif:LightSource": "21",
            "Exif:MaxApertureValue": "1.44",
            "Exif:MeteringMode": "2",
            "Exif:PhotographicSensitivity": "250",
            "Exif:PixelXDimension": "4000",
            "Exif:PixelYDimension": "3000",
            "Exif:SceneCaptureType": "0",
            "Exif:SceneType": "1",
            "Exif:SensingMethod": "1",
            "Exif:ShutterSpeedValue": "5.643",
            "Exif:SubsecTime": "413102",
            "Exif:SubsecTimeDigitized": "413102",
            "Exif:SubsecTimeOriginal": "413102",
            "Exif:WhiteBalance": "0",
            "Exif:YCbCrPositioning": "1",
            "ExposureTime": "0.02",
            "FNumber": "1.65",
            "GPS:Altitude": "165",
            "GPS:AltitudeRef": "0",
            "GPS:DateStamp": "2023:05:03",
            "GPS:Latitude": "0, 0, 0",
            "GPS:LatitudeRef": "N",
            "GPS:Longitude": "0, 0, 0",
            "GPS:LongitudeRef": "E",
            "GPS:TimeStamp": "8, 22, 8",
            "Make": "OnePlus",
            "Model": "HD1913",
            "Orientation": "1",
            "ResolutionUnit": "none",
            "XResolution": "72",
            "YResolution": "72",
            "jpeg:subsampling": "4:2:0",
            "oiio:ColorSpace": "sRGB"
        }
    },
    ...
  ]
}- Every image is stored as a dictonary inside the views list
- Every image has a unique viewId, which is used by most nodes
imagePairs.txt Example
270452153 552276230 807656038 1218463010 1352748929 2032756097
552276230 807656038 1218463010 1352748929 2032756097
807656038 1218463010 1352748929 2032756097
1218463010 1352748929 2032756097
1352748929 2032756097
- Each number in the imagePairs file represents the unique viewId of an image
- Starting with the first image in the first row, this image should be matched against all following images in the same row
- The first image in the second row should be matched against all following images in the second row, etc.
matches.txt Example
270452153 552276230
1
dspsift 11
0 0
1 1
2 2
3 3
4 4
5 5
6 6
7 7
8 8
9 9
10 10
- The first line holds the IDs of the images, that were matched
- The second lines holds the number of feature extraction algorithms used
- The third line holds the feature extraction algorithm and the number of matches
- The following lines define the positions of a feature in the features file of image 1, that match
- The following lines define the positions of features in image A and image B, that match. (e.g the feature in line 0 of the features file of image A matches to the feature in line 0 of the features file of image B, etc)
features.feat Example
338.0 130.0
338.0 131.0
345.0 134.0
345.0 135.0
352.0 130.0
423.0 130.0
423.0 131.0
418.0 140.0
418.0 141.0
535.0 184.0
557.0 186.0
- Every line defines a feature in coordinates of width and height
- One features file exists for every image
- The naming convention for features files is as follows:
<viewId>.<extraction_algorithm>.feat(e.g. 270452153.dspsift.feat)
Note
Depending on the capabilities of your graphics card, you might need to adjust the image size of the input images. You can use the ImageProcessing Node to scale down the images.
Warning
With the current implementation of MeshroomDFM, the Deep Feature Matching Algorithm produces matches and features, however in my experiments, the pipeline produces errors either in the Structure from Motion or in the Meshing step. To fix this, further research is needed.
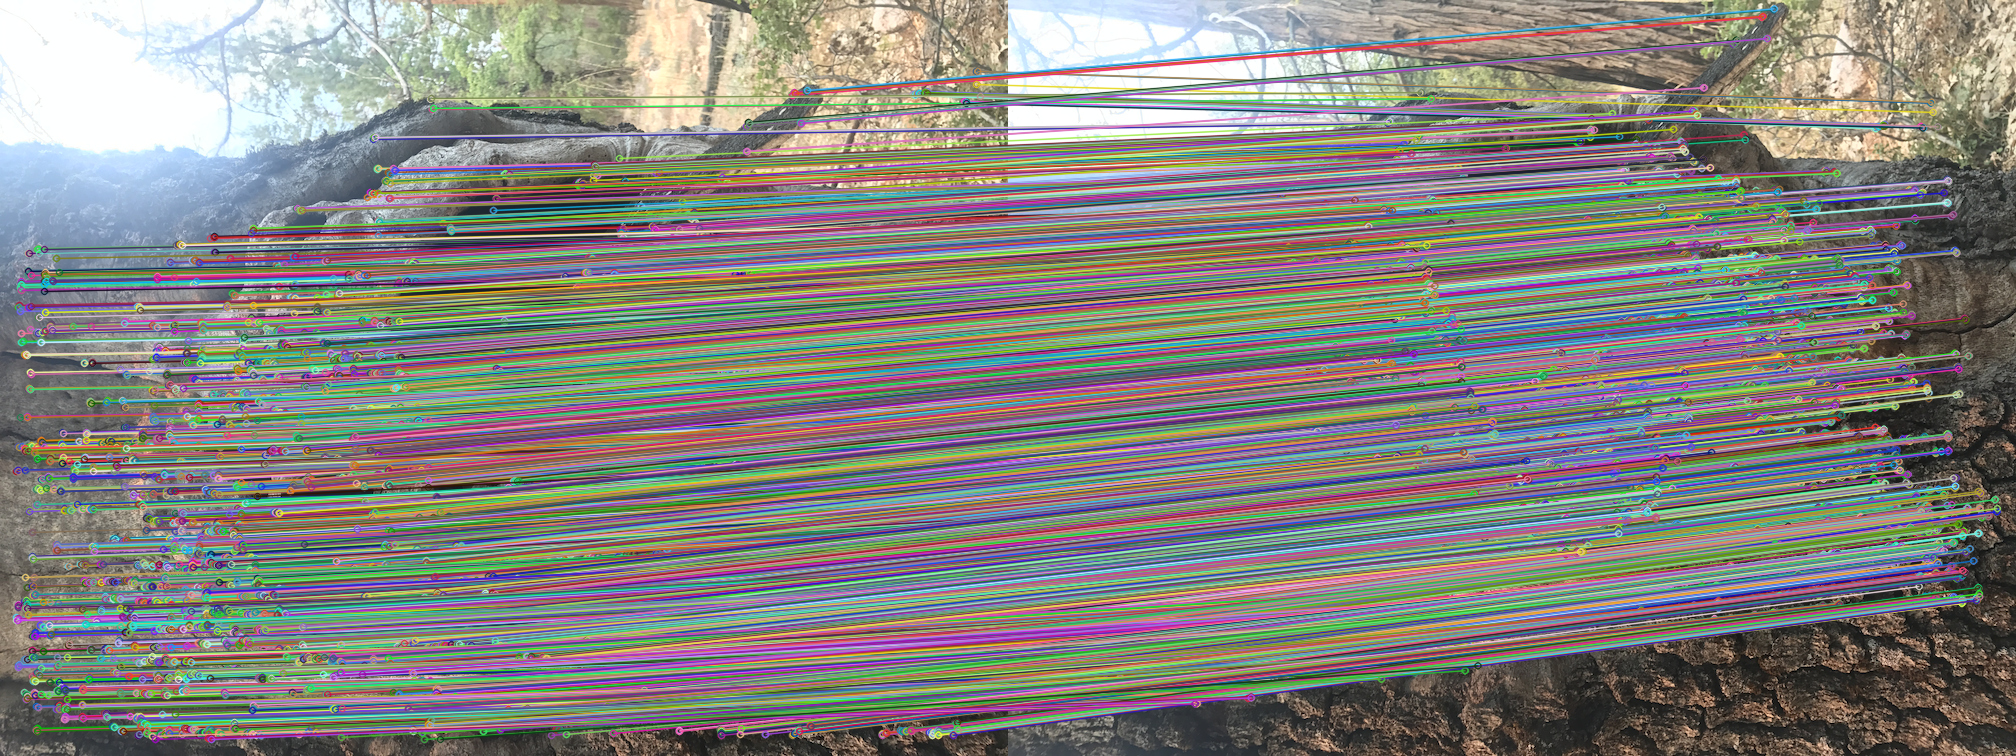
- The DeepFeatureMatchingAnalyzer Node draws all matches between two images as shown above.
Warning
This Node was developed for debugging, it is not recommended to be used on large datasets.
| Inputs | Description |
|---|---|
| sfmData | A sfm file defining metadata about the images, such as filepath, sensor size, etc. |
| matchesFolder | The folder, where matches are stored |
| featuresFolder | The folder, where features are stored |
| Outputs | Description |
|---|---|
| output | The output folder for the resulting images |
- The DFMImageTree Node allows you to create the inputPairs, that are needed for the DeepFeatureMatching Node
- The original Image Matching Node from AliceVision relies on previously extracted features to build the pyramid structure and can therefore not be used with the DFM algorithm
| Inputs | Description |
|---|---|
| sfmData | A sfm file defining metadata about the images, such as filepath, sensor size, etc. |
| Outputs | Description |
|---|---|
| imagePairs | A text file containing the IDs of images to match in a pyramid order |
Read the Wiki for more information about this project.
Distributed under the MIT License. See LICENSE for more information.


