Contents
Duo Splunk Connector allows import of Duo logs into Splunk.
The Duo Splunk Connector 1.2.0 and later releases support Splunk 8.0 and later versions with Python 3. Refer to the Splunk documentation for information about Python 2 to Python 3 migration in Splunk.
Overview
This document takes you through installing and configuring the Duo Splunk Connector in your Splunk environment. Once configured, the connector automatically pulls in the following Duo logs for the last 7 days:
- Account Logs
- Activity Logs
- Administrator Logs
- Authentication v1 Logs
- Authentication v2 Logs
- Telephony v1 Logs
- Telephony v2 Logs
- Trust Monitor Logs - Duo Premier and Duo Advantage plans only
- Endpoint Logs - Duo Premier and Duo Advantage plans only
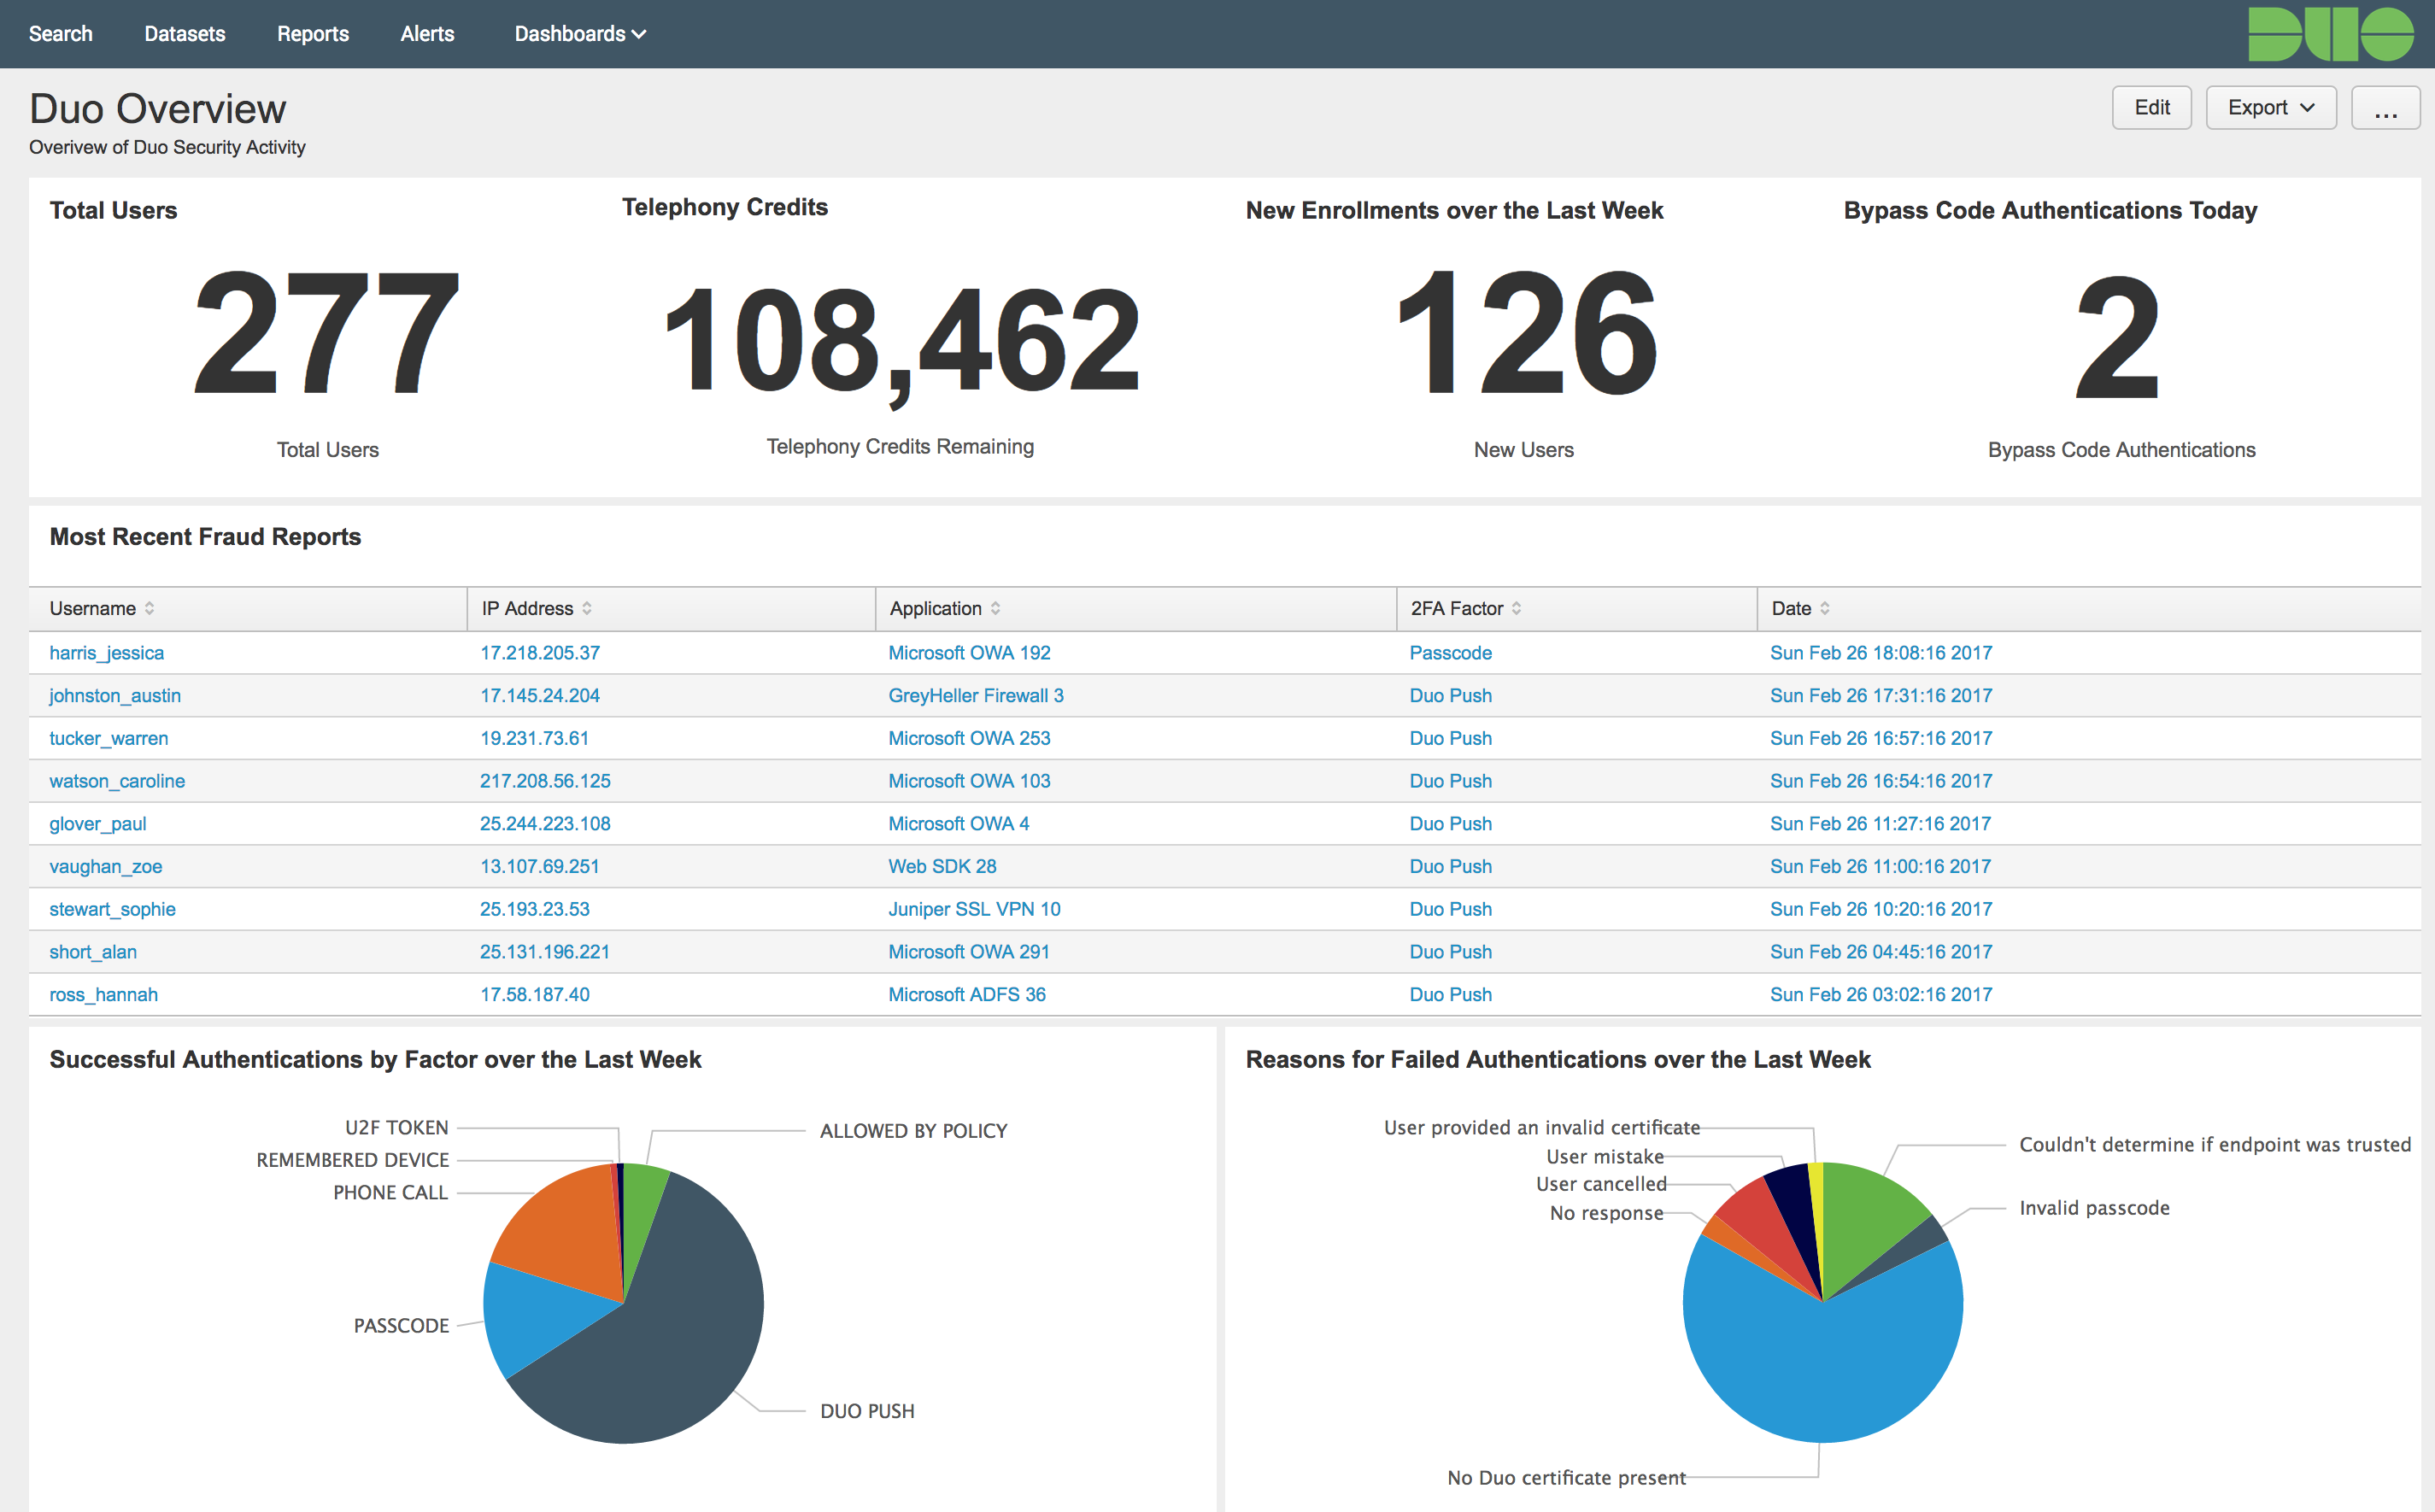
The connector comes populated with default dashboards for the above logs. Administrators can create new dashboards or manipulate the existing dashboards.
Prerequisites
- You should have the Duo Owner administrator role. Only admins with the Owner role may create new Admin API applications in the Duo Admin Panel.
- The Duo Splunk Connector 2.0.2 and later is compatible with Splunk Cloud and Splunk Enterprise versions 8.0 and later.
First Steps
Role required: Owner
-
Sign up for a Duo account. Duo Splunk Connector requires a Duo Premier, Duo Advantage, or Duo Essentials plan.
-
Log in to the Duo Admin Panel as an administrator with the Owner role and navigate to Applications → Protect an Application.
-
Locate the entry for Admin API in the applications list. Click Protect to the far-right to configure the application and get your integration key, secret key, and API hostname. You'll need this information to complete your setup. See Protecting Applications for more information about protecting applications in Duo and additional application options.
-
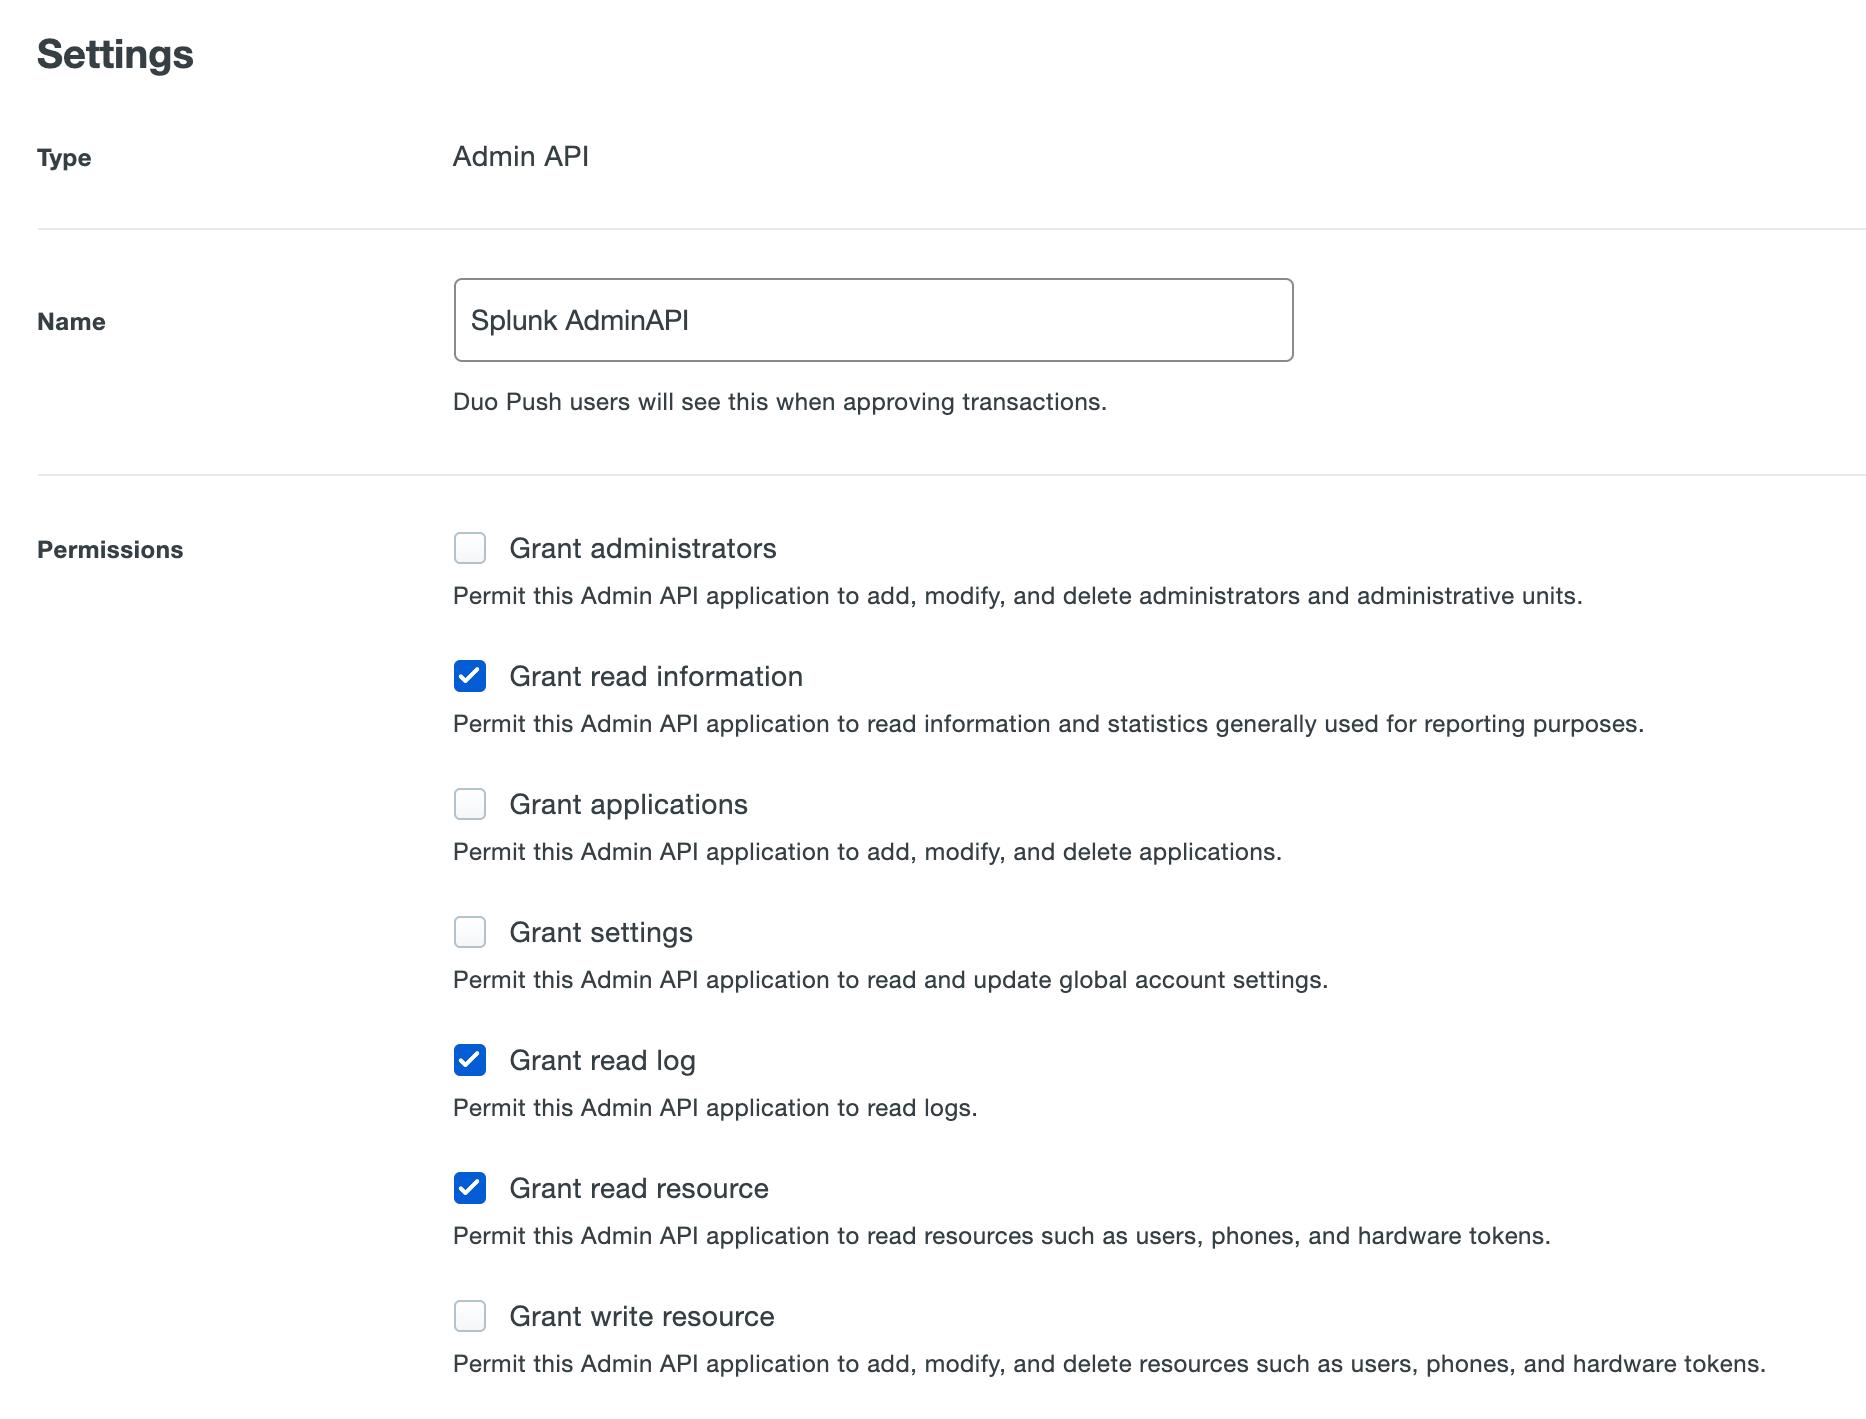
Under the "Settings" section for this application locate the "Permissions" section and check the boxes next to Grant read information, Grant read log, and Grand read resource. Do not check the boxes next to any other permissions.

-
You may also rename the Admin API application under the "Settings" section.
-
Click Save.
-
You can view your integration key, secret key, and API hostname at the top of the new Admin API application's page.
Treat your secret key like a passwordThe security of your Duo application is tied to the security of your secret key (skey). Secure it as you would any sensitive credential. Don't share it with unauthorized individuals or email it to anyone under any circumstances!
Deployment Considerations
The Duo Splunk Connector has been tested in multiple deployment scenarios; use the directions below based on your deployment.
Single Instance
In a Splunk single instance environment where there is only one Splunk server present and it is acting as both the Indexer and a Search Head you should install and configure the Duo Splunk Connector app on this server.
Distributed Search
In a scenario where you have multiple Indexers that do not communicate with each other but do communicate with all your Search Heads install and configure Duo Splunk Connector on one Indexer. Install but do not configure Duo Splunk Connector on all Search Heads.
Forwarders
In any of the above scenarios if you've configured a Splunk server to act as a forwarder, install and configure Duo Splunk Connector on the forwarder and only install Duo Splunk Connector on the servers mentioned above.
Configure the Duo Security app context to be forwarded from the Forwarder to one Indexer.
Install Duo Splunk Connector
You can choose to install Duo Splunk Connector from Splunkbase.
-
Log into your Splunk deployment as an Administrative user.
-
While on the home screen click the + icon located under the "Apps" section on the left-hand side of the page. You'll be taken to the "Browse More Apps" page.
-
Type Duo Splunk Connector into the search field. Click Install on the Duo Splunk Connector app.
-
You'll be asked to sign in with your Splunk.com account information and accept the Splunk Software License Agreement. Once you've entered the required information click Login and Install.
-
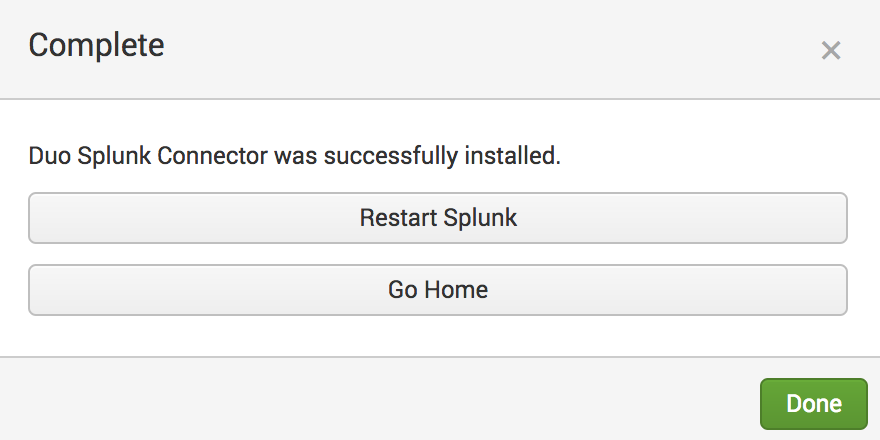
Duo Splunk Connector will automatically install and prompt you to restart Splunk once it is completed. Click Restart Splunk.

-
Once Splunk restarts log back into the site and return to your home screen.
Create Duo Index
default/indexes.conf automatically creates an index called duo upon Duo Splunk Connector installation, if it doesn't already exist. Alternatively, follow the steps below to create a new index.
-
In Splunk, navigate to Settings → Indexes and click New Index.
-
Enter the following information in the "New index" form:
Field Value Index Name Enter a descriptive name. Max Size of Entire Index Set to 500 GB. App Select Duo Security from the list. You can leave the other fields at their default values.
-
Click Save to create the index.
Configuring Duo Splunk Connector
On the first ingest run for the new log types, the Splunk Connector fetches 7 days of historical data. For high-volume logs, in particular, for Authentication v2 logs, it can take hours or even days to completely ingest all of the historical data before starting to ingest new logs. Contact Duo Support if you have issues ingesting historical data.
For more information on the data included in the logs or the format of the logs please visit the Admin API docs page.
Add a New Duo Input Configuration
-
Click on the new Duo Security app under the "Apps" section on the left hand side of the screen.
-
Review the directions on the "Duo Overview" page and then click Configure Duo when done.

-
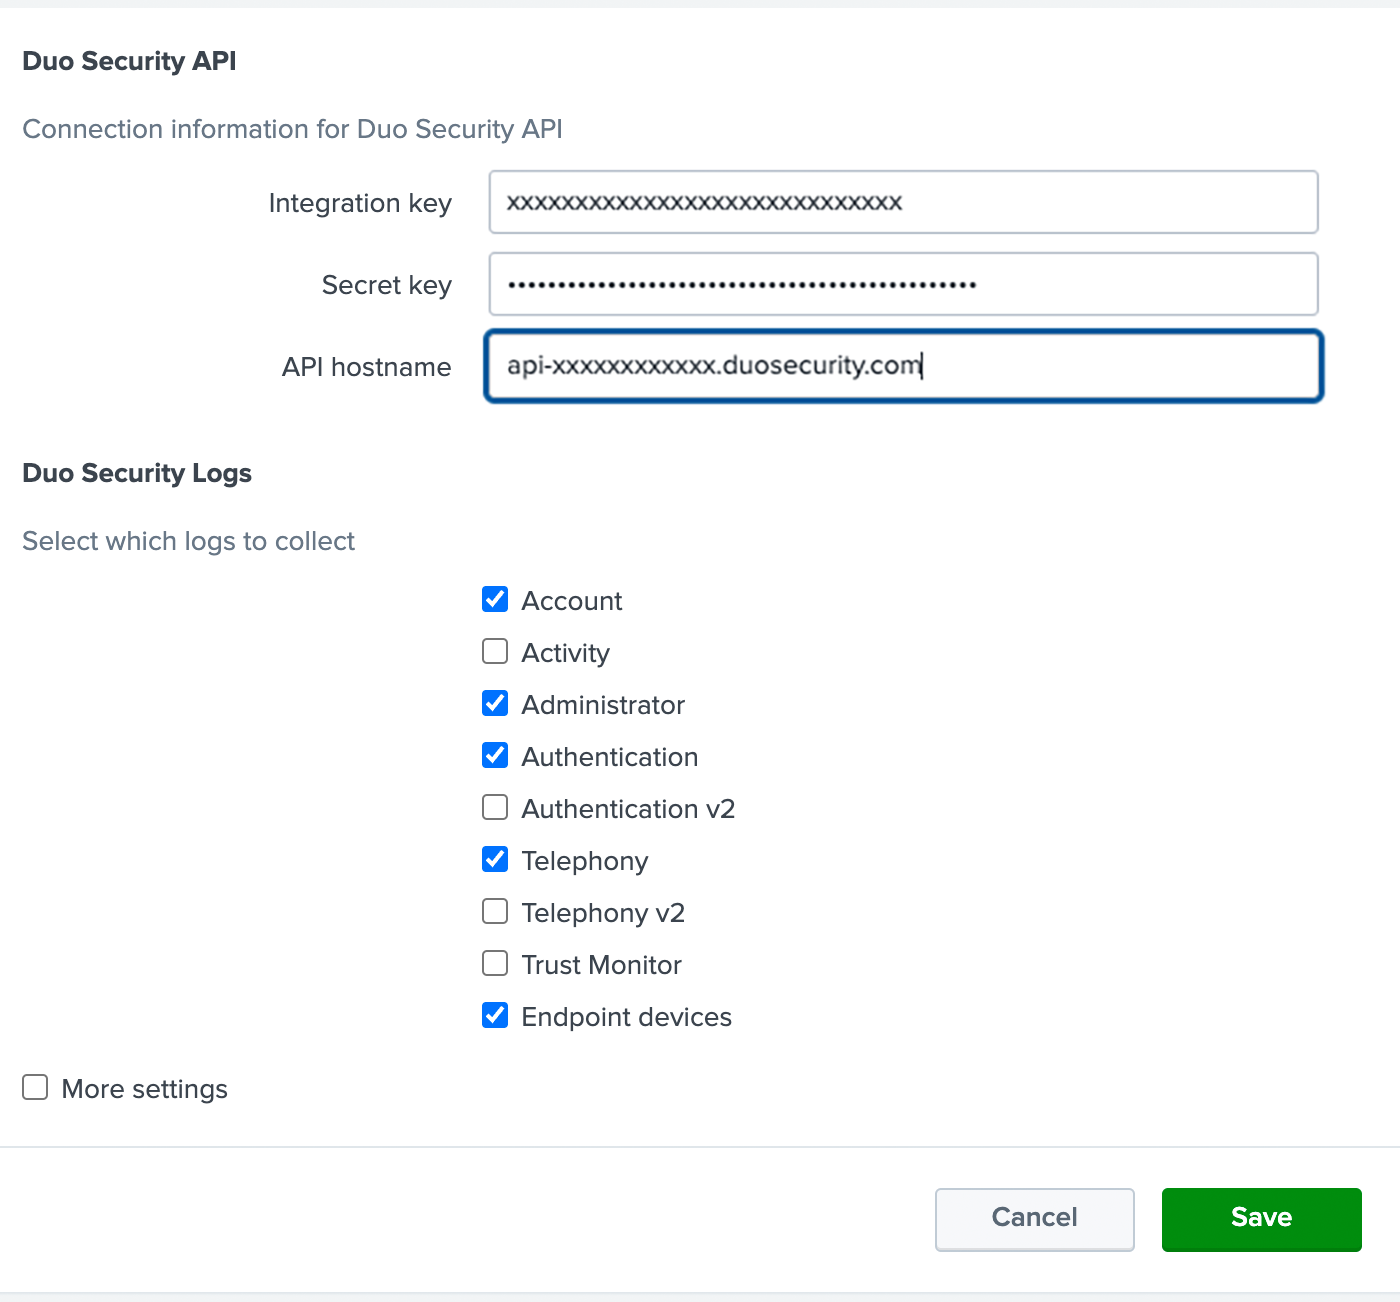
On the "Add Data" page on the right-hand side of the screen you'll be asked to enter in Duo Admin API information. For the Name field type Duo Logs.
-
Paste the Duo Integration Key for the Admin API application you created earlier from the Duo Admin Panel into the Integration Key field.
-
Paste the Duo Secret Key for the Admin API application you created earlier from the Duo Admin Panel into the Secret Key field.
-
Paste the Duo Host for the Admin API application you created earlier from the Duo Admin Panel into the Host field.
-
Select the log types you want to bring into Splunk, keeping in mind which log types are available in your Duo plan.
Note: Authentication v2 and Telephony v2 will have a Splunk
eventtypefield value ofauthentication_v2andtelephony_v2, respectively.
-
Click the checkbox next to More settings.
-
Use the Index drop-down to select the index you created for Duo (called duo in the example).
-
By default the Duo Splunk Connector queries Duo for new data every 120 seconds. You can change this time by changing the value in the Interval field.
-
Do not change any other values under "More settings" or this may cause the connector to not function correctly. Please see Advanced Configuration for more options.

-
When you've entered all required information click the Next > button at the top of the screen.
-
You'll be taken to a page saying that the data input was configured successfully. It may take some time for Duo Logs data to be pulled down.
-
Return to Apps → Duo Security to search logs and view dashboards.

Update an Existing Duo Input Configuration
-
In Splunk, go to Settings → Data inputs (under "Data").
-
Select Duo Security Log Input.
-
Make any changes to the log types you want to bring into Splunk, keeping in mind which log types are available in your Duo plan.
Note: Authentication v2 and Telephony v2 will have a Splunk
eventtypefield value ofauthentication_v2andtelephony_v2, respectively.
-
Click the checkbox next to More settings.
-
Set the desired logging level (defaults to INFO).

-
Click Save.
-
Return to Apps → Duo Security to search logs and view dashboards.
Advanced Configuration
Index Clustering
In a scenario where you have multiple Indexers clustered together, install and configure Duo Splunk Connector on one Indexer. Install but do not configure Duo Splunk Connector on all other Indexers and Search Heads.
On each server that you install the Duo Splunk Connector you'll need to make a small modification so that Splunk knows to replicate the index:
-
Go to
$SPLUNK_HOME/etc/apps/duo_splunkapp/local. Create thelocaldirectory if it does not exist. -
Open indexes.conf in an editor and add the following line to the end of the
[duo]section:repFactor = autoIf you named your index something other than
duowhen you created it, look for a section in the file with the name you used instead. -
Save the file.
-
Restart Splunk.
Changing Duo Splunk Connector Index
You can change the index used by the Duo connector by reconfiguring the connector and then updating the macro to match the new index name.
-
On the "Add Data" page click the checkbox next to More settings and select the drop-down next to Index. Select the index where you would like to store your Duo logs.

-
When you've entered all required information click the Next > button at the top of the screen.
-
Click Settings in the top right-hand corner of the screen. A drop-down will appear. Click Advanced search.
-
On the "Advanced search" page click Search macros.
-
On the "Search marcos" page click duo_index.
-
In the Definition field you will see the current index defined as
index=duoif you used that name when you first created the index. Update this value to use the custom index you chose in step 1.Example: If your index was "CUSTOMINDEX" the field should be changed to index=CUSTOMINDEX.

-
Click Save.
-
Return to the Duo Security application to view the default dashboards.
Known Issues
-
Viewing the Overview dashboard may cause the configuration screen appear for a moment. This may happen if your Splunk server is slow to return query results. The screen will disappear within a few seconds after the queries have completed.
-
Ingesting the first seven days of historical log data after setup may take hours or days for high-volume logs. Contact Duo Support if you have issues ingesting historical or new log data.
Troubleshooting
Need some help? Take a look at our Splunk Connector Knowledge Base articles or Community discussions. For further assistance, contact Support.
