Streamformatics is an application which runs a local server to analyse nanopore sequencing data - specifically designed to work in 'real-time'. The application provides a simple web browser interface (after some initial setup steps on the command line) to extract sequence data from nanopore-basecalled files, align them to a database of interest, and provide information about the species present in the sample.
After the initial setup, the application should be fairly easy to run for future work.
I am going to work on the assumption that all of the following steps are completed from the home directory. If you choose to install/download elsewhere just ensure you change paths accordingly when copy/pasting code snippets.
So let's navigate to the home directory and get started.
cd ~/Before we get started with all the dependencies, let's clone this repository so we can update the config file as we go. This config file will control a number of elements of this pipeline so it's best to add in the details while they're fresh.
git clone https://github.com/mbhall88/streamformatics.git
cd ~/streamformatics
In the root directory of this repository you should see a file called
config.json. Open this up in whatever kind of editor you feel most
comfortable with and we will update it as we go.
Japsa is a suite of tools for working sequence data. Specifically, we will be working with the species-typing component of this package. If you don't want to install japsa in the directory below, feel free to change it. But note the steps after may differ for you.
cd ~/
git clone https://github.com/mdcao/japsa.git
cd japsa
make install INSTALL_DIR=~/.usr/local MXMEM=7000m SERVER=true JLP=false
At the end of this installation you should see a message telling you
For your convenience, please add the following directory your PATH:. If you
want to add japsa to your path then go for it (steps not covered here).
Assuming you followed the default steps above we will now add the path to the
species-typing component to the config.json file we opened before. Under the
entry for "speciesTyper" the executable should look like this (the comma at
the end is important).
"executable": "~/.usr/local/bin/jsa.np.rtSpeciesTyping",If it doesn't (or you selected a different installation directory) change it
accordingly. If you added japsa to your PATH then you can remove the path
information and just leave it as "jsa.np.rtSpeciesTyping". Note: json
file format is very strict, so make sure everything is in exactly the same
format as it is presented here.
While we're here. The "quality" entry under "speciesTyper" refers to the
minimum alignment score to use for reads aligning to your database. From our
experience we find that for this application (and with the quality of nanopore
reads) it's best to leave this set to "0". But feel free to increase it.
If there are any problems with setting up japsa, either refer to the repository or feel free to email me.
The next thing we need to setup is node.js.
Node is going to manage the server for this application and will be the
'controller' for firing up programs and connecting their inputs/outputs
together.This should be fairly straight-forward to do. I will cover Linux and
Mac install. For any other system, or if you have problems, refer to their
extensive install page.
Quick aside: The Mac instructions I will cover from here on will be based on
homebrew installation. If you are using a Mac and don't have homebrew I
highly recommend it. To set it up simply run the following and then installing
future programs will be considerably easier.
/usr/bin/ruby -e "$(curl -fsSL https://raw.githubusercontent.com/Homebrew/install/master/install)"Now, with that covered, to install node.js
brew install nodecurl -sL https://deb.nodesource.com/setup_8.x | sudo -E bash -
sudo apt-get install -y nodejsNow we will need to install the node.js dependencies. This is also fairly
easy to do as node has a package manager called npm (similar to pip for
python). To install these, we will navigate to the root directory for our
project and let npm to the hard work for us. (This is for both Linux and Mac).
cd ~/streamformatics
npm install
And that's it! This will download and install the required node packages into a
folder called node_modules.
The program within this application that watches for new sequence files and
pipes them into the aligner is a Python program/script. This program, called
strom, is located in the public/scripts directory of the repository. strom
relies on two Python packages: h5py and
watchdog. From any directory, run:
pip install watchdog h5pyNote: If you have installed this repository somewhere other than ~/ then
make sure you change the location for "watcher" in config.json accordingly.
The aligner used by this application is the fantastic minimap2.
From playing around with this and bwa recently, it is clear that minimap2 is
much better for long reads. If you want to know more about why and how it works,
check out the preprint. To install:
cd ~/
git clone https://github.com/lh3/minimap2
cd minimap2 && make
If you are likely to want to use this program a lot in the future I highly
recommend adding it to your PATH.
Now that this is installed we will need to add the path to the executable to the
config.json. Under "minimap2" there will be a field called "executable".
Ensure this has the value "~/minimap2/minimap2", (again, the comma is required).
Additionally, you will see "memory" and "threads" fields. We will touch on
memory when we set up the database, but for threads, you may want to change this
according to the resources the computer you will be running this application from
has. To find out these resources on a Mac, run system_profiler SPHardwareDataType.
On Linux, try lscpu.
The idea of this whole application is that you are aligning your nanopore reads
to some kind of database of interest to you, as the data is basecalled. A key
part of this is setting up a database for yourself. The database file itself is
nothing too complex, same with the index file for it. If you need some inspiration
then head to ftp://ftp.ncbi.nih.gov/genomes/ASSEMBLY_REPORTS/assembly_summary_refseq.txt
and you can browse through a list of reference genomes and with links to where
you can download them from.
The main idea is that you need to have a .fasta file with all of your genomes
of interest and an accompanying file that is used by the japsa as an index.
This index file basically just maps the header from the fasta file to the name
you like the genome represented as in the output. So say your header was
>chr1 AC:CM000663.2 gi:568336023 LN:248956422 rl:Chromosome M5:6aef897c3d6ff0c78aff06ac189178dd AS:GRCh38
you would likely want that mapped to something like Homo sapiens. An example of
the top of one such file is
Acaryochloris_marina >gi|158341140|ref|NC_009931.1| Acaryochloris marina MBIC11017 plasmid pREB6, complete sequence
Acaryochloris_marina >gi|158341329|ref|NC_009932.1| Acaryochloris marina MBIC11017 plasmid pREB7, complete sequence
Acaryochloris_marina >gi|158341503|ref|NC_009933.1| Acaryochloris marina MBIC11017 plasmid pREB8, complete sequence
Acaryochloris_marina >gi|158341621|ref|NC_009934.1| Acaryochloris marina MBIC11017 plasmid pREB9, complete sequence
Acetobacter_pasteurianus >gi|529218539|ref|NC_021976.1| Acetobacter pasteurianus 386B plasmid Apa386Bp1, complete sequence
Acetobacter_pasteurianus >gi|529218760|ref|NC_021977.1| Acetobacter pasteurianus 386B plasmid Apa386Bp4, complete sequence
Important: The file is a strange format. The first 'column' should be the name you want to represent the genome and this is followed by a space and then the header from the accompanying reference. Do not include spaces in the name in the first column.
You can obviously be as fine-grained or coarse as you like with these mappings. But if you have any issues setting it up, feel free to get in touch.
The general naming convention we have worked with is genomeDB.fasta for the
actual database of sequences and speciesIndex for the mapping file. You can
name them whatever you want though.
Now that you have these two files setup, I would suggest placing them in the
folder called data/database within this repository.
mkdir -p ~/streamformatics/data/databaseAfter placing them in there,
we need to point to them in config.json. The entries for them should look like
this
"database": "~/streamformatics/data/database/genomeDB.fasta",
"speciesIndex": "~/streamformatics/data/database/speciesIndex"
Additionally, if your database is larger than 4GB you will need to change the
"memory" parameter in config.json to something a little larger than your
database (for reasons outlined in this issue).
If your computer does not have the RAM required for this, get in touch
with me and I will go through the steps required to get around this.
Make sure you save the changes made to config.json.
Now that is all setup, you should be in business. So lets get started!
Navigate to the repository and fire up the server. Running the following code
should automatically open the localhost for the server in a web browser.
cd ~/streamformatics
npm start
If for some reason a web browser window does open, just navigate to the address that is printed to the terminal after running the above commands.
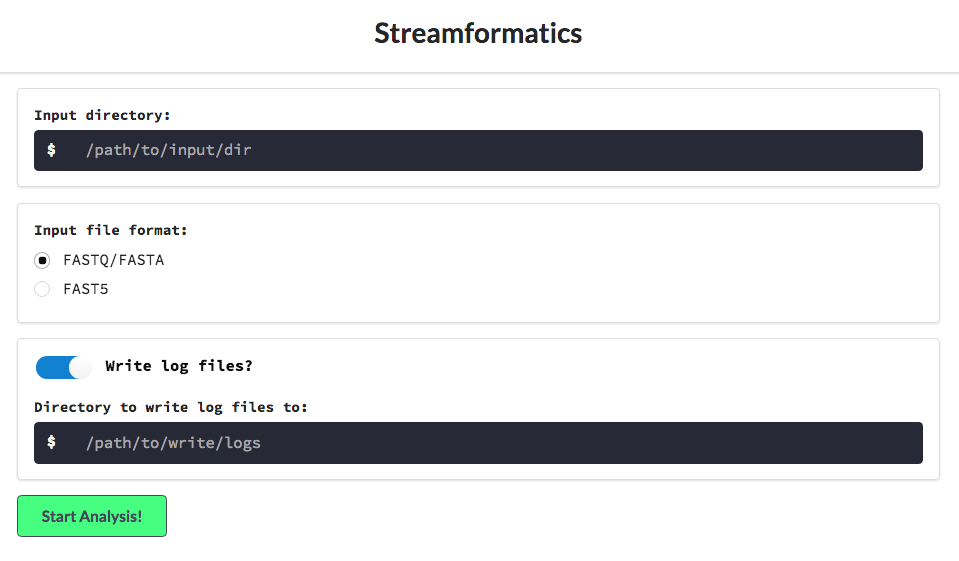
You should now be presented with a screen that looks like this
The steps from here should be self-explanatory. Provide the directory that your nanopore reads are being deposited into (the application will watch subdirectories so feel free to enter a main directory for your experiment).
The reason for needing to specify FASTQ or FAST5 is that if you don't alter the
startup scripts for minKNOW, the local basecalling will only create a FASTQ file
every 4000 reads. Therefore if you are wanting to know the details of what species
you have in 'real-time' you can either alter those scripts (which can be annoying)
or select the FAST5 option and the FASTQ file within each FAST5 will be extracted
and fed into minimap2 as soon as it is produced.
I would also recommend writing the log files (set by default). These files include the stderr from all the pieces in the pipeline (very handy if debugging is required) and most importantly, this will give you a copy of the output from the species-typing that is also being represented in the visualisation.
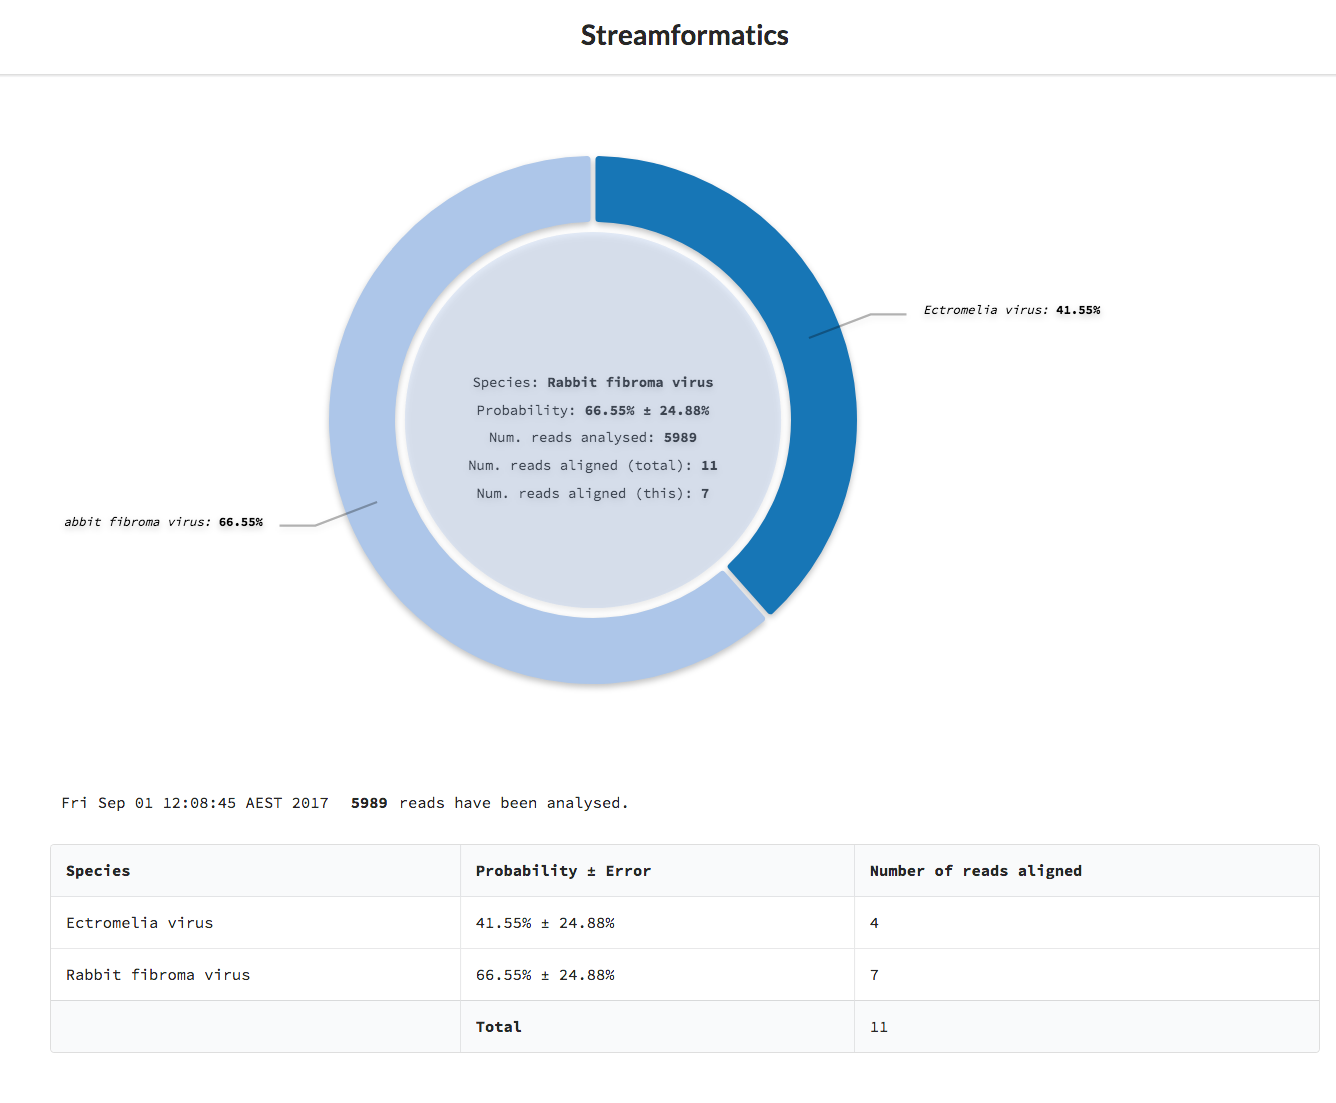
After selecting Start Analysis the form will disappear and (eventually) the donut chart and a table representing the species present, based on the data so far, will appear.
When you're done with your experiment, go to the terminal tab that is running the
server and press ctrl-c. If you want to restart, do this followed by
npm start.

